
Welcome back to our series on getting started with netTerrain’s REST API. In the previous blog post we reviewed some of the basic setup procedures to get started with the netTerrain REST API.
Here we will go a bit deeper into data retrieval, writing into netTerrain and deleting some stuff.
As a quick refresher: this blog post /exercise guide series is divided into three mini blogs — this series can be useful for all those software developers out there that can’t wait to create integrations with netTerrain but need that extra gear to get things in motion. It’s also dedicated to those netTerrain power users that want to add their special foo and are too anxious to wait for that pet feature in the roadmap.
At Graphical Networks we provide full guides to our API as well as classes and trainings if you want to become an expert and feel like you could use a guiding hand.
1.1 API request types: GET, POST, PUT and DELETE
There are essentially just four main types of requests to interact with netTerrain via the REST API:
- GET – returns data (resources or collections of resources)
- POST – creates a new resource
- PUT – updates a resource
- DELETE – deletes a resource
The API uses a similar approach for types and for our tests we’ll be mainly using the Nodes object.
1.2 Getting a node
To become acquainted with data returned by the API, we’ll get a collection of nodes and pick one of them:
a) Run GET http://localhost:50001/wapi/v1/nodes.
b) Make sure the response contains a collection with the description of number of pages, number of objects per page and more. The collection element should look like follows:
{

"href": "http://localhost:50001/wapi/v1/nodes/24000000000041"

}
c) Href is a resource address. It ends with a netTerrain internal Id, but in the RESTful API, to identify resources, Hrefs (Hypertext REFerences) are used. Use the URL above (Href value) to run another GET request.
d) If everything ran smoothly you should see a node resource in the response. Inspect it and notice how it contains certain attributes, plenty of Hrefs pointing to its sub-resources (we’ll get to that later) and its own Href.
1.3 Creating a node
OK, retrieving nodes is nice, but creating nodes is nicer.
Resources are created with POST requests. This type of request contains a body. The challenge here is to construct the proper content for the body, so let’s get to it.
Here we’ll use netTerrain’s Swagger help page to discover how a request body for a node should look like. This will work for other types of objects too. An alternative is copying a body of a node we’ve received in the previous exercise and removing the excess code.
a) Go to the http://localhost:50001/swagger page, expand the “Nodes” section and then expand the “POST” method.
b) You’ll see the “Use this node format for new node creation:” section with a node in Json format containing “name”, “parent_diagram” and “node_type” attributes.
c) Return to Postman and copy the node you received in the previous exercise.
d) Change the request according to this picture:
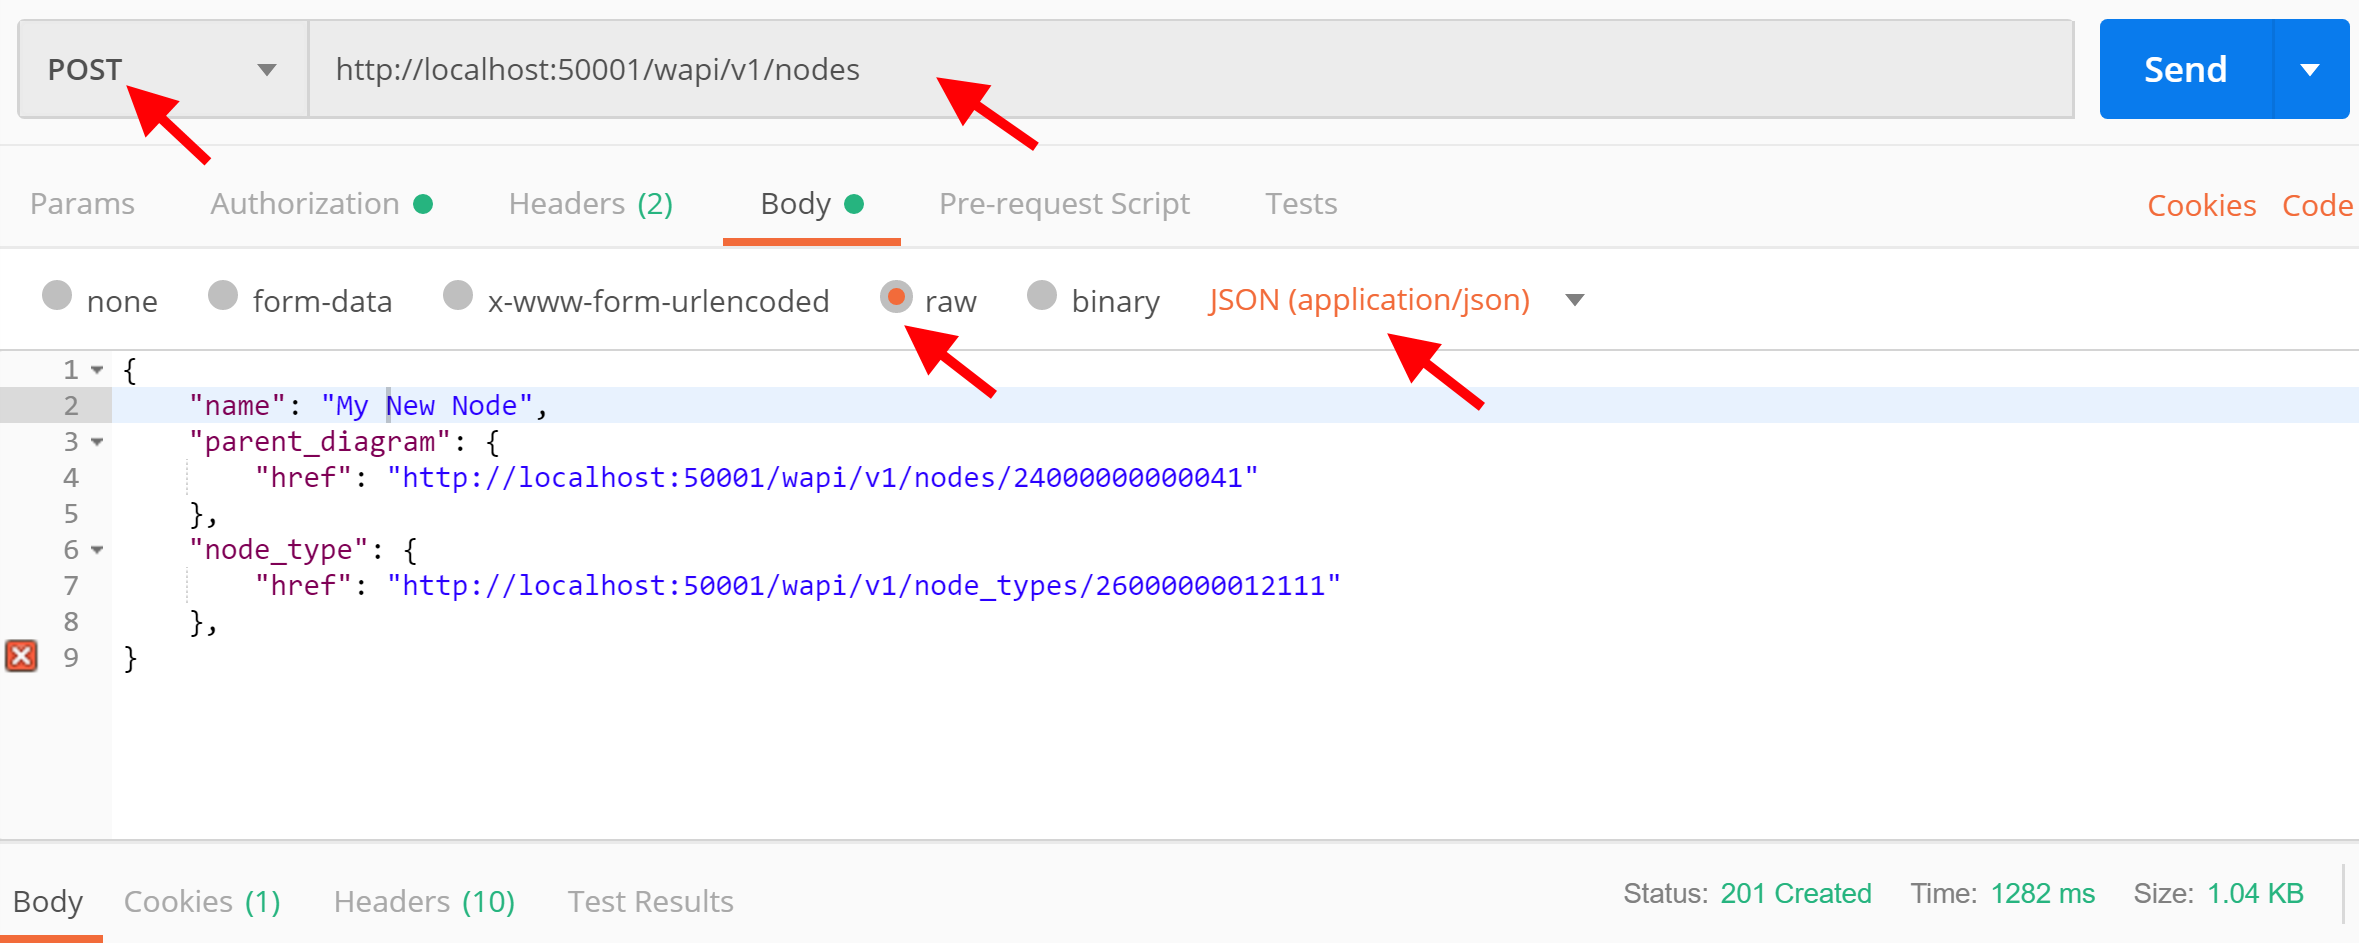
i. Open the “body” tab, select “raw”, copy the body and remove all attributes except “name”, “parent_diagram” and “node_type”.
ii. Set the “application/json” content type.
iii. Set the “POST” request type and make sure the URL of the request ends with “nodes”.
iv. Send the request.
e) You’ll receive the notice “201 Created” when this process succeeds. The response with a new node object is attached. Inspect it and notice how it has the same set of attributes as the node you got previously.
f) There could be a couple of reasons for not getting an object created:
a. You forgot to delete “href” from the body (a new object will get its Href upon creation)
b. You forgot to remove the decimal numbers from the request URL (For example attaching “/24000000000041” in your POST and PUT requests is not required)
1.4 Changing a node
Resources are changed with PUT requests. Let’s rename the node we’ve just created and move it to the top-level diagram.
a) Copy the body of the node we’ve created in the previous exercise and place it in the body tab.
b) Change the request type to “PUT”.
c) Remove everything except the “name”, “parent_diagram” and “href” attributes.
d) Change the name and the parent diagram Href. You should get something like this:
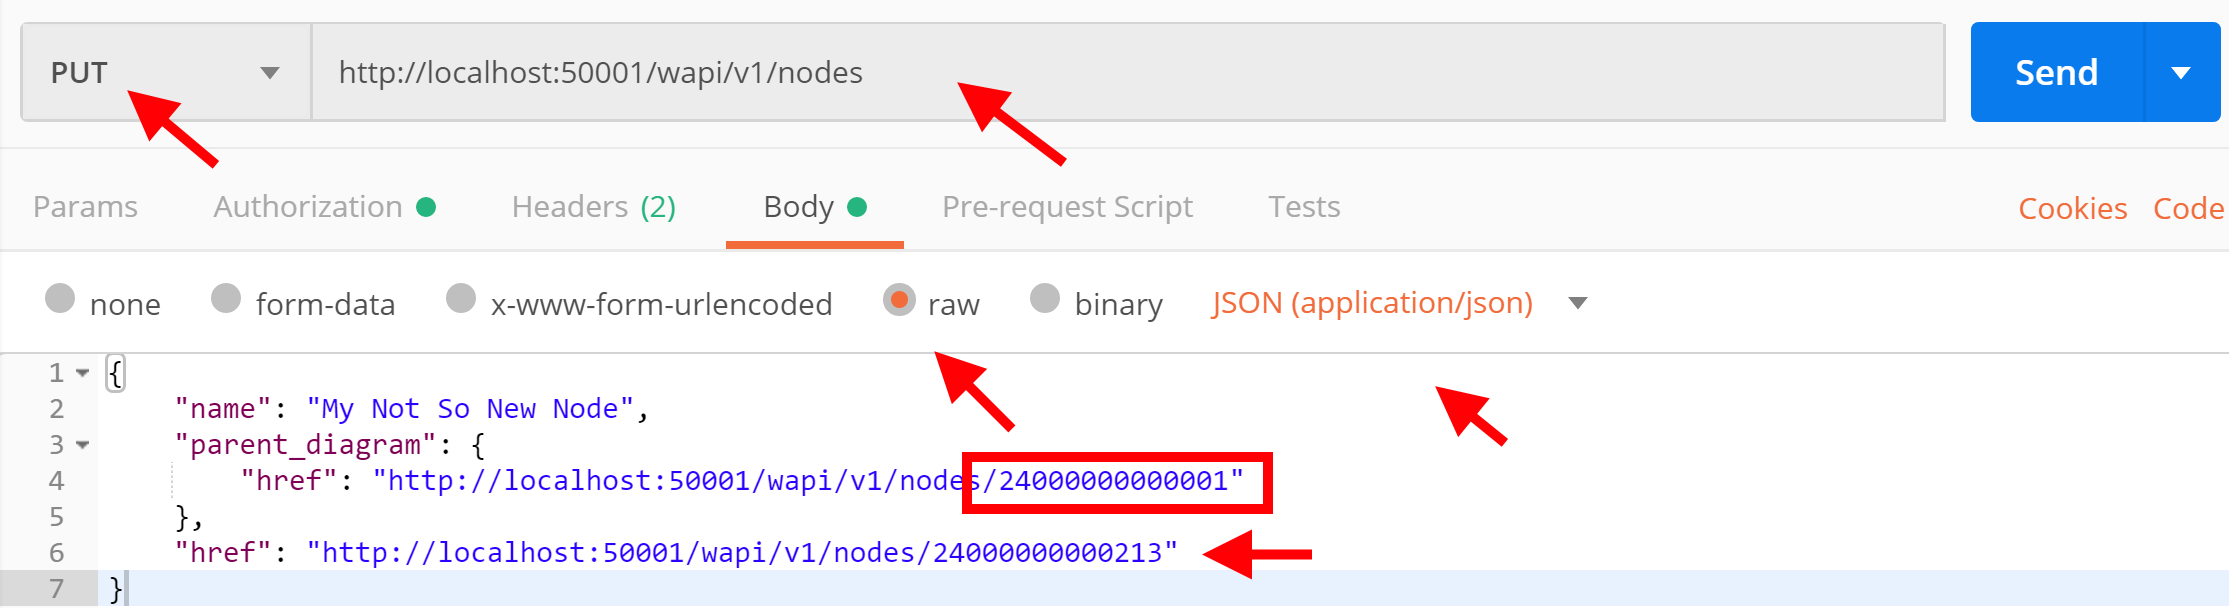
e) Notice that this time “href” stays in the body as we’re changing an already existing object.
f) The highlighted number is what differs from the previous “parent diagram” reference. This is the Id of the top-level diagram in netTerrain. For this exercise we just assume we know it. Normally to get an Href of resources one needs to find the Id first. We’ll get back to that later.
g) Run the request. You should get a “200 Ok” message.
1.5 Deleting a node
Now we are getting dangerous.
The deletion process is quite simple. In this exercise we’ll just go ahead and delete the node we’ve been working with.
a) Chose the “DELETE” request type.
b) Use the node Href as the request URL:
DELETE http://localhost:50001/wapi/v1/nodes/24000000000213
c) Send the request.
d) In case of a successful deletion, you’ll receive a “200 OK” status message.
e) Try to run a GET request with the same URL. You should get a “404 Not Found”.
This concludes the second article in our three-part series on getting started with netTerrain’s REST API.
Want to read other articles in this series?
- Part One: Basic Procedures for Getting Started
- Part Two: Data Retrieval, Writing into netTerrain & Deletion
- Part Three: Manage Collections, Filters, Expansions
Happy Documenting!