In this blog about our IT visualization software netTerrain, we will show one way of creating a connector to Solarwinds using netTerrain’s Integration Toolkit (ITK). This is not the only way, and maybe not even the recommended one in certain scenarios, but it sure is a quick one, as we connect directly to the database. For more permanent or mission critical connectors we recommend connecting through the API, which is also available.
Our users find that netTerrain’s integration toolkit is very easy to navigate and get the connection established with the data flowing to your network mapping/diagram project.
Creating a Connector
Ready to see how the magic happens? In the Integration Toolkit, you’ll go up to ‘Tools’ in the menu bar.
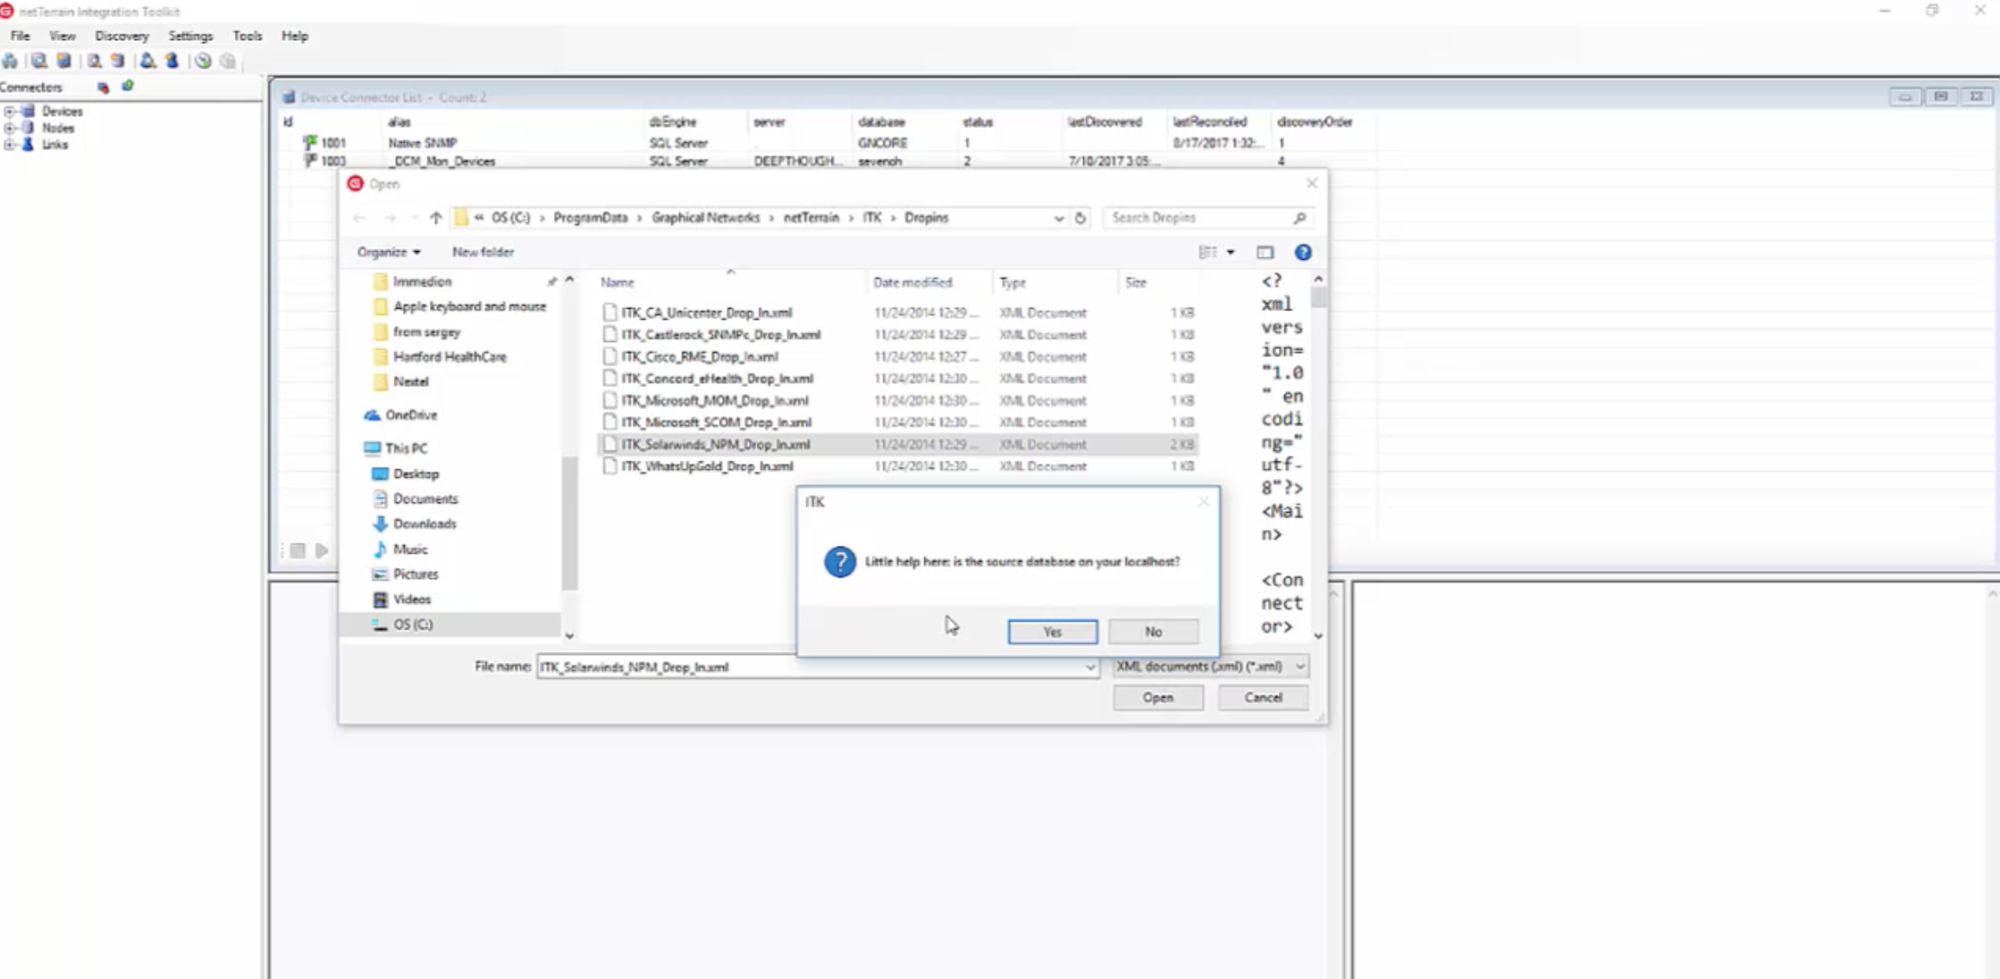
In Tools, you’ll see something called ‘XML Dropin’: click on this and navigate down to Solarwinds. Now, you just need to answer a few pop-up questions.
The first question the ITK will ask: is the source database your local host? If it is, it will populate localhost. If it’s not, you click no and you’ll need to put it in. There is an example instance in there.
In my case, I’m going to put in a SQL backslash 2014 — which is a local but defined instance: so here, just put in whatever the name of your database is in Solarwinds. Click ok.
Next question: are you using a trusted connection? Since I am, I’ll answer ‘yes’.
Is the database expected to be NetPerfMon? NetPerfMon is a typical solarwinds database instance name — mine actually isn’t, so I’ll say no to that. I’ll put in my name and click OK.
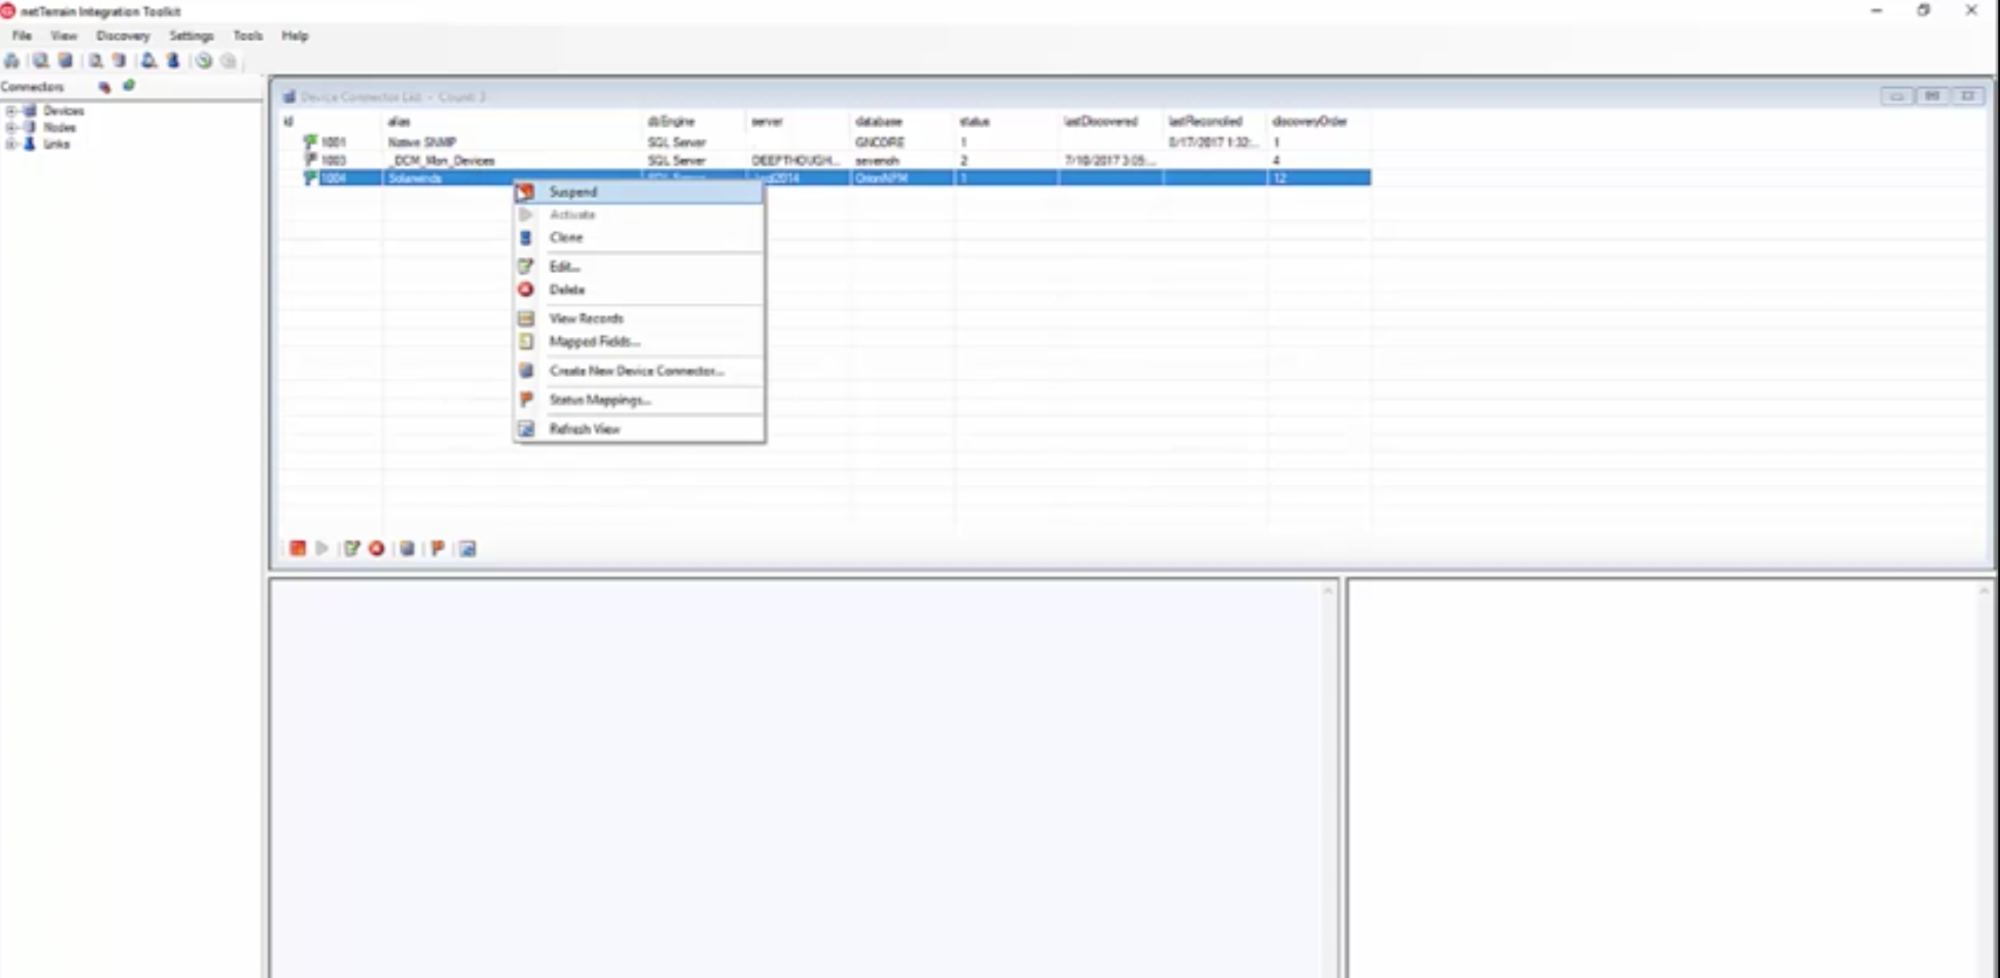
From here, I’ll go to edit and bring up the interface for the connector.
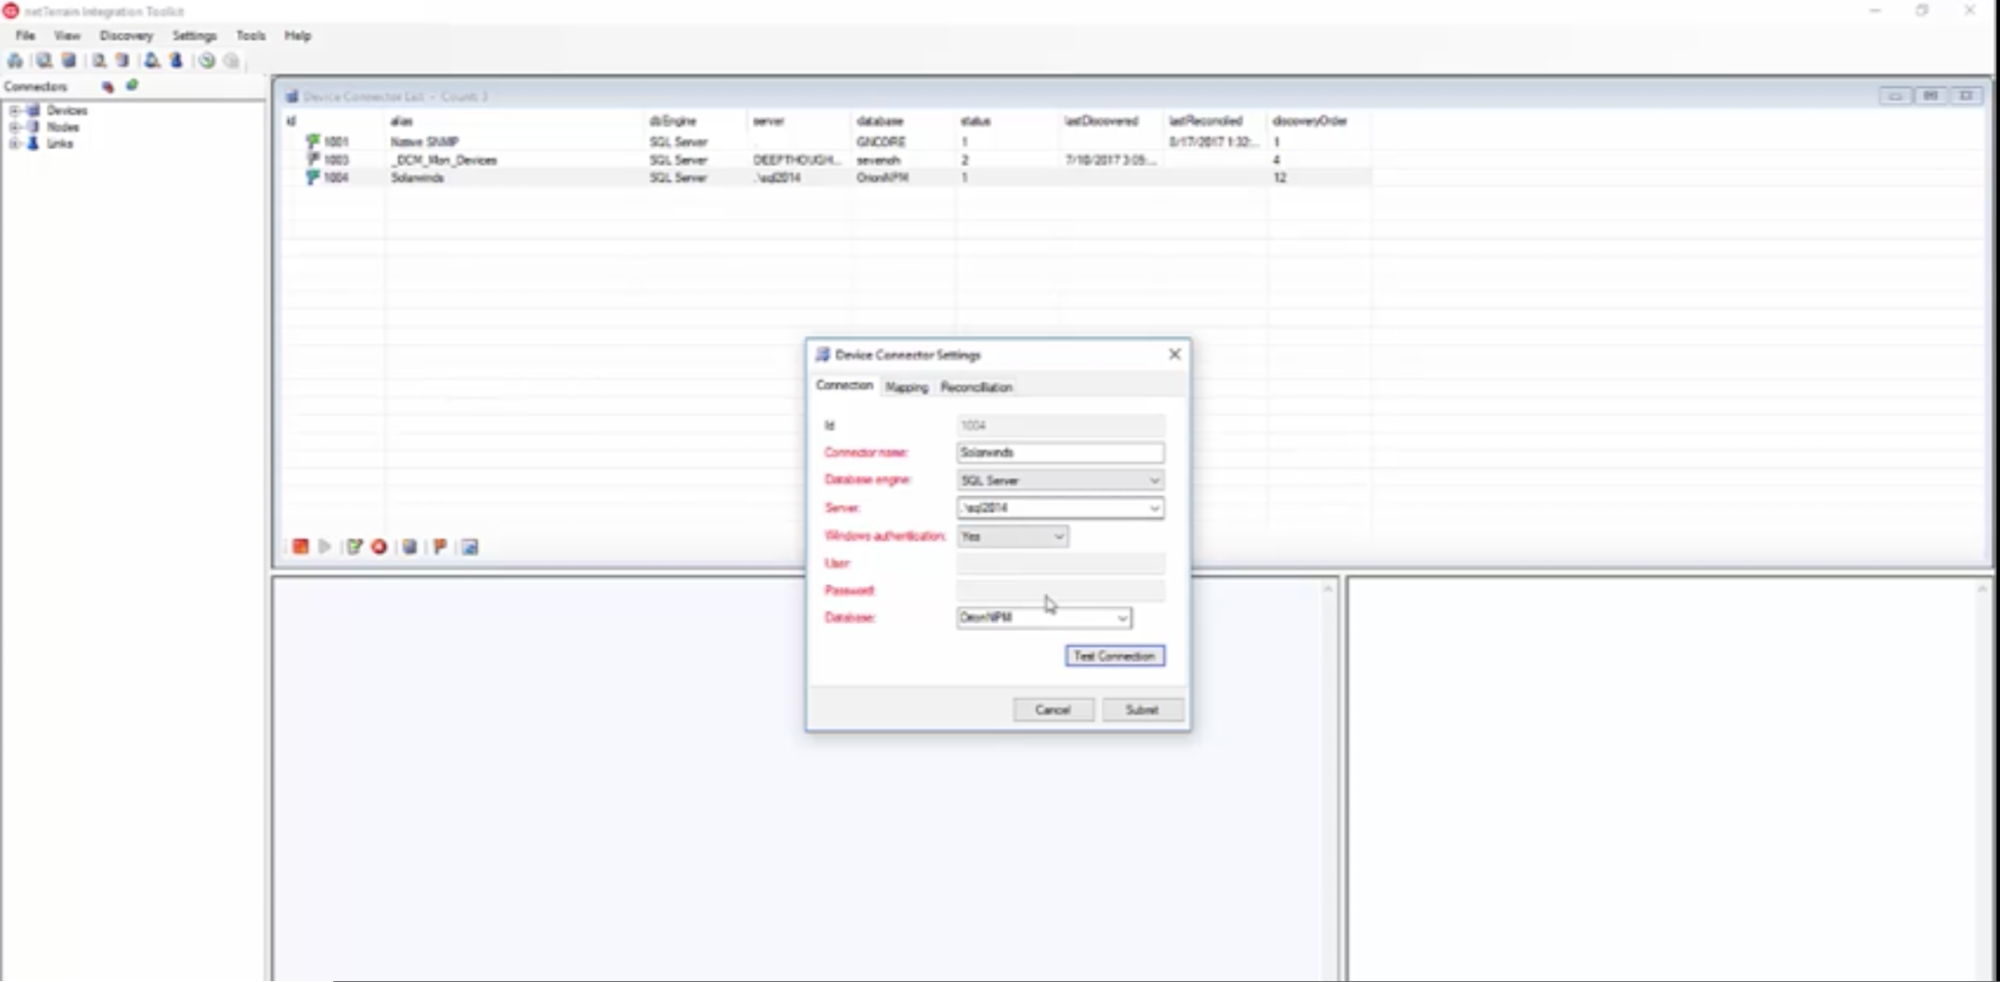
You’ll see some information about it:
- First, you’ll see the name of the connector. If you’d like, you can change the name.
- Next, you’ll see the database types/SQL server. This is the database instance, so this is where the solarwinds database is located (aka which server and so on). Mine is local so it’s fairly easy — if yours is remote, you might put in the full IP address.
- Windows authentication? Mine is local, I just put it in and get read-only access – if you say no, you’ll have to put in a username password. It’s all read-only access because you’re not trying to write or put anything INTO solarwinds.
- For ‘database’, you’ll put in the name. If it’s successful now, you know you have a good connection as far as user authentication and password.
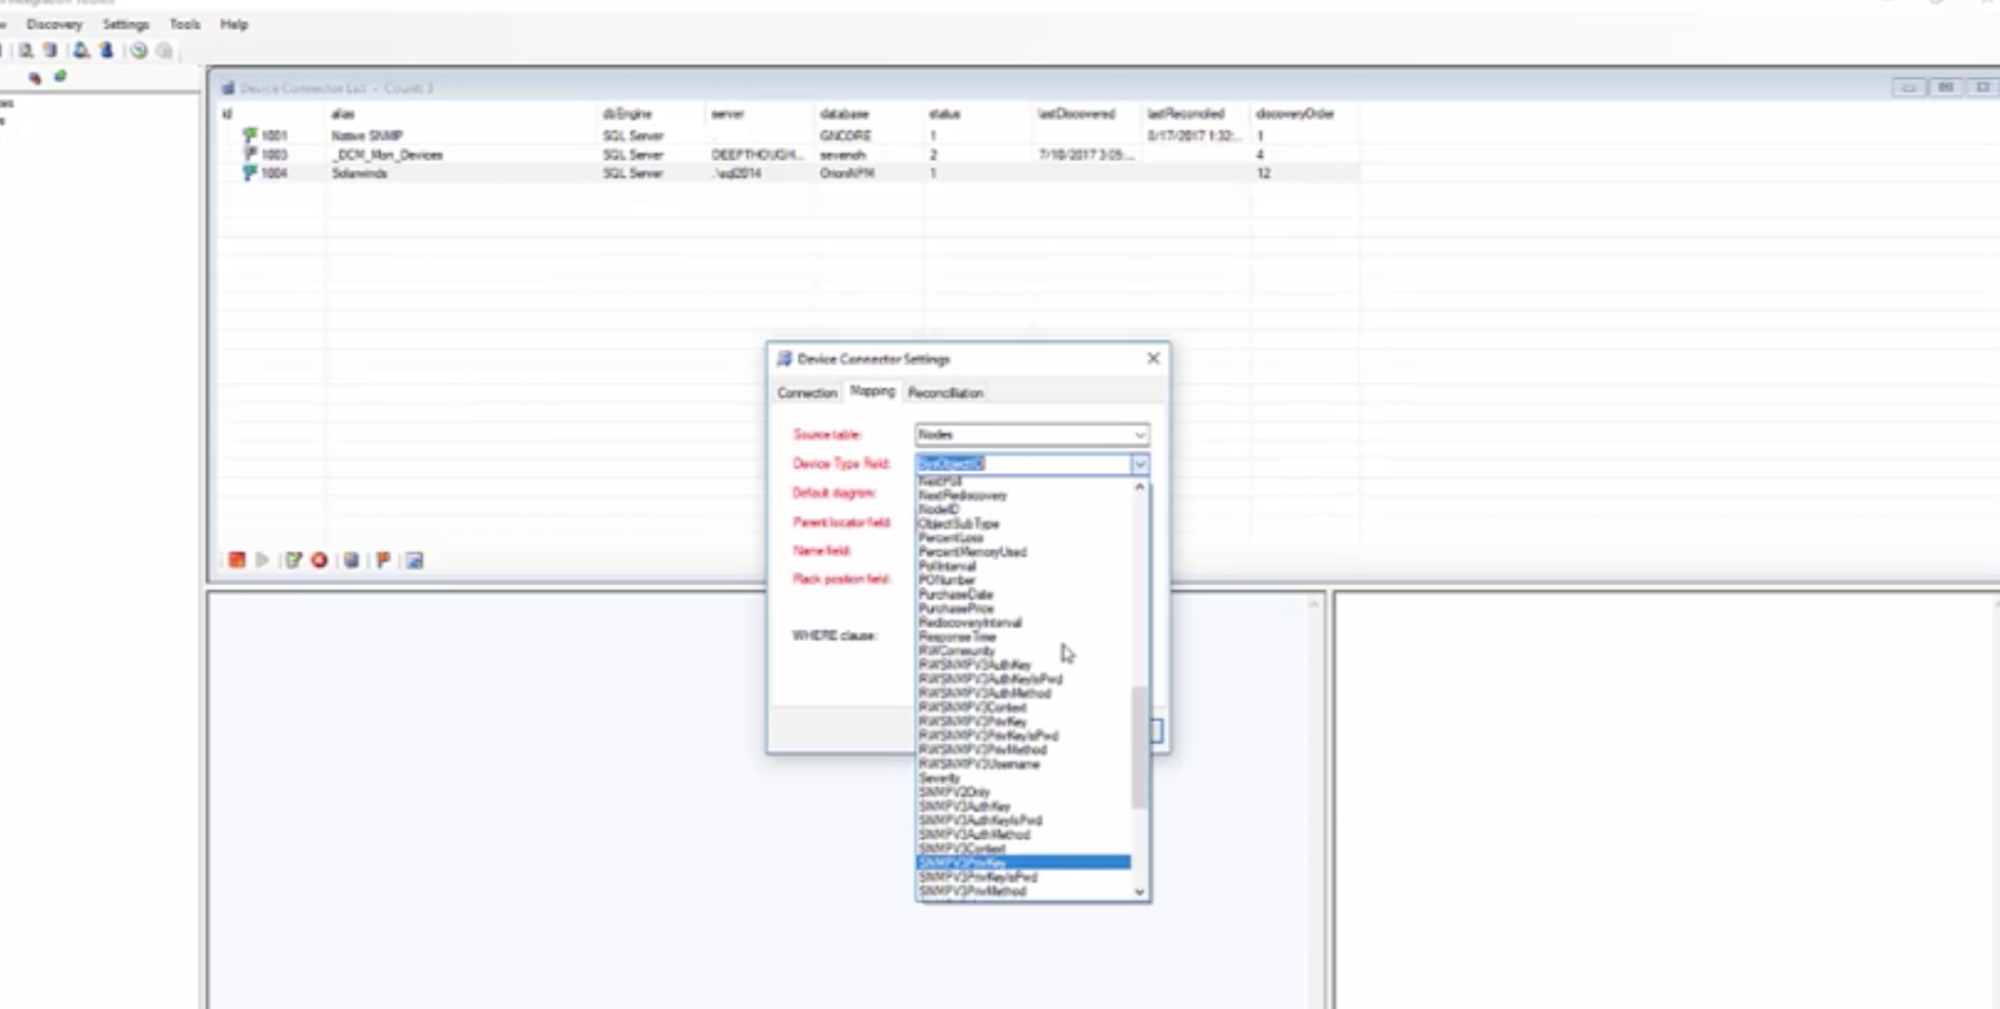
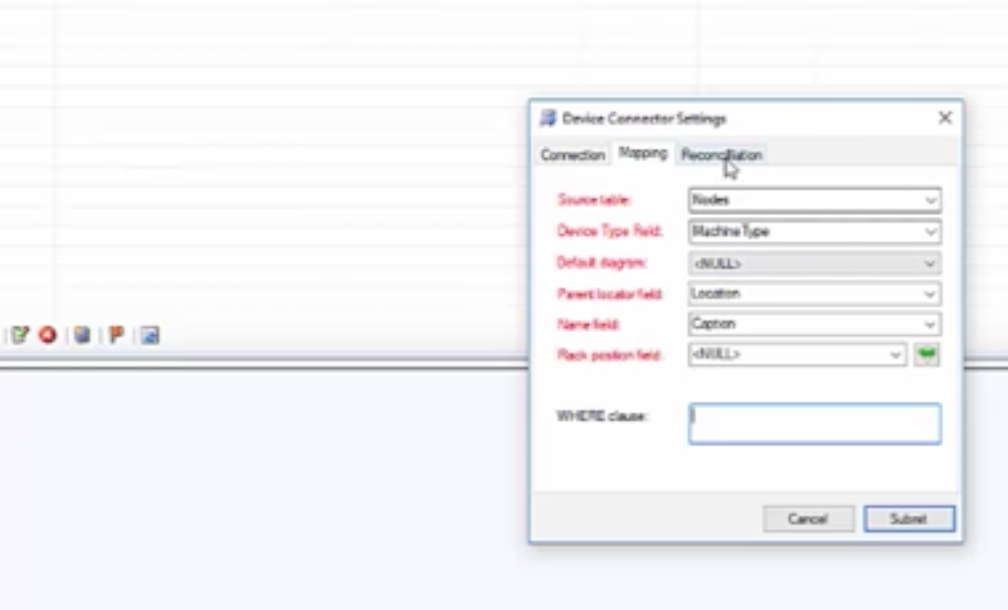
Now, we need to go over to the mapping tab:
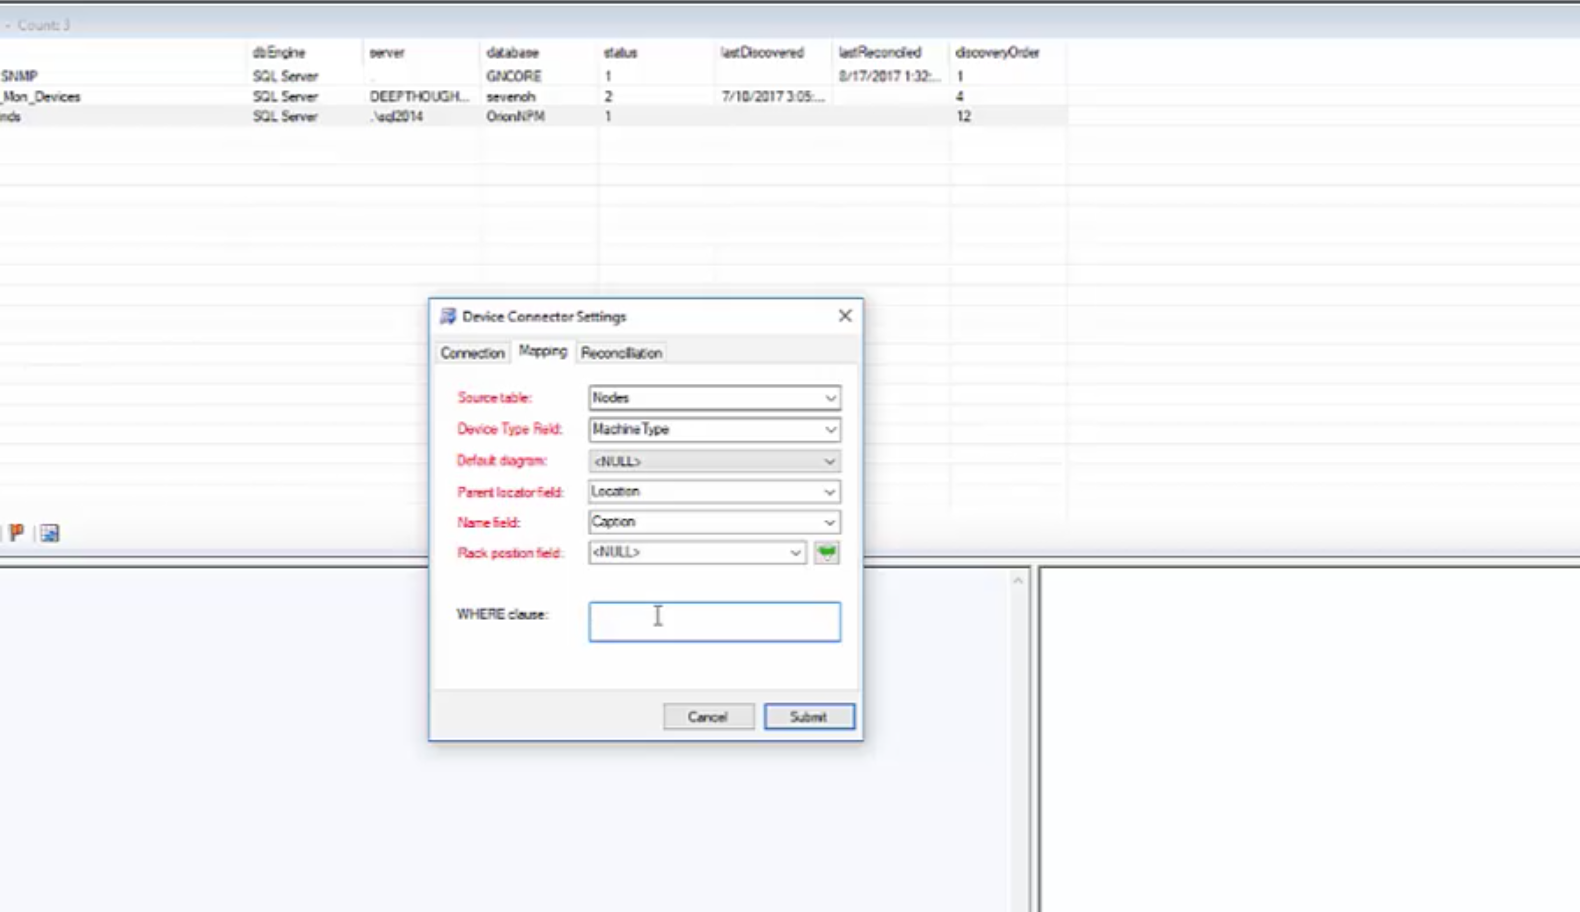
Here, you’ll see that some of these are already pre-defined and filled out which is good — it’s because of that drop-in that we used. Some of these things, however, you may want to change.
Source Table Field
The source table is the table we pointed at and pulled the data in from Solarwinds — in this case, it’s the ‘nodes table’ — that is typically what it would be called in the dataset from Solarwinds. So you choose that: if there is a different table you need to connect to, you can do a dropdown to get a list of various tables to which you can connect.
Device Type Field
This is the field that defines what the object is, or what the object type is. In this case, it says Object ID. Sometimes, you may want to change this.
In my case, for example, I’m going to switch it out to ‘machine’ type. What you might want to do here is look at the data and see what makes sense –, to explain a bit further: this is the information that the system netTerrain is going to look at and use for what we call ‘mapping’ the object type in Solarwinds to the type of object that it will be in the netTerrain catalog.
We’ll do the actual mapping in a moment — but in the case of the ‘Device Type Field’, we define it here.
Default Diagram
If you want all these objects to go into one standard diagram, then that’s where you would set that. Right now, if you set this to ‘null’, all the devices would end up at the top level of your netTerrain project. This works, but you would end up having to move them.
Parent Locator Field
This is optional. If you happen to be taking advantage of SMNP data, such as a location field, where you put good data in such as ‘i’m defining a location a building #100 for this device’, we can look up the location and place the object in that building — and this is true down to the cabinet level. A lot of our users don’t use this, so you may just need to use the default diagram.
In my case, I will use the location data because my data does have some location info. If you aren’t using location data, that’s fine: just change it to ‘null’ instead. You can leave the default diagram null, as well. The main thing now is just to get some data flowing.
Name Field
The name field is the field which will define the name of the object, such as the DNS name, for example. We’ve found that this is typically defined in the caption field in the Solarwinds dataset. This may be a bit different in yours — so you may want to look at the actual table in Solarwinds (if you’re wondering what that looks like, you may have to talk to the Solarwinds database person if you want to get output from this node source table of Solarwinds).
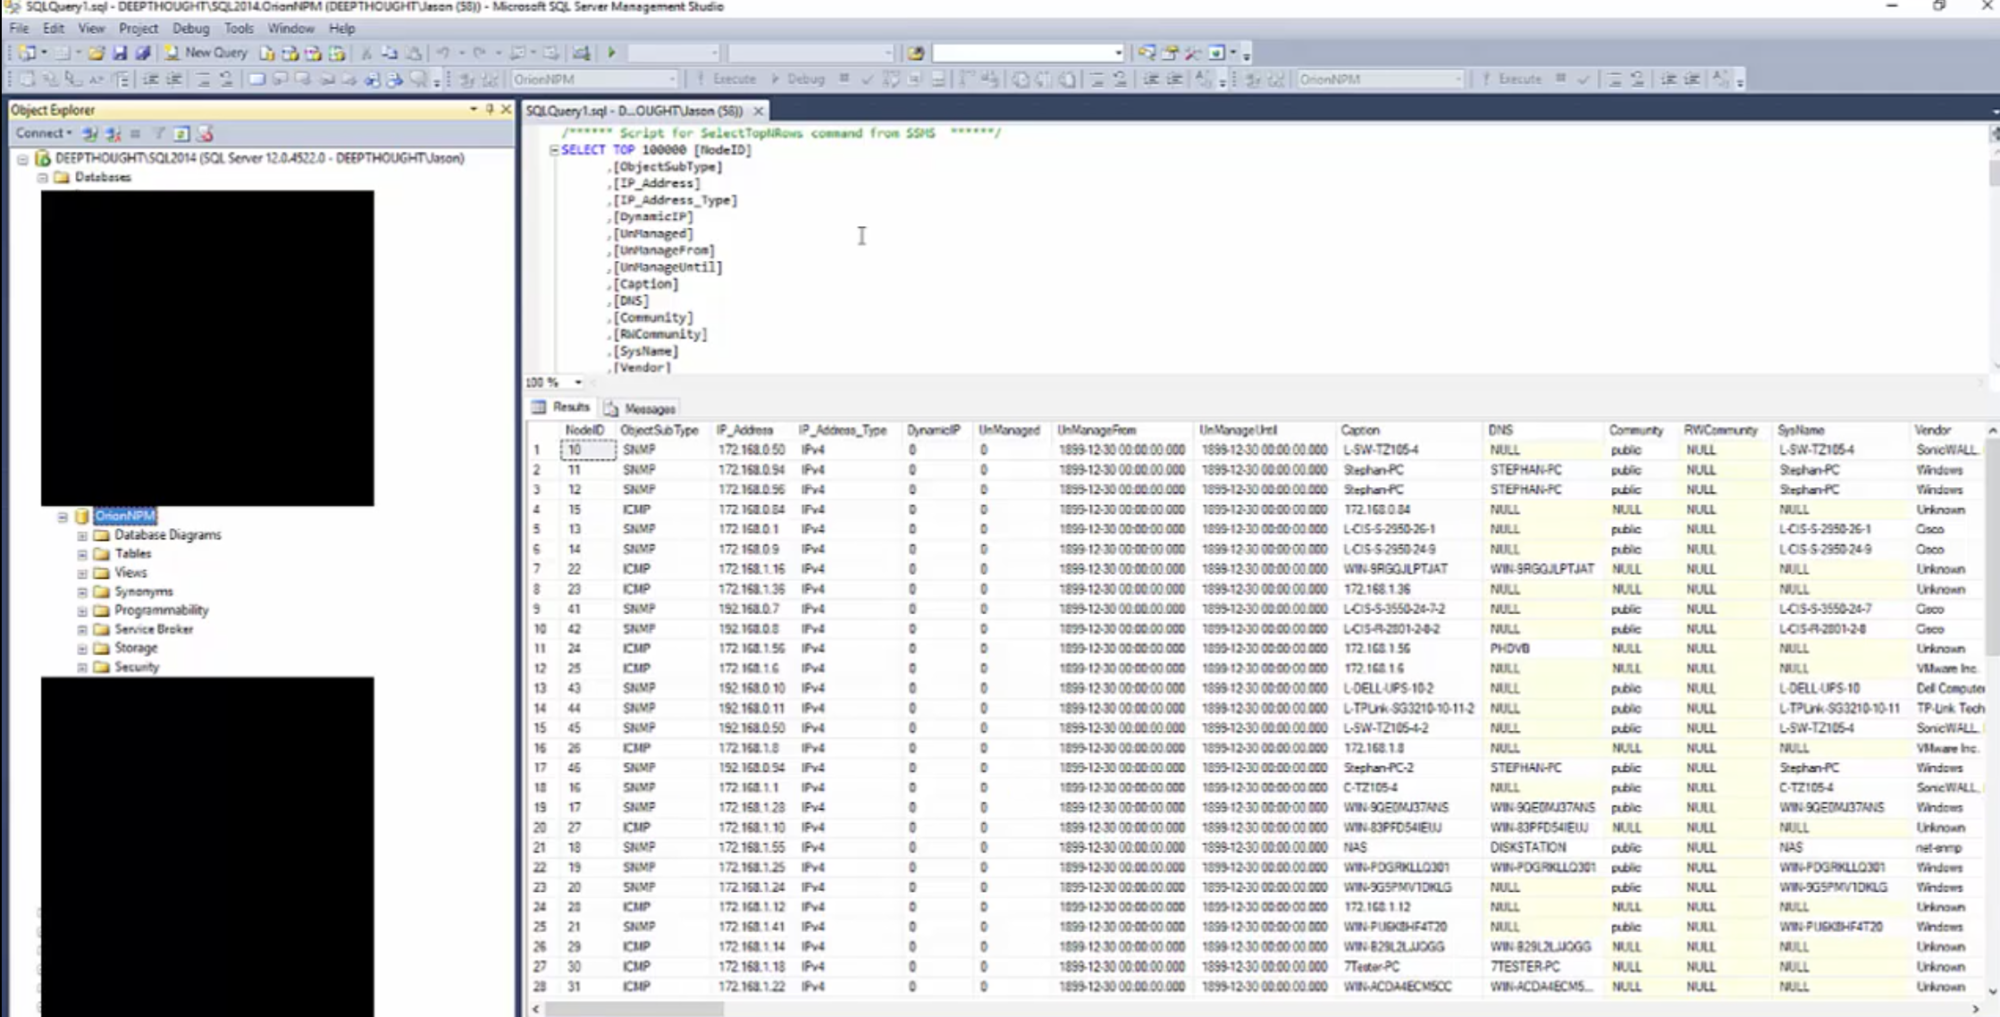
I happen to have my database here – I’m bringing in some data across from my database in this particular table that was the ‘nodes table’ — and if I scroll across, you’ll see lots of columns of data.
Of course, you won’t want to or need to read all of the data but as you can see, you can bring in and use any data that is needed.
In my case, I’m taking advantage of the caption information because that has my DNS or name information about my objects.
We’ll use some of the other fields as well, but to get started, I’d stick with the basics such as nodes and table (if that’s how it’s defined), machine type, location, caption field.
Where Clause
You can use the ‘where’ clause if you want to filter information…maybe you have a lot of devices and the status on them is that they’re archived or not in use anymore — you can use the ‘Where’ clause to exclude those (side note: this is something I’d come back to after I have the basics of the connector set up and working first).
Reconcile
The reconcile function means that if there are data changes, it will update that data with the changes — automatically. So: if something in Solarwinds changes, the changed data will populate into netTerrain (and you can set up how often that happens).
Insert New Devices
You can choose to insert new devices here. This means that if a new device is added in Solarwinds and discovered, it will automatically get created in netTerrain.
Delete
The ‘delete’ functions means that if something is removed from Solarwinds, it would be remove it from netTerrain automatically. You can set to ‘no’ if you don’t want the system to remove it automatically.
Get the Data Flowing
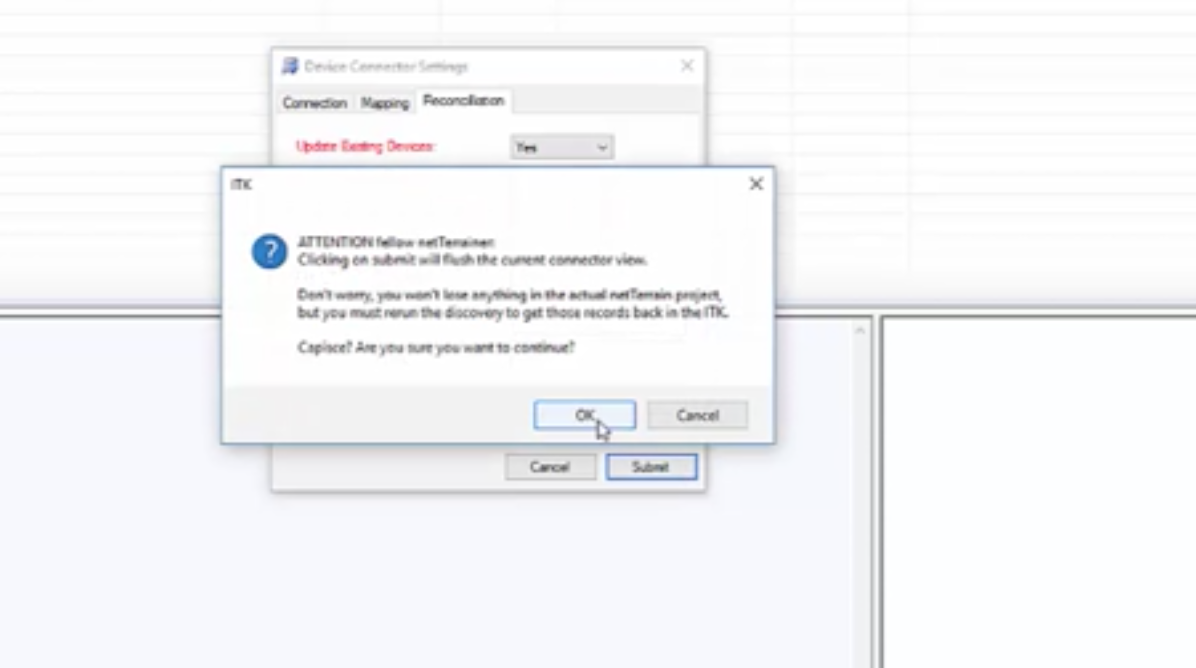
Ready to get moving? Once you submit, it’s going to let you know that it’s going to flush some tables and do other stuff – that’s fine, so I’ll just click Ok.
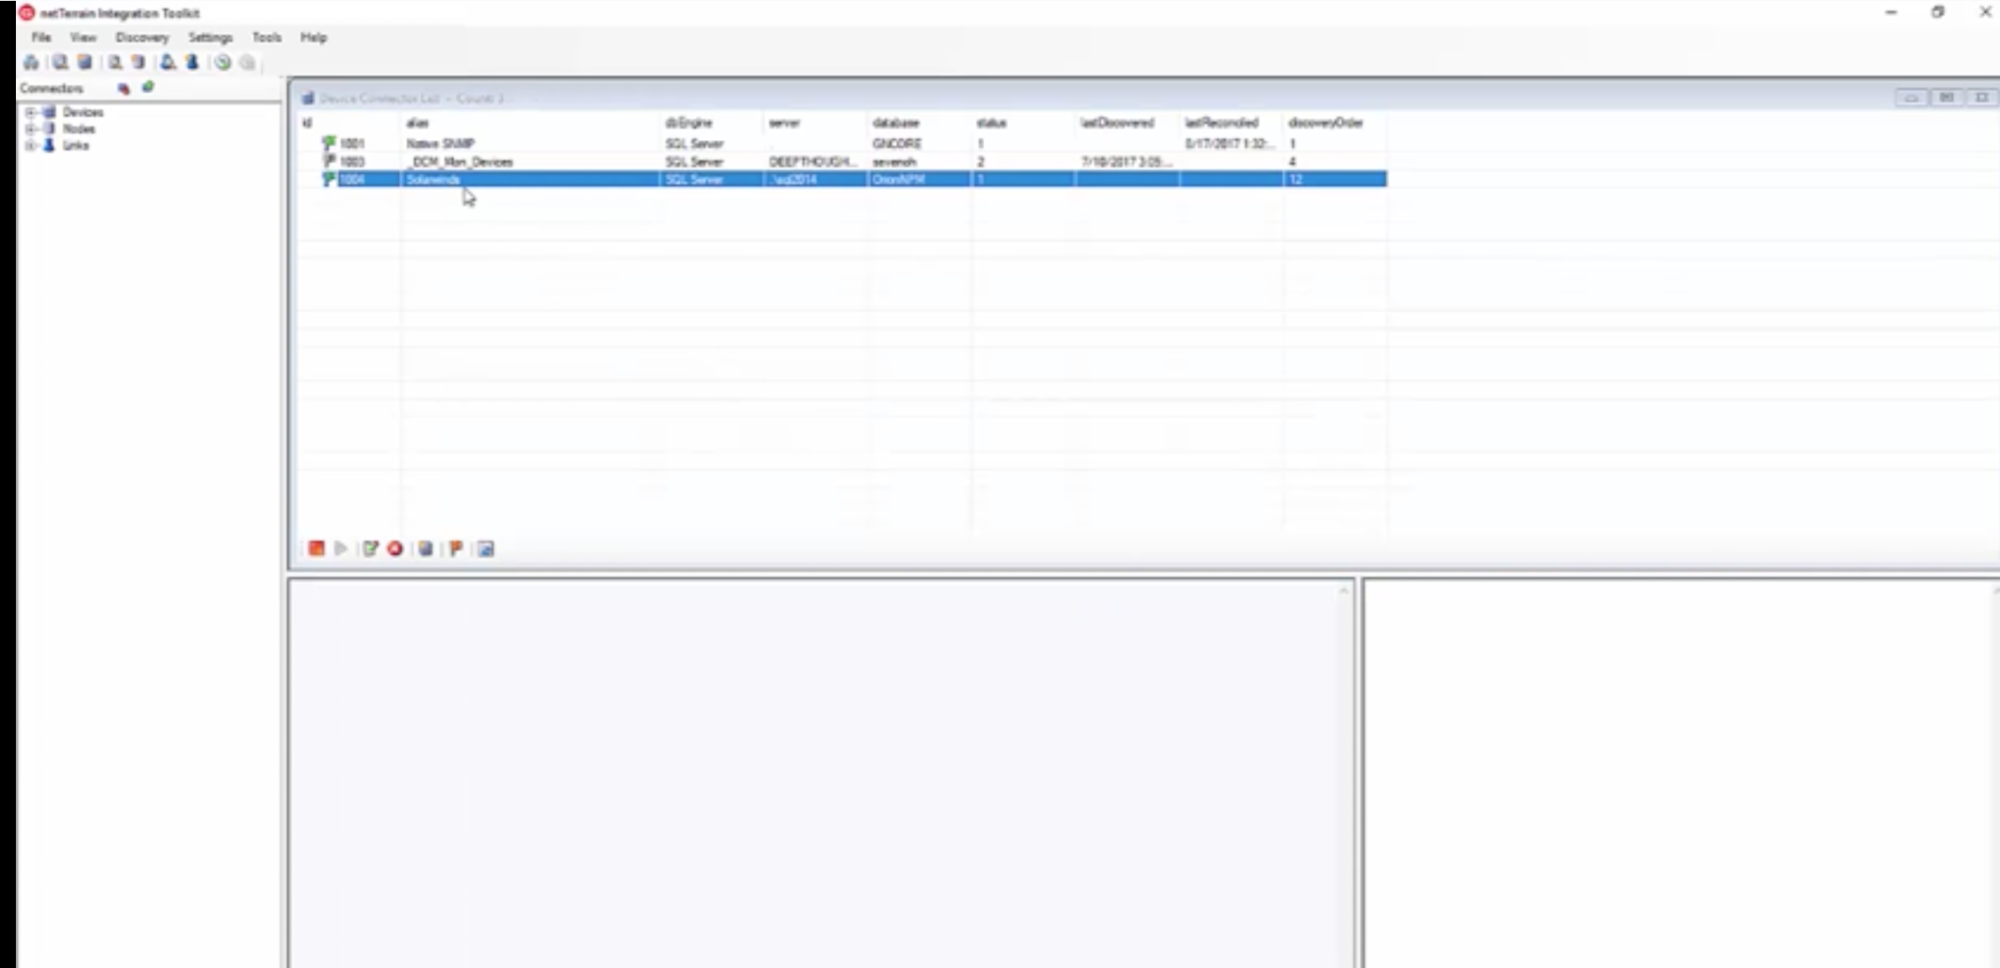
Now that I hit OK, the ITK will restart. Once it has, you’ll see Solarwinds appears now.
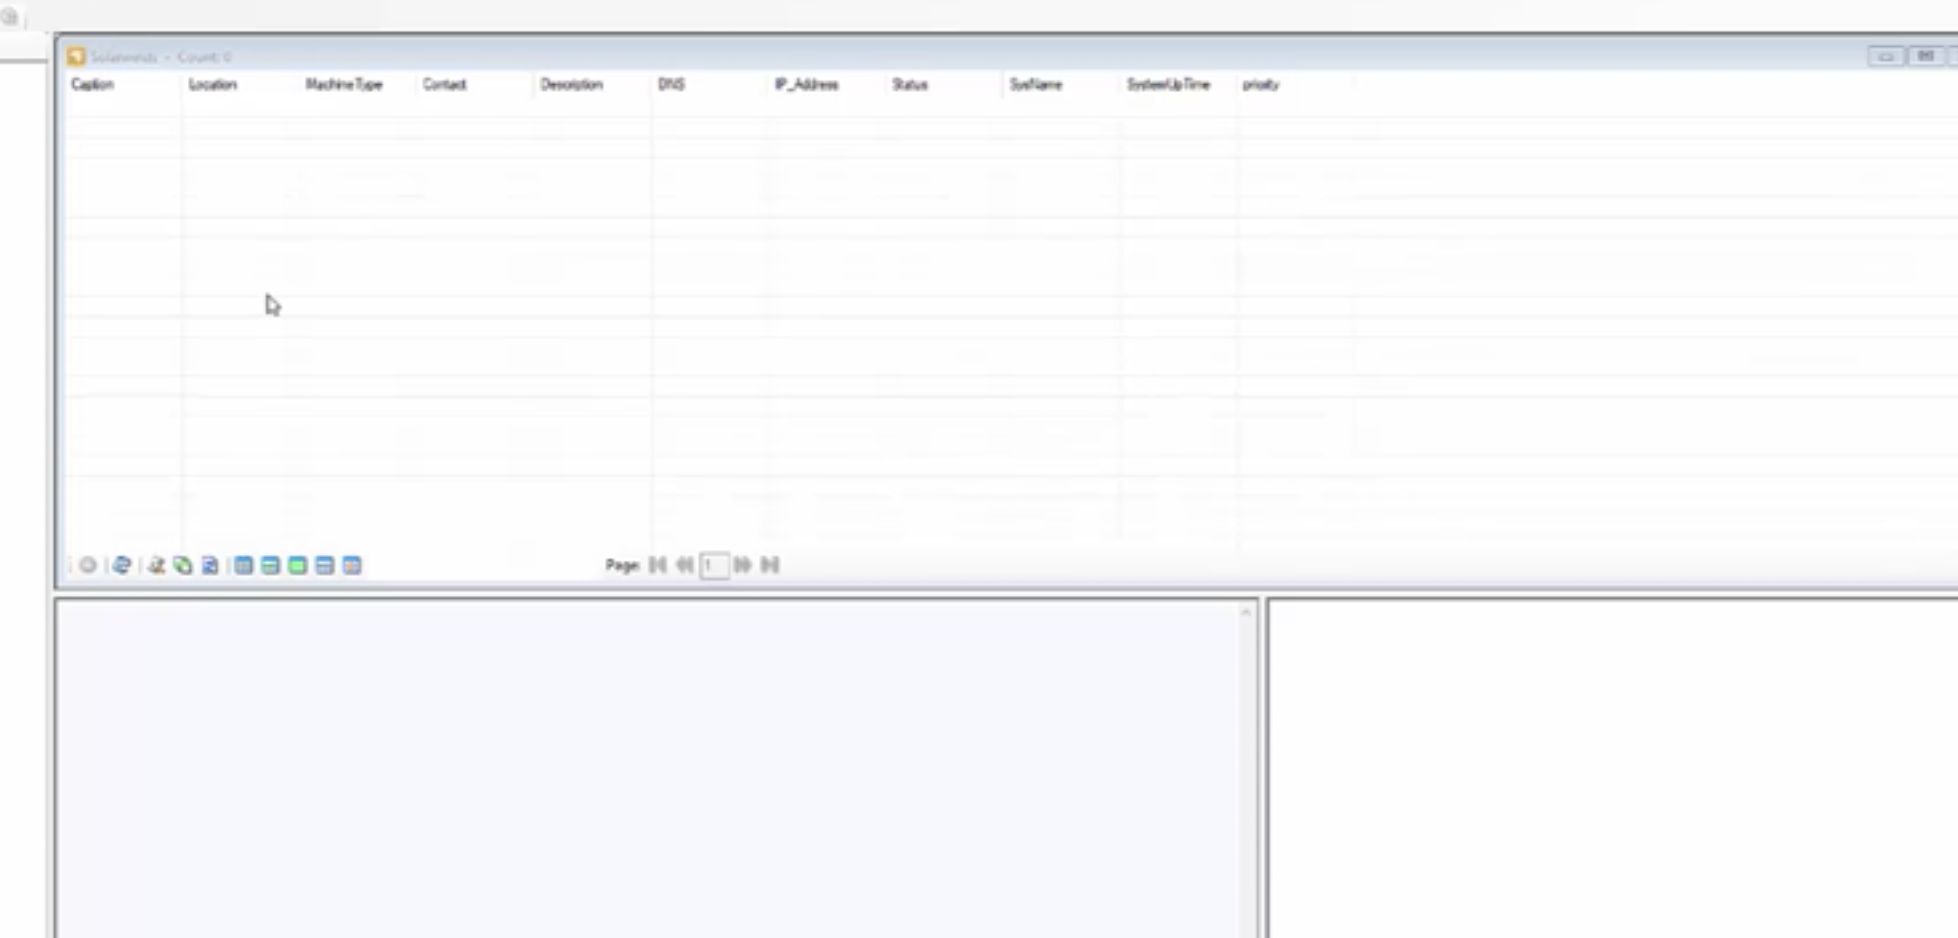
Double-click on Solarwinds and you will discover that there’s nothing in there yet. When you double-click, the default behavior for the ITK connector is to drill down and show you the table it has discovered.
Now, it hasn’t discovered anything yet…why not? Because I don’t have this automatically bringing data across in the system.
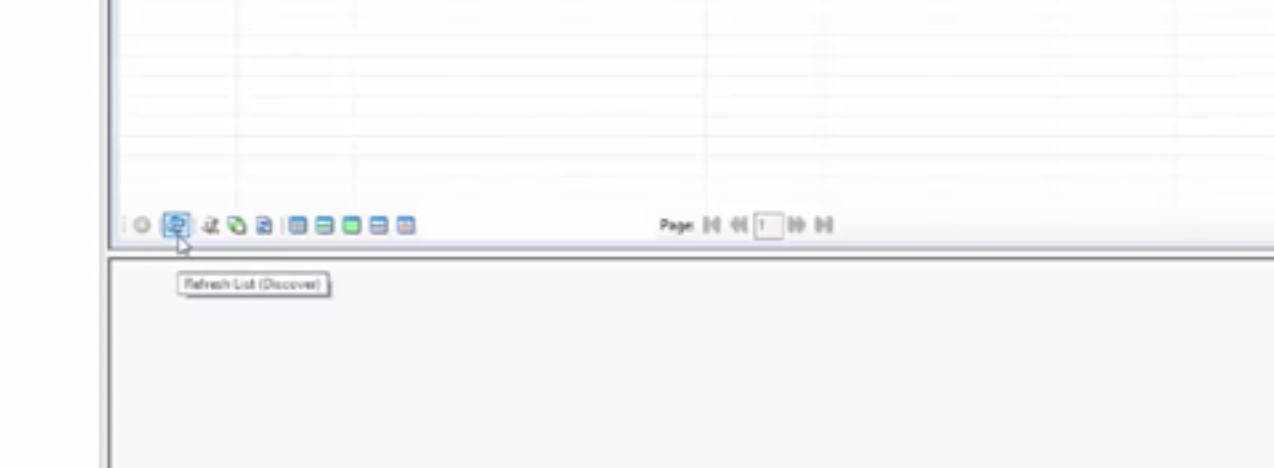
I can test it though by doing a simple discovery.
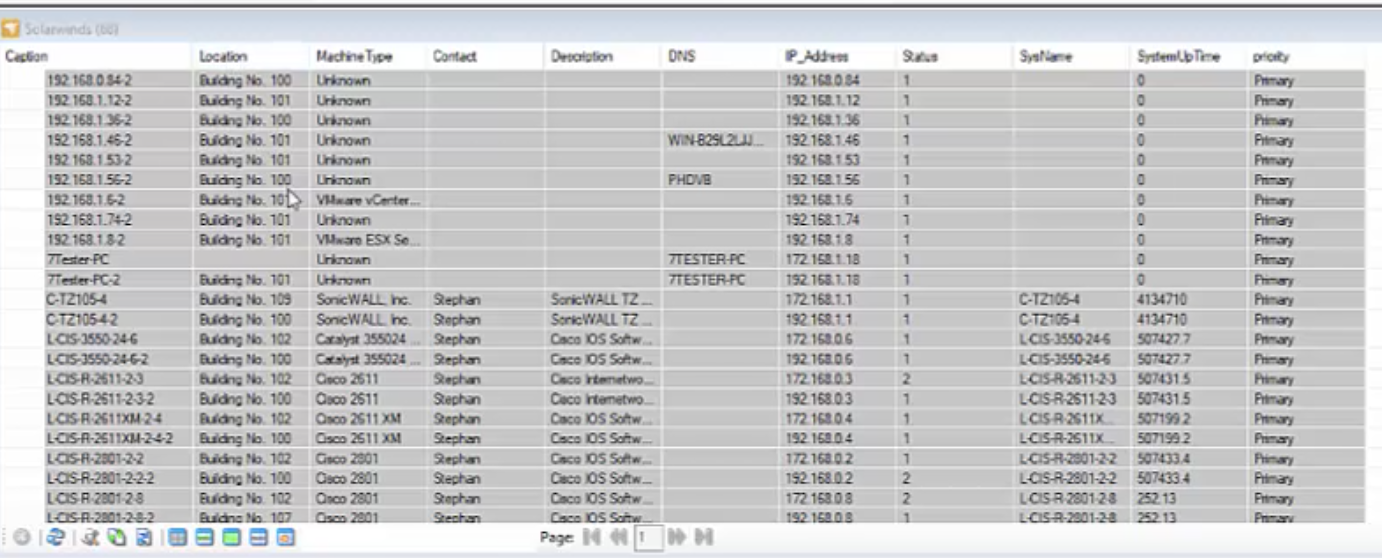
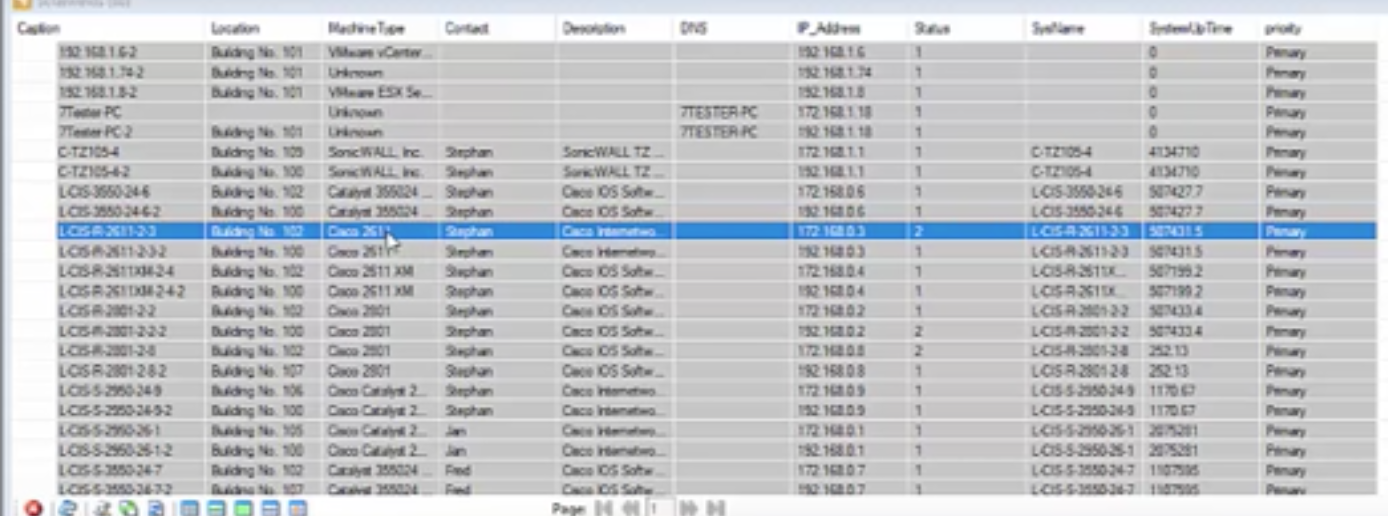
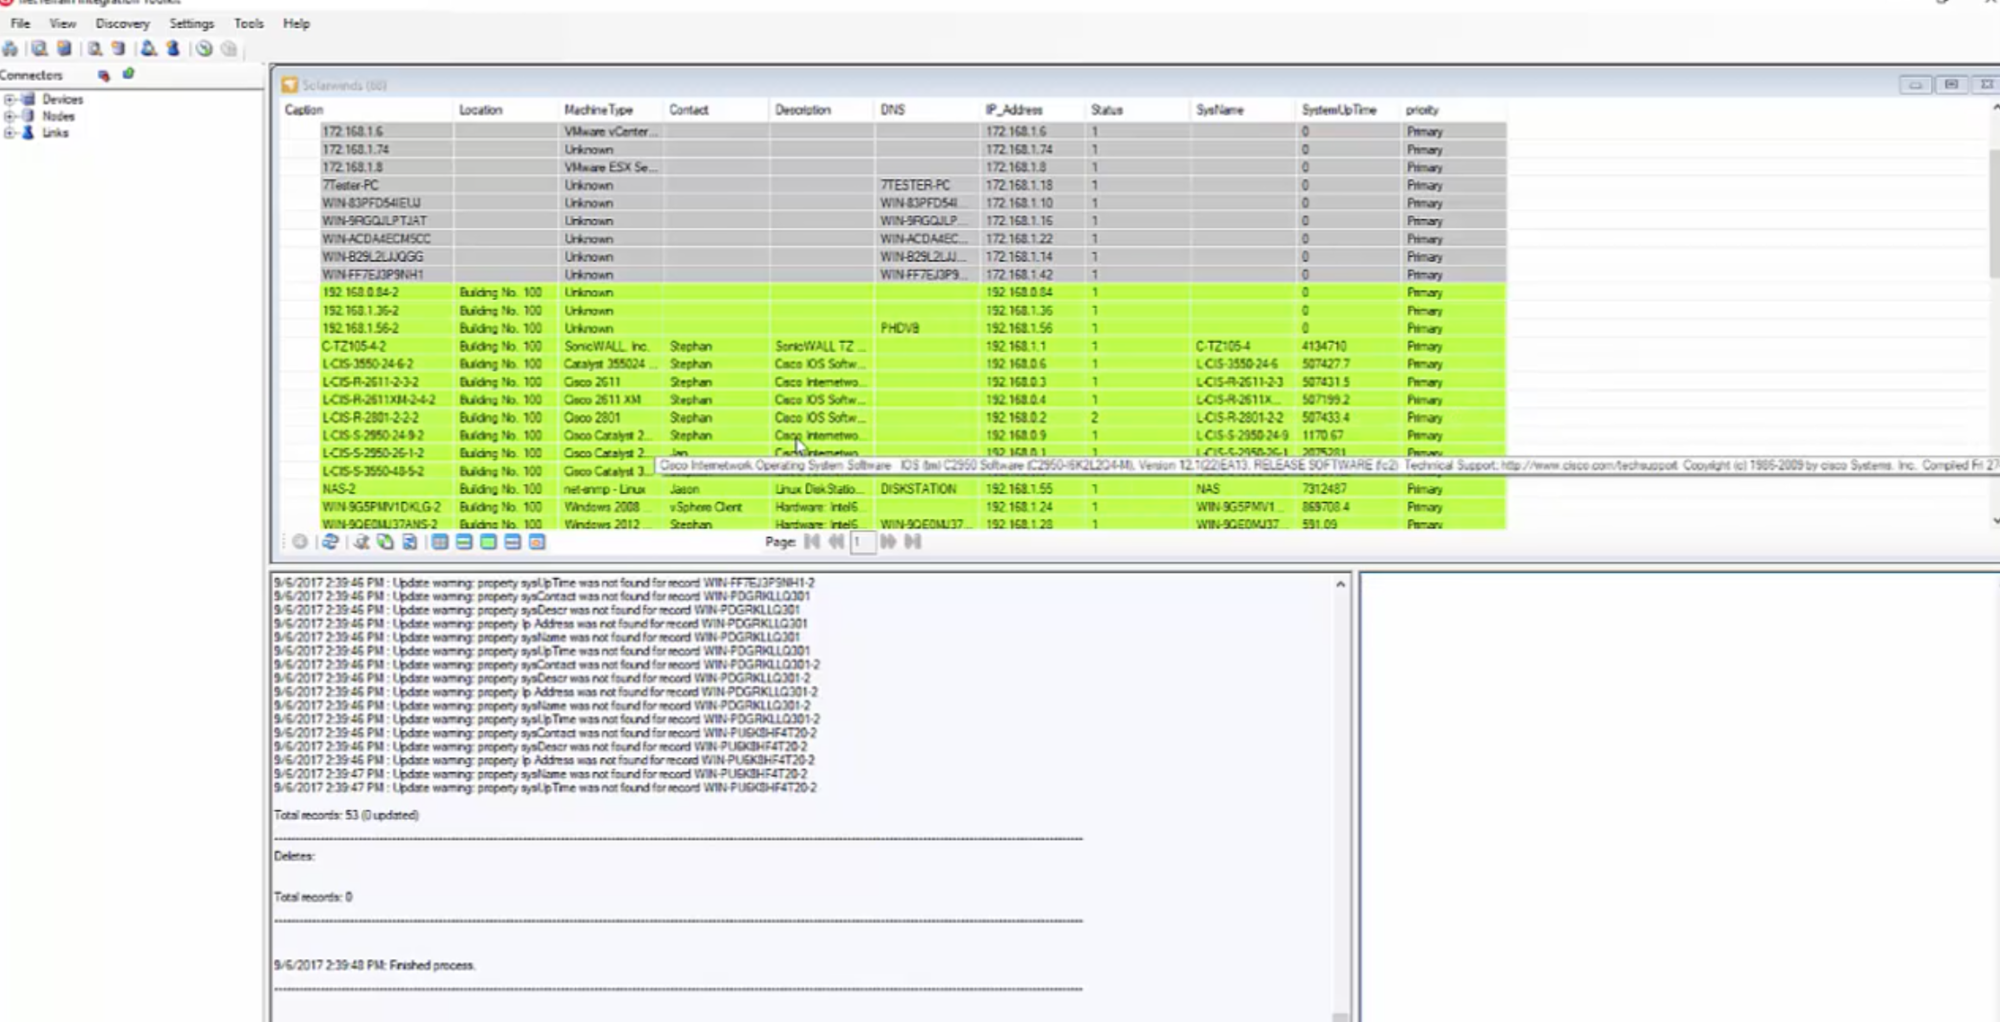
Now that I’ve done a discovery, you can now see that I’ve brought in a bunch of data. This data would mirror what is in my table (the one that I showed above).
Fine Tune Things and Map Objects
Let’s check out ‘Tools’ up at the top. Maybe I’m having trouble with data not coming across: from Tools, I can go to the log and take a look at it. Often, if you do have problems, we will ask you for this log.
So, back to the data we discovered. As you can see, we have these columns of data.
I have a location column: as I mentioned, I was going to use my location info to place objects into netTerrain….so, because I do have location data that should work (in your case you may not use location and may have it set to default which means it will basically put the objects on the top-level diagram of netTerrain — which is fine because we can always change these things moving forward). The main thing we want to get going is setting up the connector and getting the data flowing across.
Looking through the data, I can see ‘machine’ type as I defined it. The ‘machine’ type is going to drive the catalog objects.
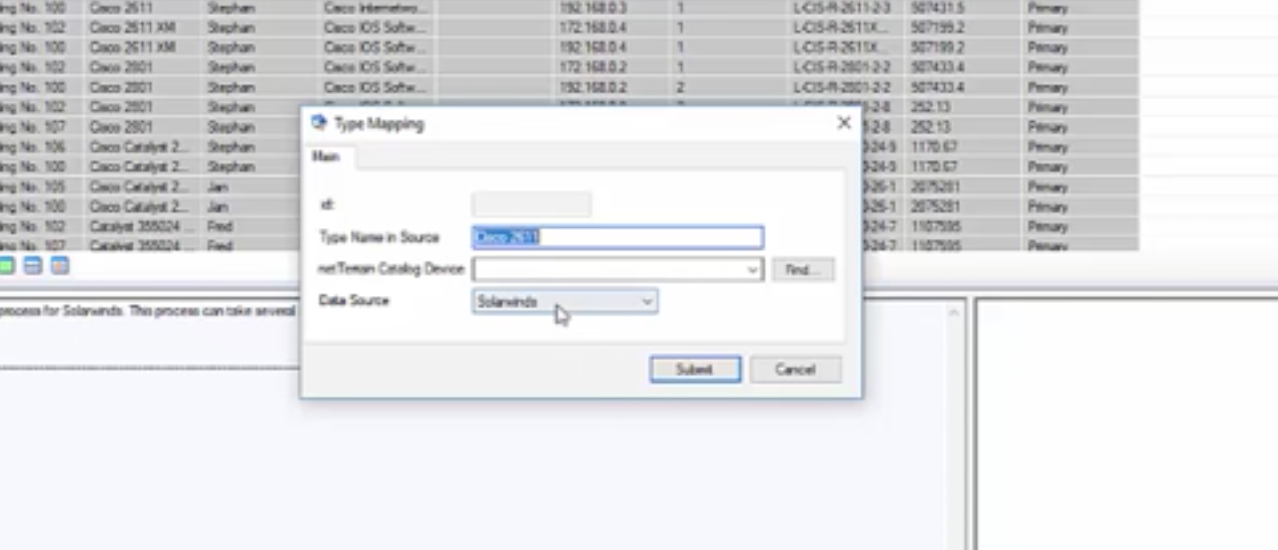
Right-click on this column and there is an option here called ‘map type’. What I’m doing here is saying “hey, when you go to create this object using data from Solarwinds we’re going to use that data to create something in netTerrain such as, in this case, a device.” So, what we need to do is to create a ‘mapping’.
Basically, what we are telling netTerrain is that anytime you see Cisco 2611 for ‘machine type’, use this type of object that’s in the netTerrain catalog.
How do you do this?
You can use the dropdown list and find it, or click ‘find’ and have it do a filter for us — I just typed in 2611 to check out what comes up. I have a few 2611 objects that are in my catalog — so I’ll just hit ‘apply selected’ and submit that.
Nothing has really changed but now netTerrain knows that if there is a ‘2611’, to go ahead and create it using that catalog object type.
Next, another setting to be aware of is in ‘Application Settings’. On the second tab in app settings, called ‘Other’, it says ‘use generic objects for unmatched types’.
If you put a checkmark in here, what it does if it doesn’t have a mapped network to netTerrain, it uses a generic object to create it. I’ll make sure it’s turned on and hit submit.
So….let’s see what we have now.
First, let me go into my netTerrain project.
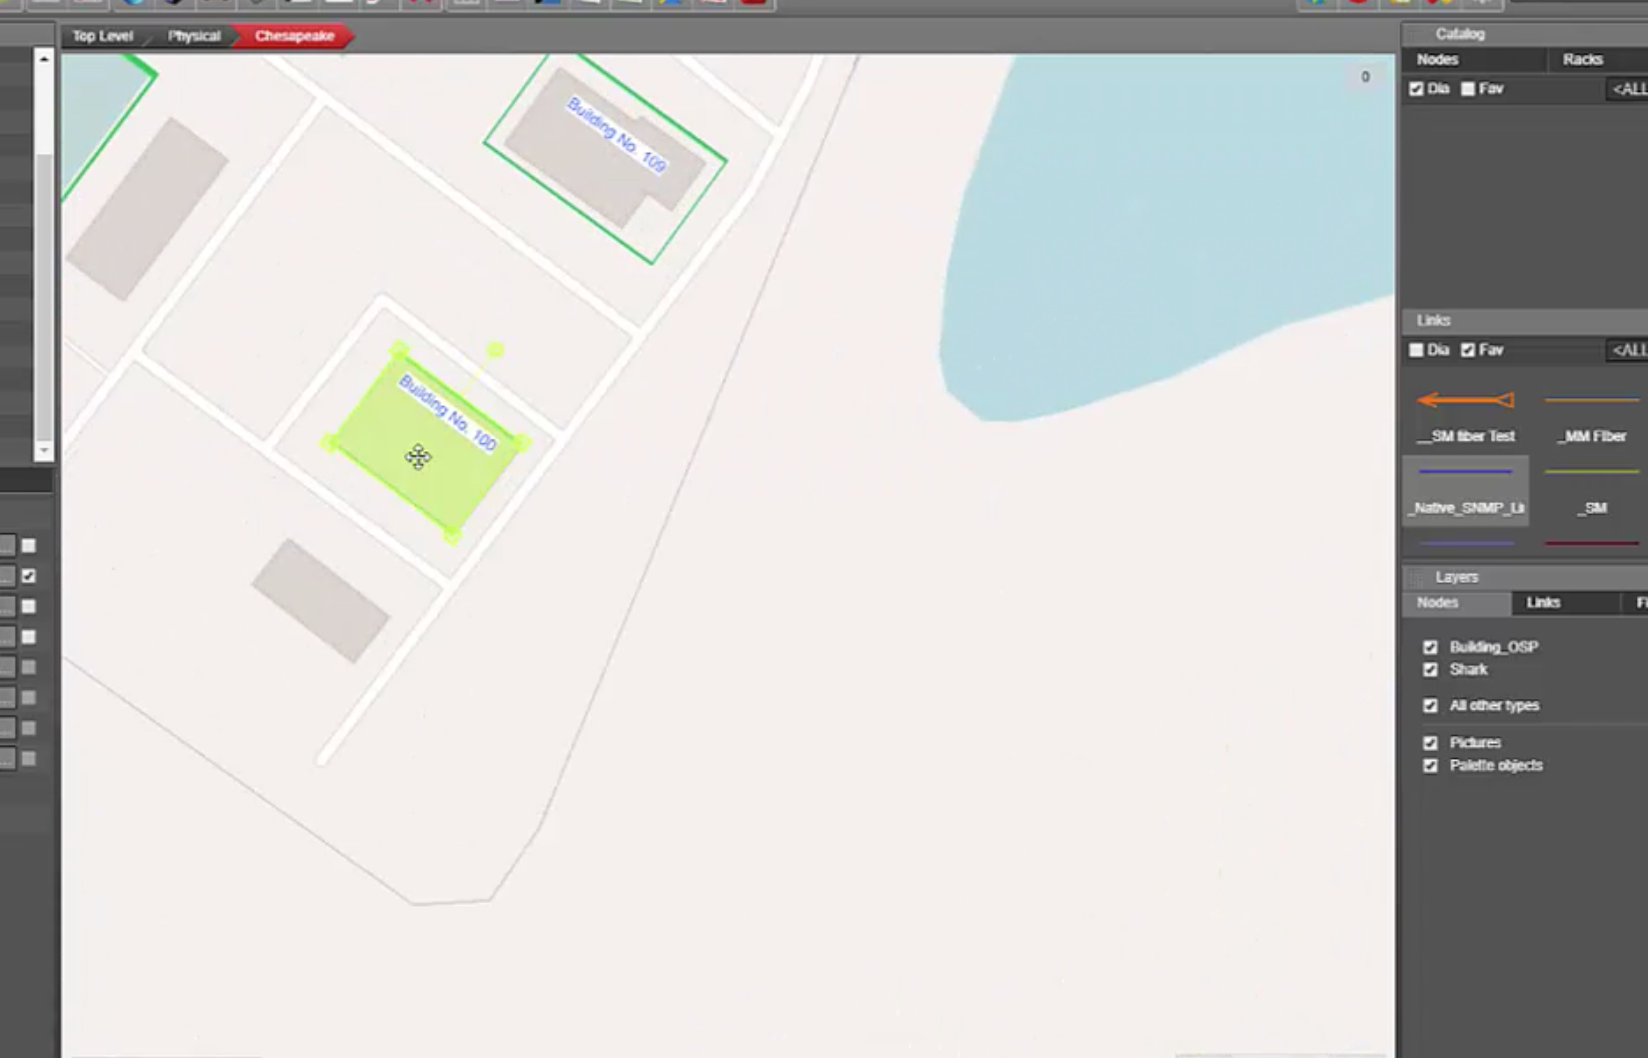
I’ll drill down into the specific location where I have the devices that supposed to get created.
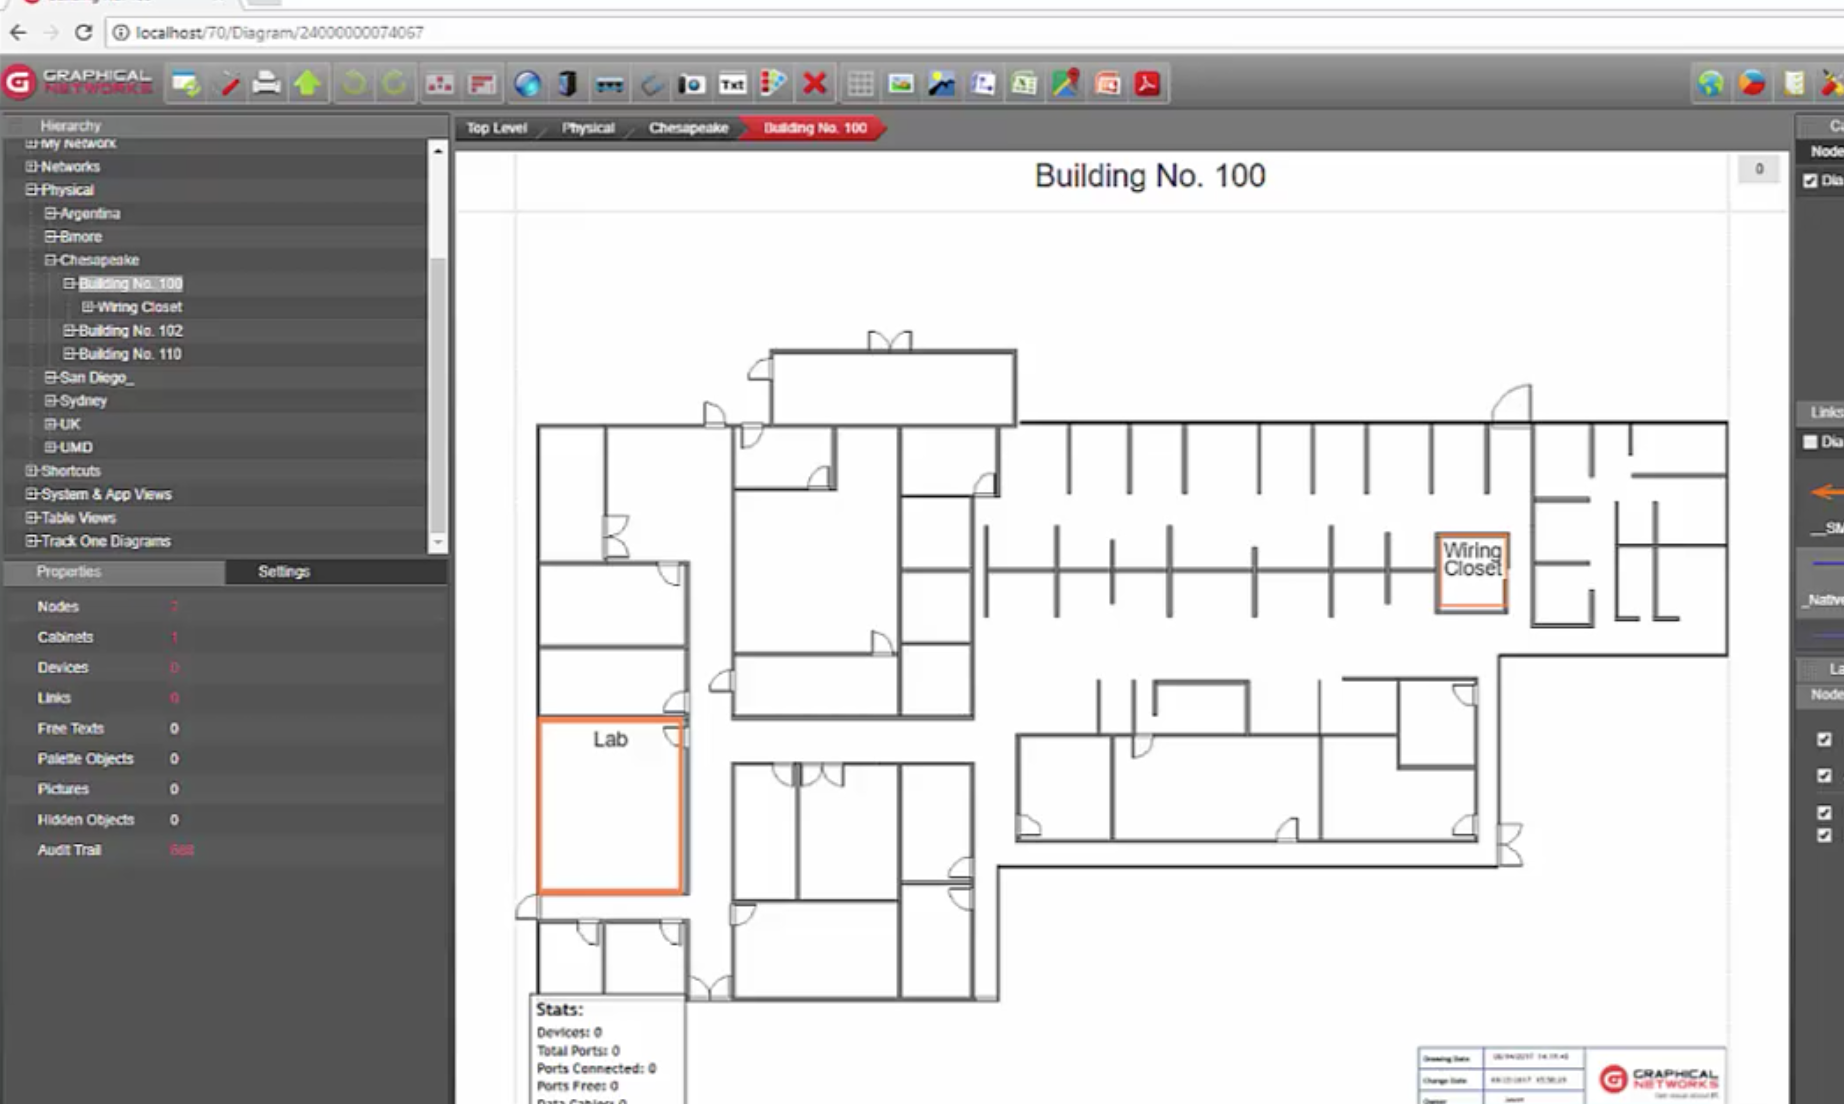
Zooming in, you can see I’ve got some buildings defined in here — here’s building 100, for example. Click on Building 100 and look inside – and uh-oh: there’s nothing in here – no devices.
Now, we’ll switch back to the ITK.
Earlier, we did this thing called ‘discover’ (aka refresh) before. I’m now going to go one step further. I could do a preview and this will give me a list of what it’s going to do updates and changes — but what I really want to do is ‘reconcile’ (which tells the system to take the info and put it into netTerrain).
Once you do this, you’ll see it’s going to say it will insert your records and you’ll see some other fun stuff happens here such as ‘generic device not found’ etc – ignore all that for now.
Keep in mind: these are steps and the first step is to create the connector and get data flowing across and then we will fine-tune things a bit after.
We’ll let this run and complete…
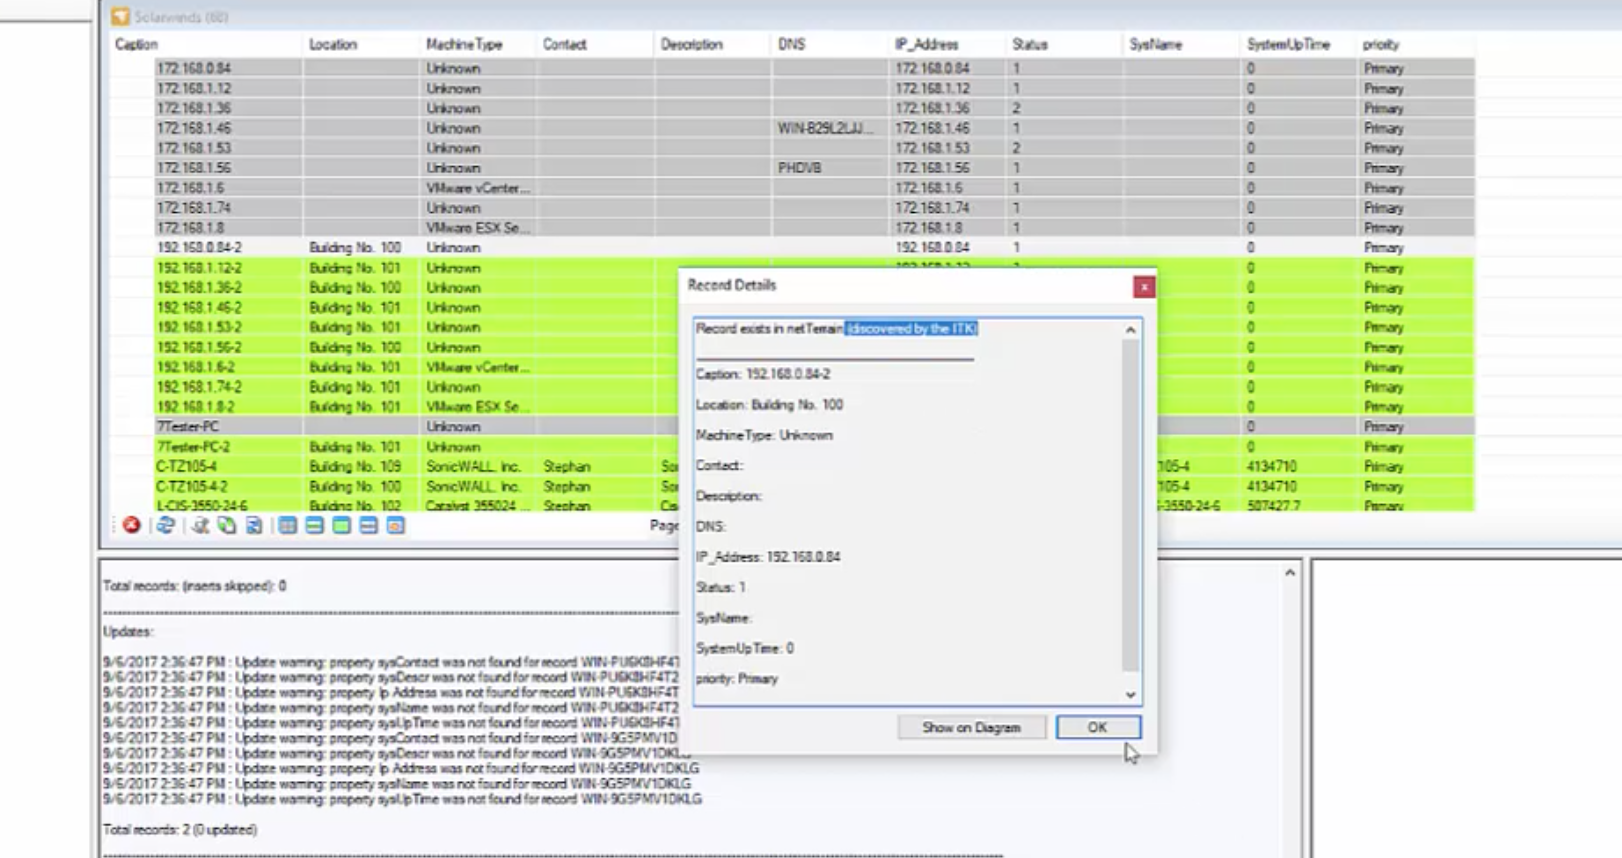
Now you’ll notice things change up here — they’re not all just gray looking things up here. We have a bunch of greens now – the greens are telling you that if you double click record exists in netTerrain and discovered by ITK.
The green ones are telling you the objects are now in netTerrain and were discovered by the ITK. Now, it could find objects that were not discovered by the ITK but were actually already in netTerrain — so that is why we define info at the top — so you know where things are coming from.
You’ll see I’ve got Location, Building 100 – we can sort things. We have a few things in Building 100 – about ten or so objects.
Let’s see what happens now when we go back to netTerrain and refresh the page…
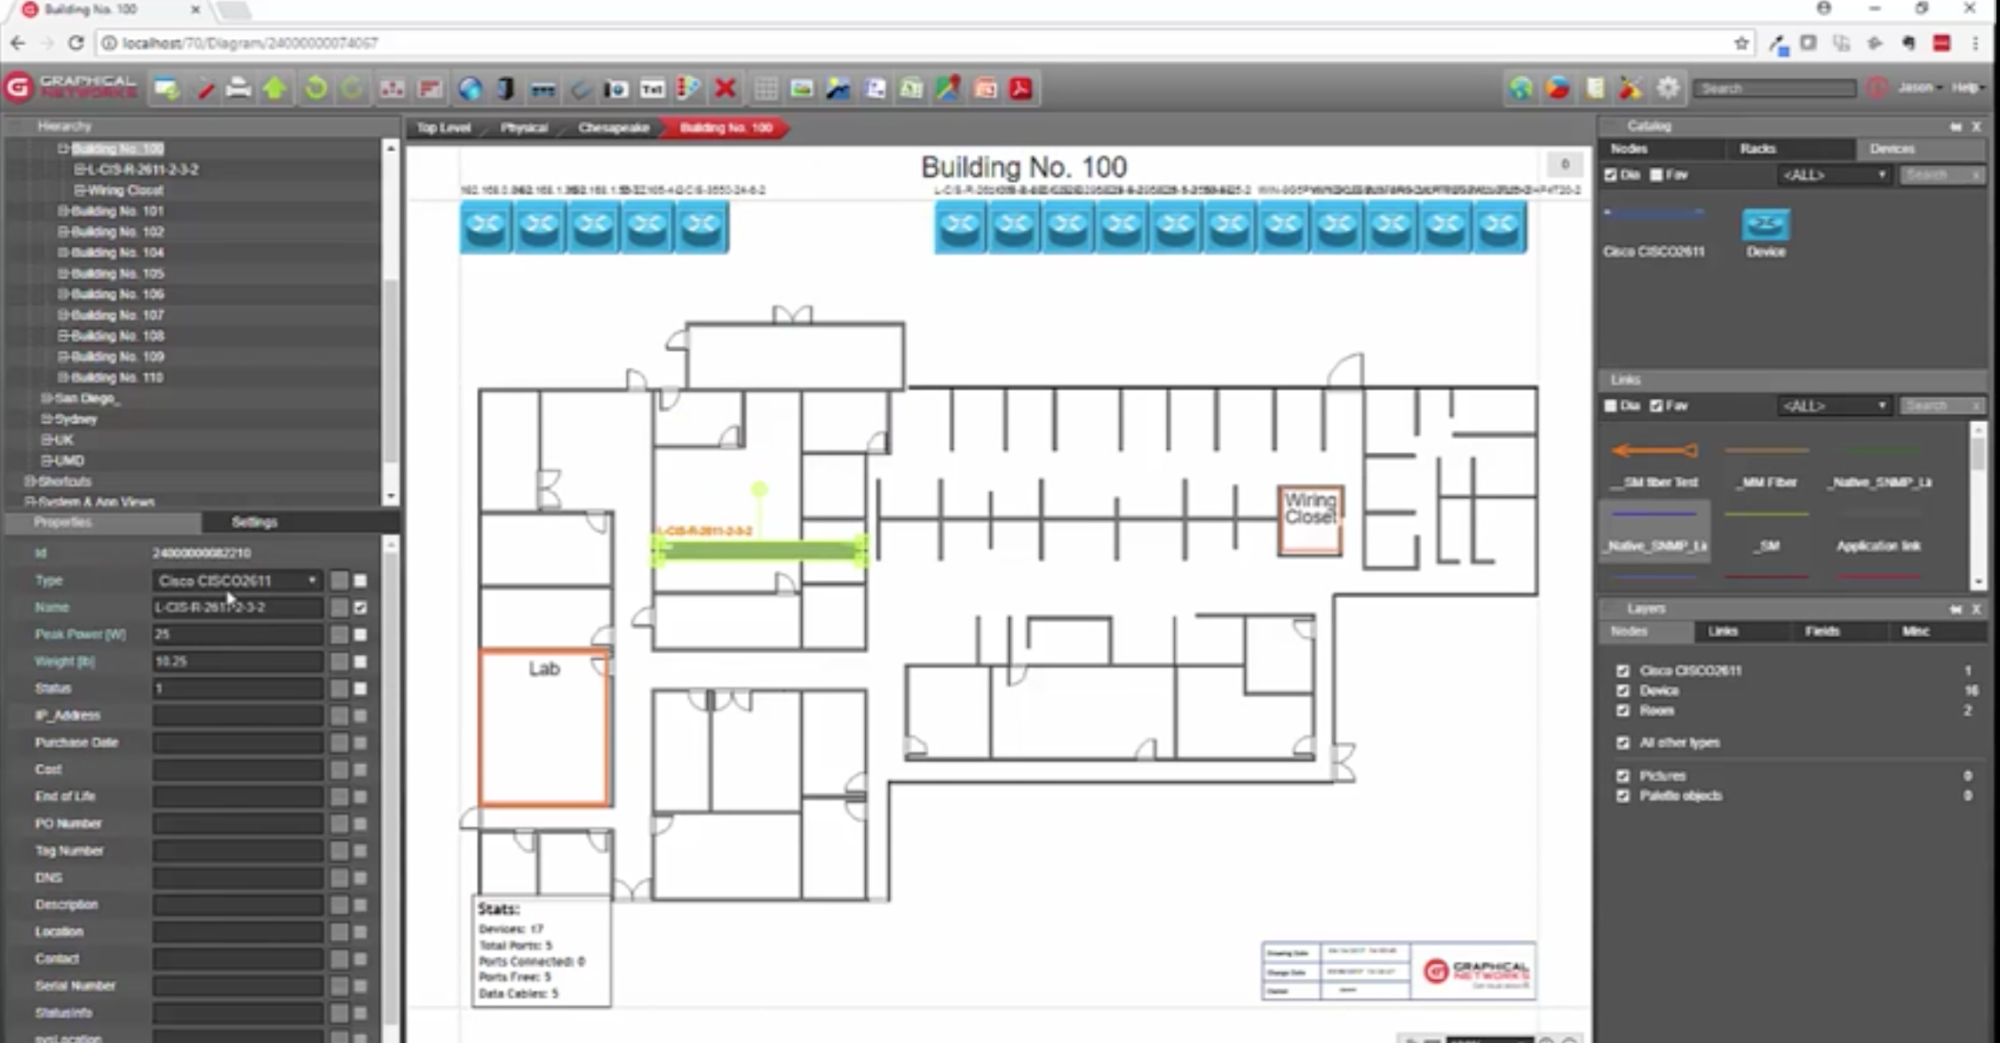
Ok: so you can see I’ve got a 2611 – that’s the one I mapped. All of the other objects are just generic-looking objects because they haven’t actually been mapped — they were automatically created using a generic object and some data flowed across.
If I click on one of these generic objects — on the left hand side, you’ll see a bunch of data fields for the object, the device type in the catalog — this may or may not be populated because we haven’t yet done what’s called ‘the field mapping’.
So far, this is exactly what we want to have happen:
- Create a connector
- Connect it
- Data flows across
- Start to fine tune things
- Map objects
- Map some data fields
Map Data Fields
So we’ll go back to the ITK, in this case we need to go back to the connector. If you are ever lost in here – on the left hand side, you can open up the ‘device view’ and it should give you the view here. Note that you may need to close a window to get back to the view.
Now that we’re back in Solarwinds, right-click and this time, we’ll go down to the map fields. In here, what we’re going to do is look at what is currently mapped. The system contact is mapped to the system contact field, for example.
If there are other fields you want to map — the field in data source, in this case the field from Solarwinds — we can map that to a field that’s associated with the object type in netTerrain.
You can choose it and close it.
I already have a lot of fields here that are basically mapped — so if we need to update the fields, maybe some data we were expecting isn’t coming across, then we can investigate that by looking at the log or simply doing another update or update-and-reconcile so it gets the information population.
Again, if you see warnings and other things that’s ok. It just means you may need to go back in and re-map the field or re-update the data.
In sum, we hope this has been helpful in showing you how you can use the ITK adapters in netTerrain to create an initial connection to bring the data across. If you are a netTerrain user and have more questions, please let us know over at support; and if you’re interested in learning more about netTerrain, you can schedule your demo of the software here.
