In this blog series all about racks, we’ll dive into using racks in netTerrain and explore some of the capabilities in terms of: ease of rack mounting, modeling, the different kinds of racks or cabinets that you can create, and some of the capacity planning features. In this blog, the first in a five part series, we’ll mount equipment on racks in netTerrain: you can also follow along in the corresponding video that begins at 0:00 and ends at 6:57.
In netTerrain DCIM, racks are just containers of devices. Why are netTerrain’s racks structured like this? This structure gives users more flexibility (and, as you may know, we’re obsessed with flexibility).
To start, let’s put down a rack. First, we’ll copy a new building (as most of our customers build a hierarchy with a map and some buildings).
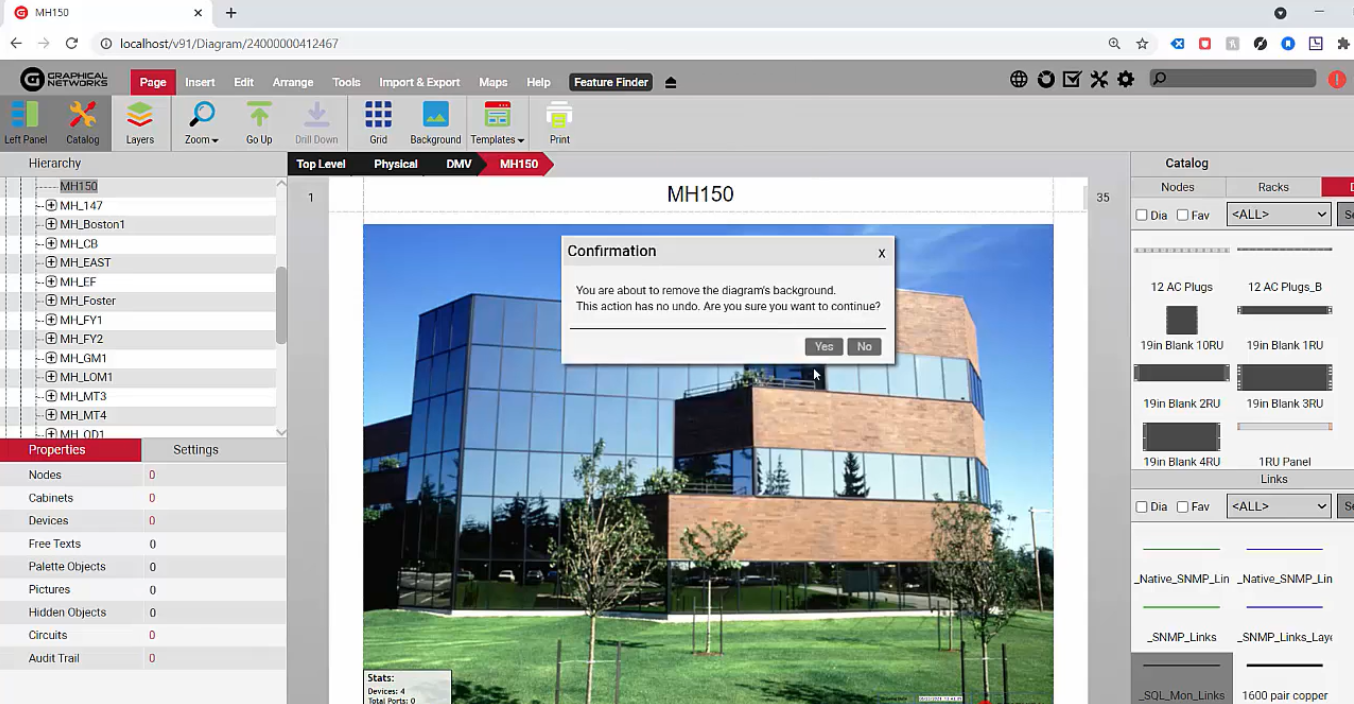 The default image displays from building that was copied
Because we copied the building, there’s already a default image where we’ll put the floor, so just remove that default image and go straight to the floor plan (in netTerrain, you’re not stuck using a fixed hierarchy: you have the flexibility to skip certain layers). You’ll typically place your racks on top of the floor plan — the floor plan (or grid) can be a JPEG, a PNG and SVG file that you exported from AutoCAD, etc. If you prefer to create your own grid, you can do that, instead: it’s easy.
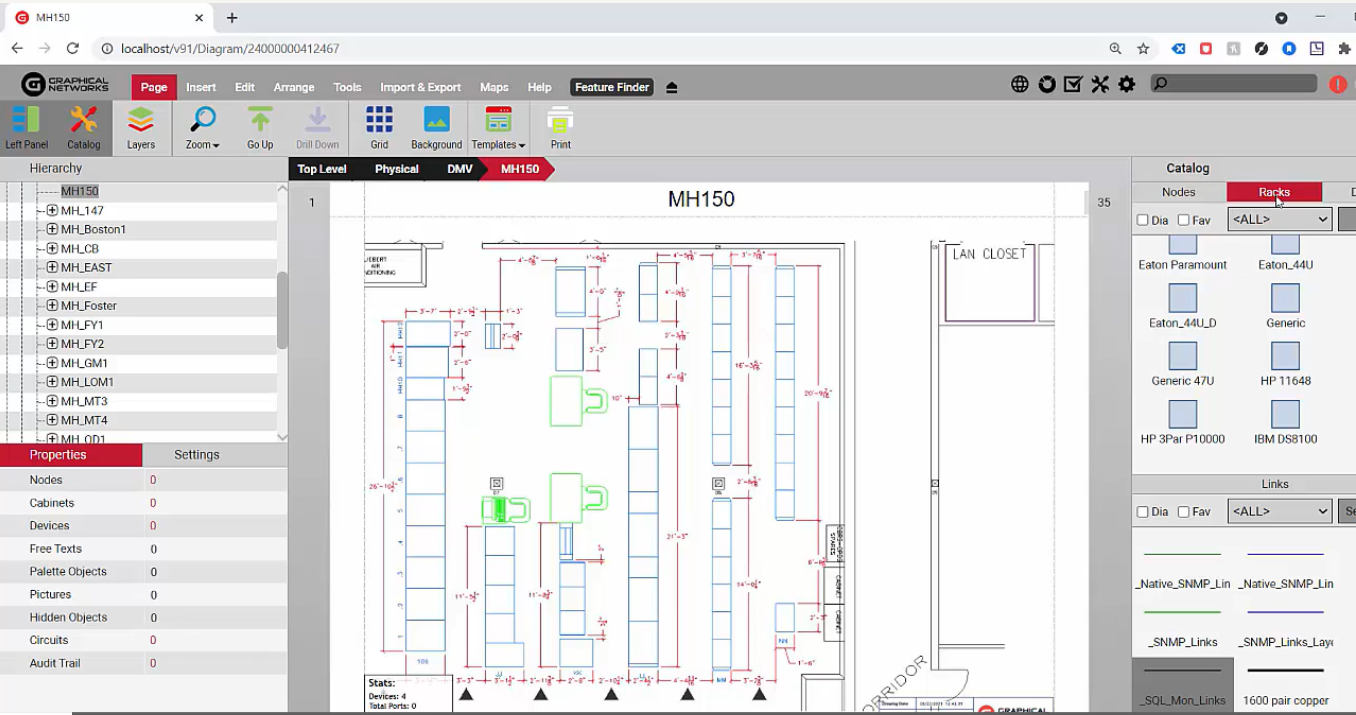 A floor plan grid in netTerrain DCIM
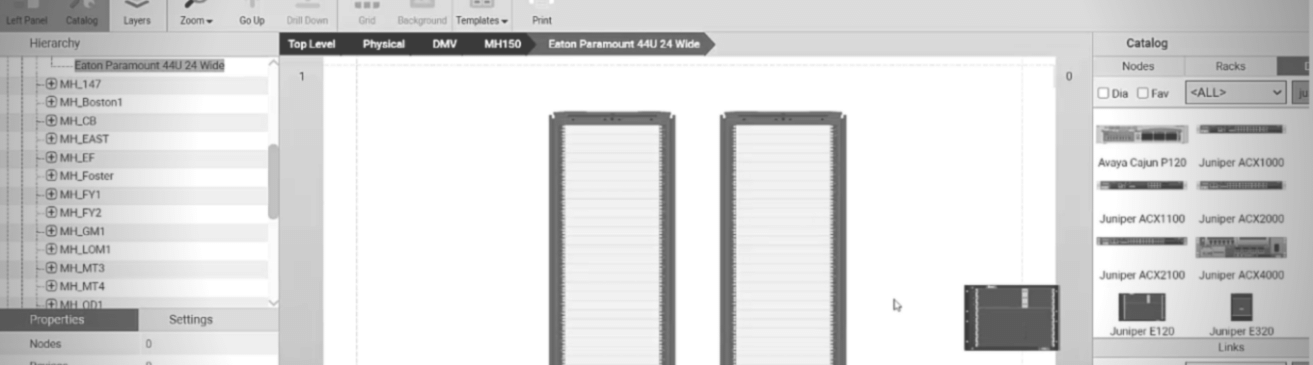
Next, locate the Racks tab. netTerrain users usually either import the racks from a spreadsheet, import them automatically from another database, or add them manually. You can also use the API to create racks if you want. Usually when you drag a rack on the floor plan, it may not have the exact size of the area where you’ll place these racks.
To solve this, just set the default size for the subsequent racks that you’re placing here. The visual capabilities that you have, such as resizing, rotating displayed fields, default values, and the properties that the racks may have, are all completely customizable.
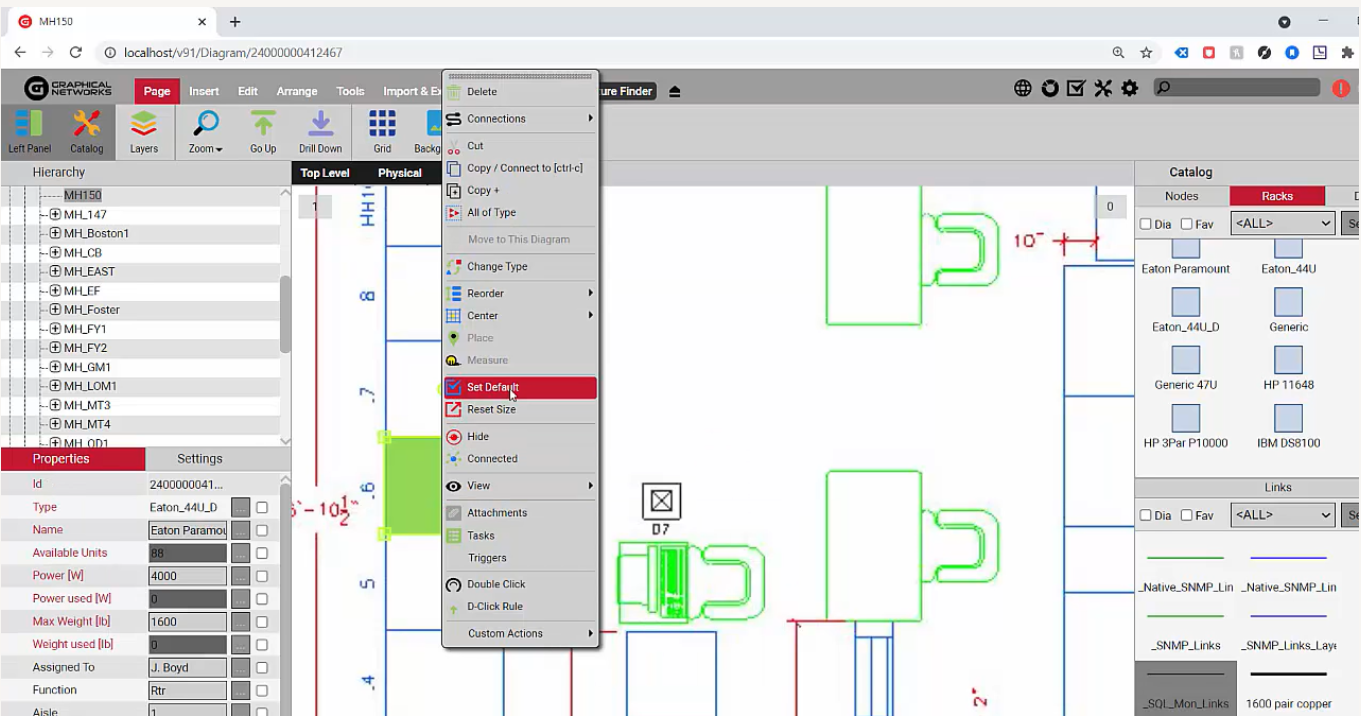 Setting the default size is easy
For example, let’s just put in the available rack unit as a parameter here to track. You can also add your custom fields: once you double click, you’ll see a predefined container image. Racks allow for mounting on the front, or front and back, or just the back: it just depends on what you want.
 Racks allow for mounting anywhere
In theory, you can create racks in netTerrain that can show the side or even have more than more than two containers because, in the most general sense of the word, the racks are containers. Some customers have modeled something that’s completely different than a rack to contain objects by taking advantage of the concept of containers in netTerrain, but the vast majority of examples involve what we usually see as racks in the data center.
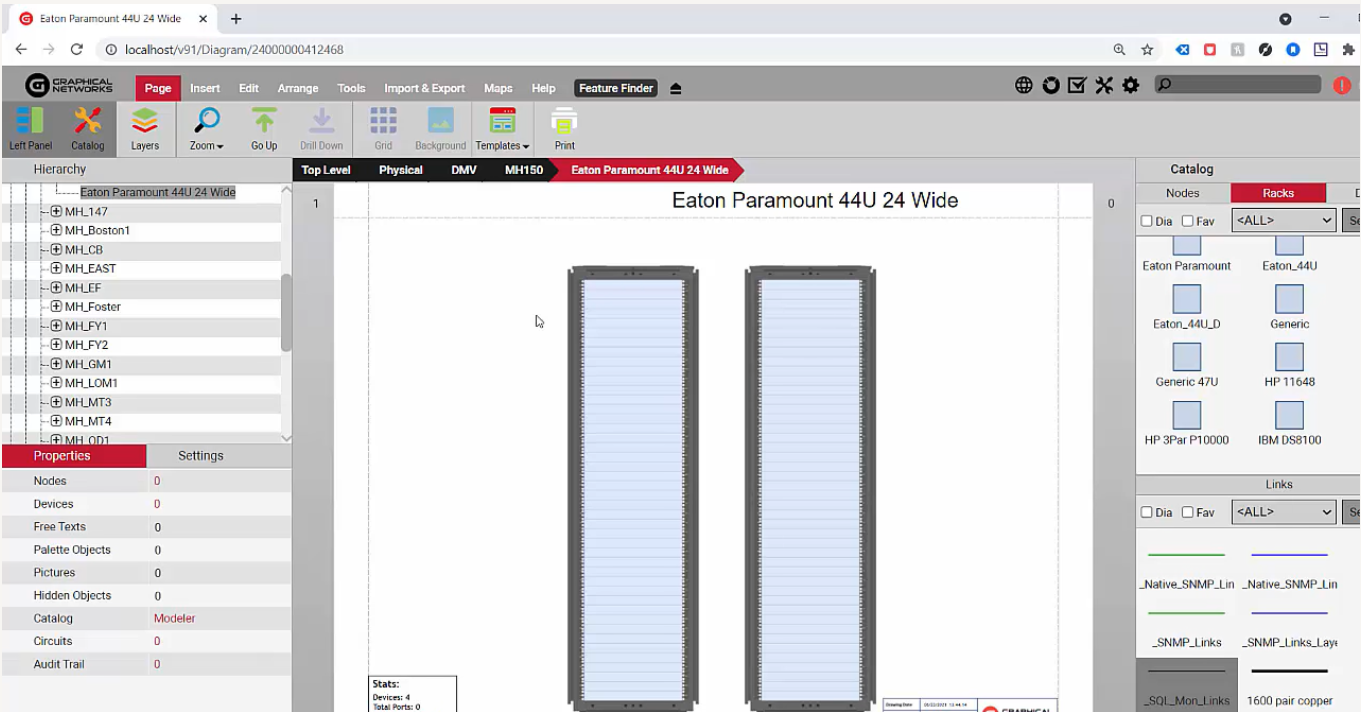
How were you able to automatically have this created in netTerrain based on the rack specifications — in this case, a Eaton Paramount 44 rack unit. For now, let’s just accept the fact that when we created this rack, it automatically displays a certain type of container or rack mountable area on the front and the back (and it also includes some templates with the name of the rack and a footer with some aggregate functions, such as: the audit trail, the number of objects you may have, and so on).
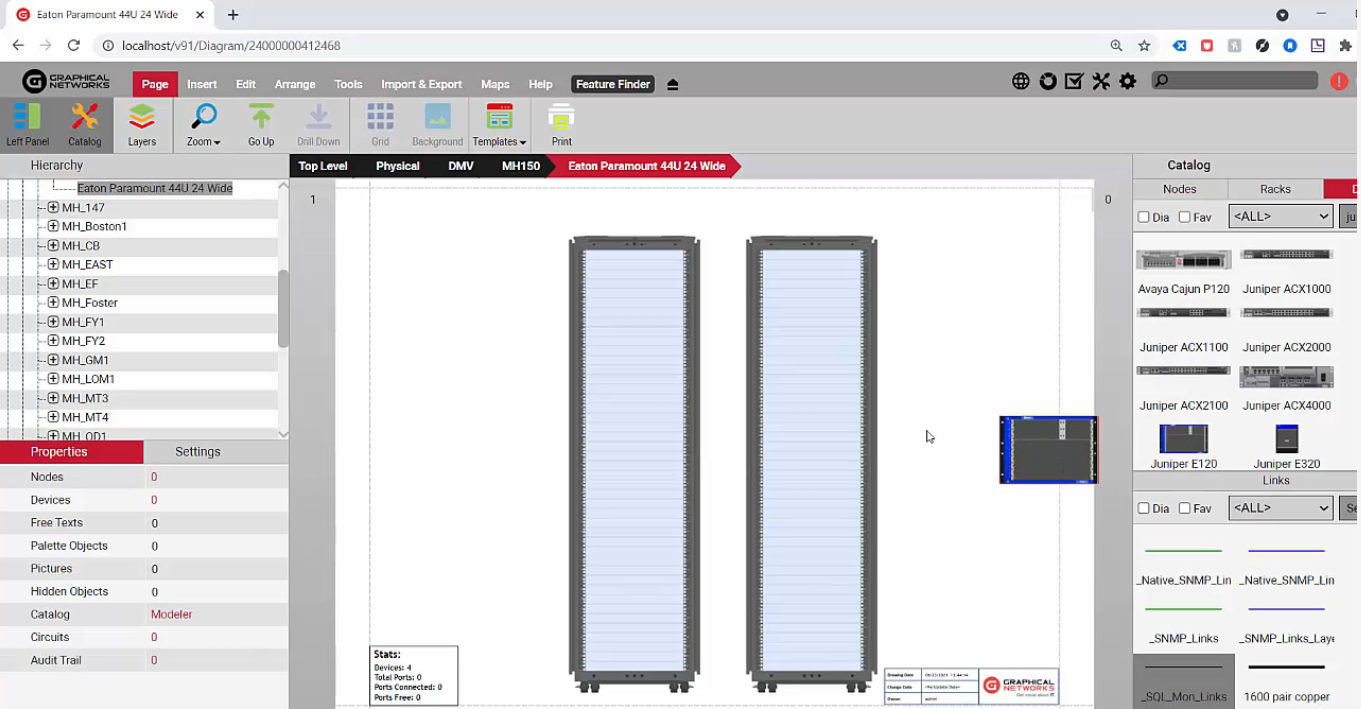
Next, let’s go in to devices and rack mount a few items.
The racks let you nicely snap objects on them when you drag-and-drop the device. If you import the devices automatically (from a spreadsheet or from a database or discovery process), you can automatically rack mount based on rack position. Automatic rack mounting like this is also doable from the API, but if we’re doing it manually, it’s quite easy to use because you basically just drag-and-drop and then it snaps nicely in the rack units and bam: you’re done.
 Manual mounting is an easy drag, drop, and snap into place process
You may be thinking: “OK, this is not flexible enough because you may have to do it in thirds of rack units.”
This is where you would use the up and down arrows. With the up and down arrows, it’s easy to fine tune it to 2/3 of the rack unit. As you rack mount, you’ll see a shade or shaded area on the left. The shades show that we marked this rack in the catalog as one that does dual mounting.
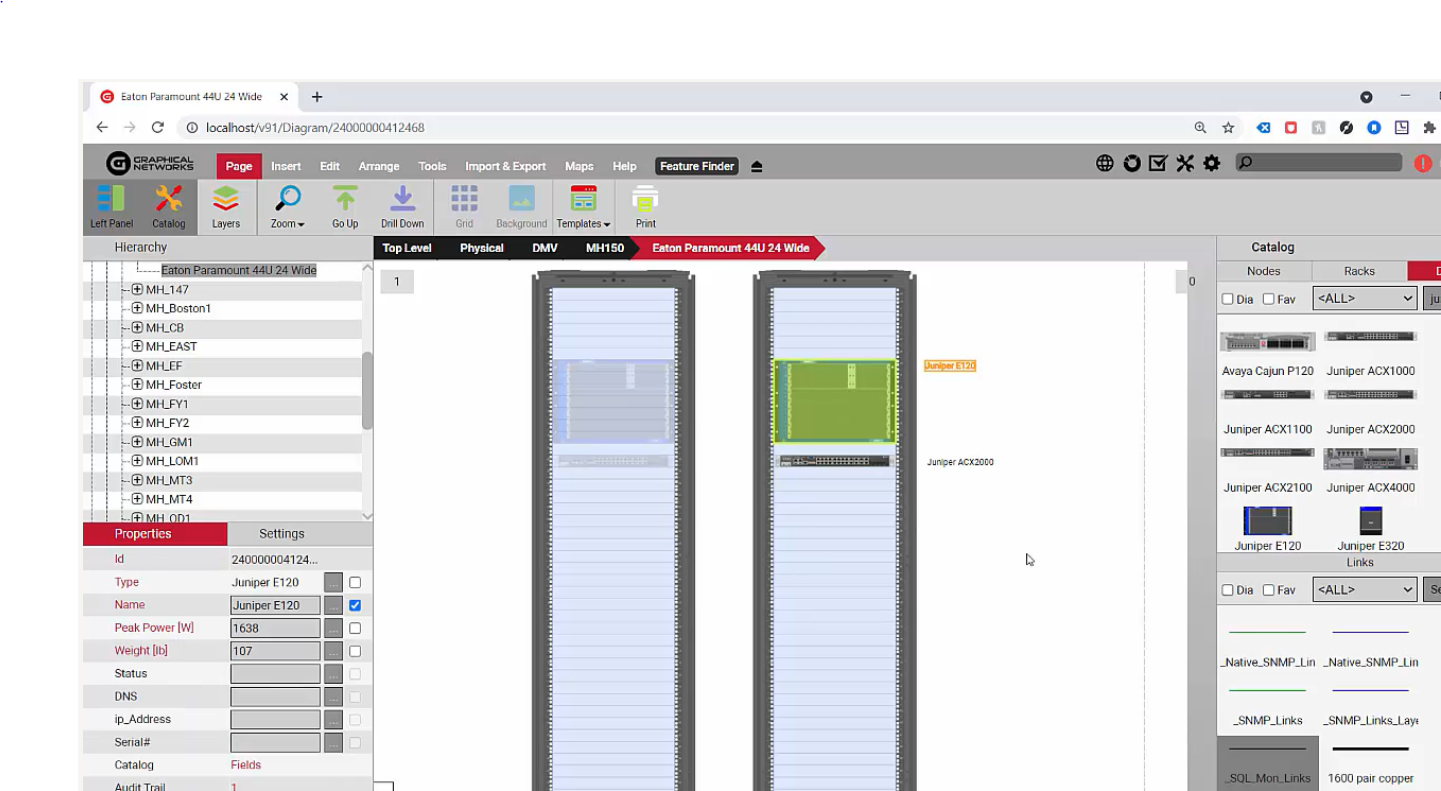 Shades depict racks that do dual mounting
In other words, as you mount something here, it also takes up space on the other side; this is customizable and you can prevent that from happening, if you’d like. You can use both sides, if you want: just configure the equipment that way. This provides for some additional business rules for automating things, further fine tuning, and having their capacity planning.
If you try to add more equipment, for example a Cisco 6009, and try to add that same equipment in the back, it won’t allow you to as now we don’t have any free space. With racks in netTerrain, you can add equipment on the side or top of the rack.
Once you add in equipment, you can also start placing cards and netTerrain. The cards are automatically displayed in a new tab: only the cards that are allowed to be mounted on that equipment are displayed.
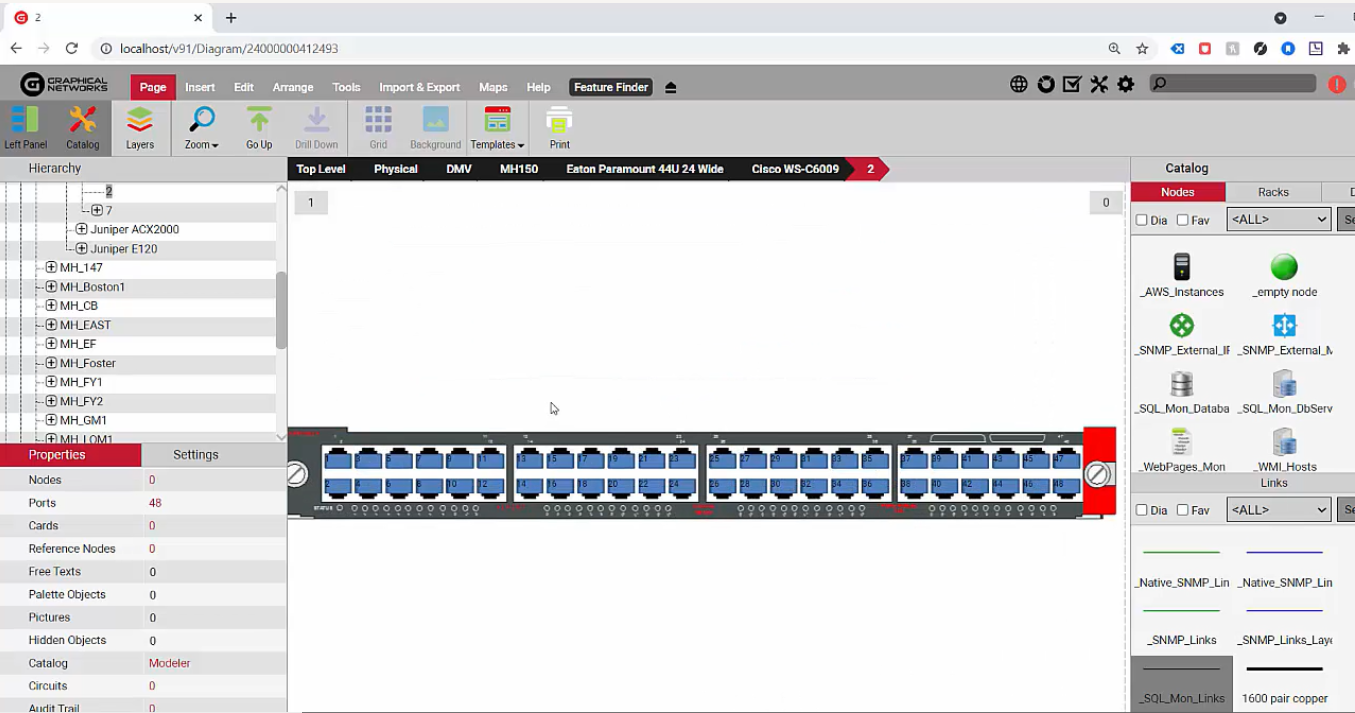 Drill down into the cards and see ports and more
As you mount the cards on the modular equipment and then drill down in the cards, you’ll see all the ports automatically created with a ton of additional features (though I’m going off topic here as this blog is about rack mounting).
In sum: this blog (and the corresponding video, parts 00:00 to 6:57), you learned how netTerrain works in terms of mounting equipment on the racks. As you can see, it’s pretty simple. Stay tuned; in the subsequent blogs in this series, we’ll dive in further to racks in netTerrain so that you’ll walk away with a better idea of how netTerrain DCIM works and if it can help solve your rack headaches.