
One of the things that you may want to document in a Data Center Infrastructure Management System (DCIM) like our software netTerrain is how objects like racks or power equipment are distributed in a data center floor plan.
When you’re documenting a data center floor plan, there are lots of objects that you may want to lay out:
- Racks
- Power equipment
- Cooling and CRAC units
- Cable trays and data center cabling
- Sensors
- Cameras
- Out-of-rack network and power equipment
- And more
Naturally, it’s easier to lay out a myriad of data center objects on top of an existing floor plan drawing — which is why many of our users like to know if we support importing AutoCAD or similar images (we do). Another approach you can take is to lay out the data center assets, devices, and other objects on top of a predefined grid. In this blog, we’ll look at how easy it is to take either approach in netTerrain.
Using your existing floor plan images
As I mentioned above, many users already have pre-existing floor plan drawings that can be used to overlay their data center assets in netTerrain. In order to do this, you should know which image formats netTerrain supports: multiple raster formats and a couple of vector formats.
Raster images are essentially bit maps that get pixelated as you zoom in whereas vector image formats don’t get pixelated when you zoom into the diagram. The main raster image formats we support include PNG, BMP, GIF and JPEG. For floor plans, we recommend using the SVG vector format (which you can export from AutoCAD directly).If you don’t have a way to produce an SVG file, a high resolution PNG will do, although you probably don’t want that image to be too heavy and bog down the rendering of your floor plan diagram.
To add a new floor plan to netTerrain is ridiculously simple: just right click anywhere on the diagram and from the context menu that pops up click on ‘Background’.
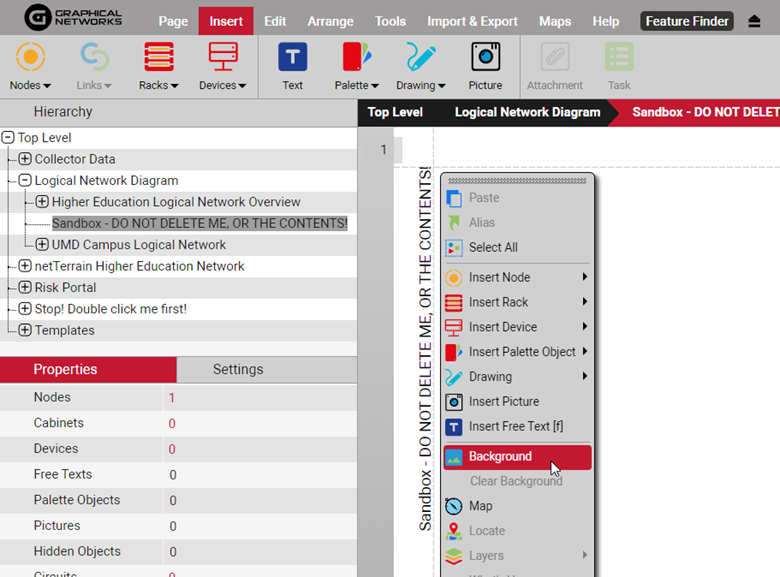
This will prompt you to upload your background image. Notice that netTerrain lets you define which extensions are appropriate for an image upload so, when a user chooses an image, any formats that aren’t up-to-par will prompt a warning message.
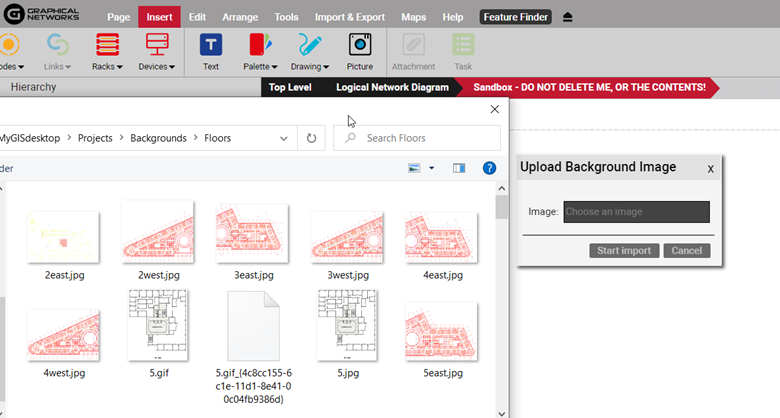
If you’re working with raster formats and want to avoid pixelation as you zoom in, use as high a resolution PNG as possible ( but try to keep the size of those files within a couple megabytes to optimize performance while a diagram is rendering).
Using netTerrain’s built-in grid
Sometimes you may not have a floor plan image or, perhaps, you simply don’t want to use one because the exact location relative to the actual physical layout of the data center isn’t that important. If an approximate or relative location of each rack, asset or item works, the built-in netTerrain grid is a great workaround.
netTerrain lets you define grids on a per-diagram basis, and you can even set granular grid spacing for the X and Y coordinates independently. Additionally, you may want to display the grid without forcing objects to snap.
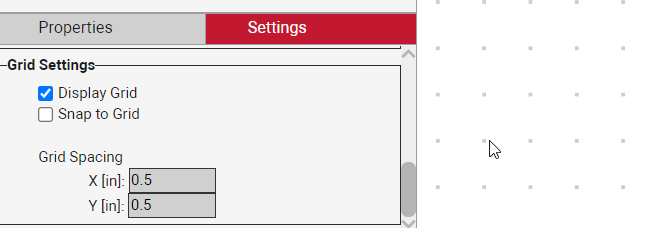
To set the grid in netTerrain, head over to the ‘Settings’ tab on your diagram and all the grid options are available at the end:
- Display grid checkbox
- Snap-to-grid checkbox
- Grid spacing in inches
Any changes in the grids, such as other diagram settings, are applied immediately — it’s easy: you don’t have to save or apply anything. To add more sizzle, you can change the background color of the diagram and upload any floating images you’d like on top of the grid.
Whether you want to use your own carefully curated drawings, or you want to align things on a generic grid, netTerrain’s options let you design your perfect floor plans for professional looking data center and network documentation projects.

Happy documenting!