 Every once in a while, we all need to translate something into Klingon. With netTerrain, you can do this. In this blog (and video – click here to watch it), you’ll learn how to localize strings in netTerrain: in other words, how you can translate netTerrain DCIM, Logical (networking mapping), and OSP (outside plant software) to another language, or even to just change some of the existing verbiage (for example, certain words that are used in your data center that aren’t industry standards).
Translating languages in netTerrain is simple: there is a whole set of tools available to make the process easy for you.
Before we launch into the how-to portion of this blog, take note:
- netTerrain already includes a number of supported languages in 7.2 – these include: English, Spanish, Québécois French, and Chinese (this applies to all flavors of netTerrain: DCIM, Outside Plant, and Logical).
- When modifying any strings for supported languages, let’s just say that you’re changing strings for English….these could be overridden in a future update. Keep a copy of whatever you change and remember that, after an update, those strings are replaced. Just grab your backup copy after an update and override it back.
- In general, this blog (and video) is more suited towards creating new non-supported languages in netTerrain.
- The translations you perform will only impact the web-based portion of netTerrain. Translations are not available (currently) for the ITK (integration toolkit) and the dashboard designer. The environmental monitoring module, as well as the view upcoming collector — use a different process.
- To modify any string in English, you wouldn’t use the translation tool, you would just modify an existing XML file.We will show you how to do this later on in this blog.
Where to Find the Translation Files
So: where are all these translation files and where does this information reside in netTerrain?
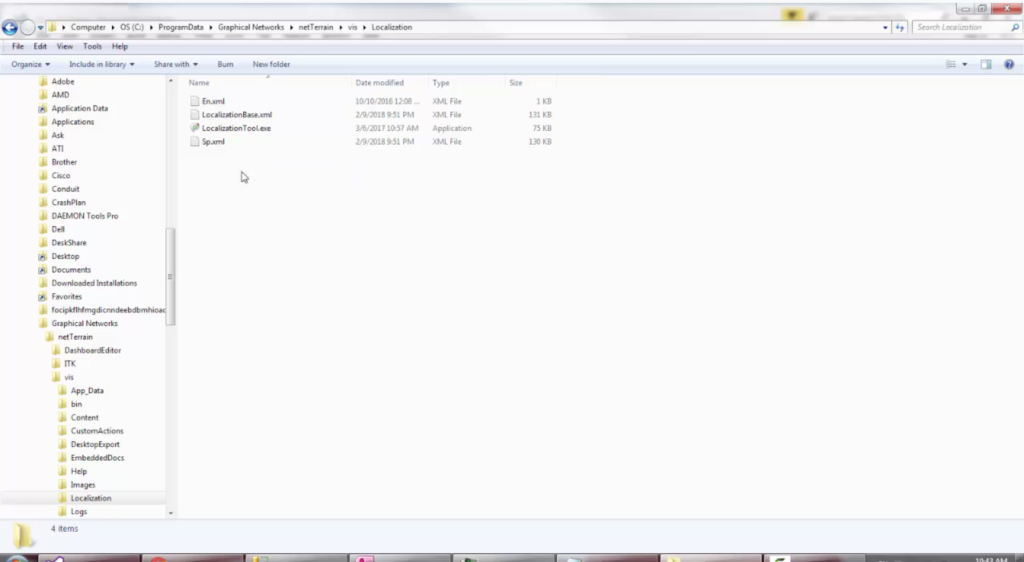
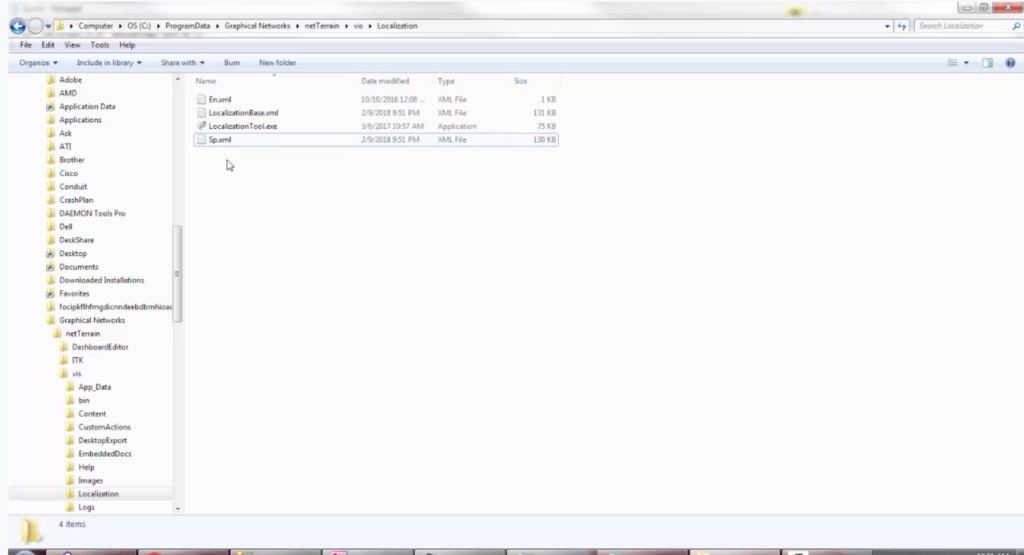
In the server: it’s not hard-coded. Obviously, if we can change strings in netTerrain, and can translate netTerrain to another language — it can’t be. You can find the files right in the netTerrain server (this is usually installed under ‘program data’) and you will find a folder called ‘localization’. Click on the folder to see the existing files — as well as the translation tool itself.
In this blog (and video) we are using netTerrain 7.1 (keep in mind that two languages included in netTerrain 7.2 are not here). In the localization folder, you’ll see that you have a LocalizationBase.xml file there: there is an English file which is really just a reference file (it’s not really used). In addition to the English file, you will see files for different languages: Spanish (SP), French (FR), Chinese (CN). If you are translating to a new language, you can add your files here.
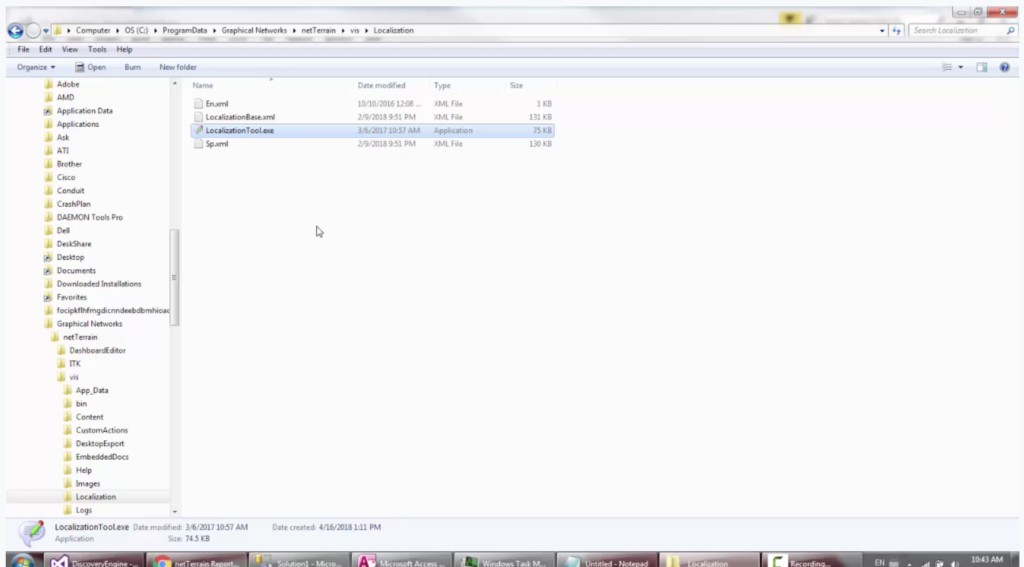
In this folder, take note of LocalizationTool.exe: this is the translation tool that you need to use if/when you want to translate netTerrain to a new language.
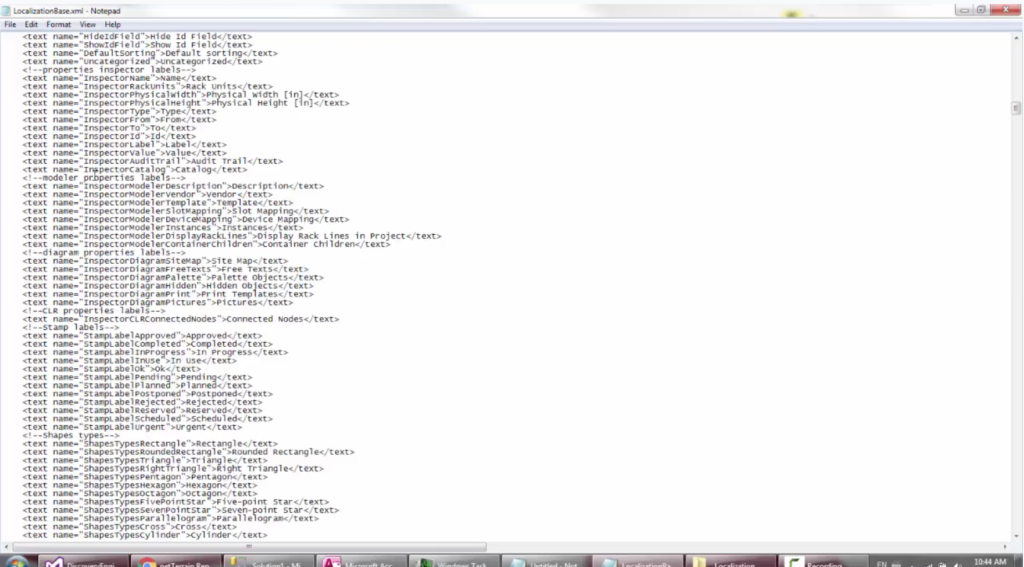
Before we launch the translation tool (don’t worry: in this example, we won’t be doing entire translations), we’ll first take a look at the most important file: the LocalizationBase.xml. If you are in netTerrain right now, you can go ahead and open it up (in this example we’ll be using notepad).
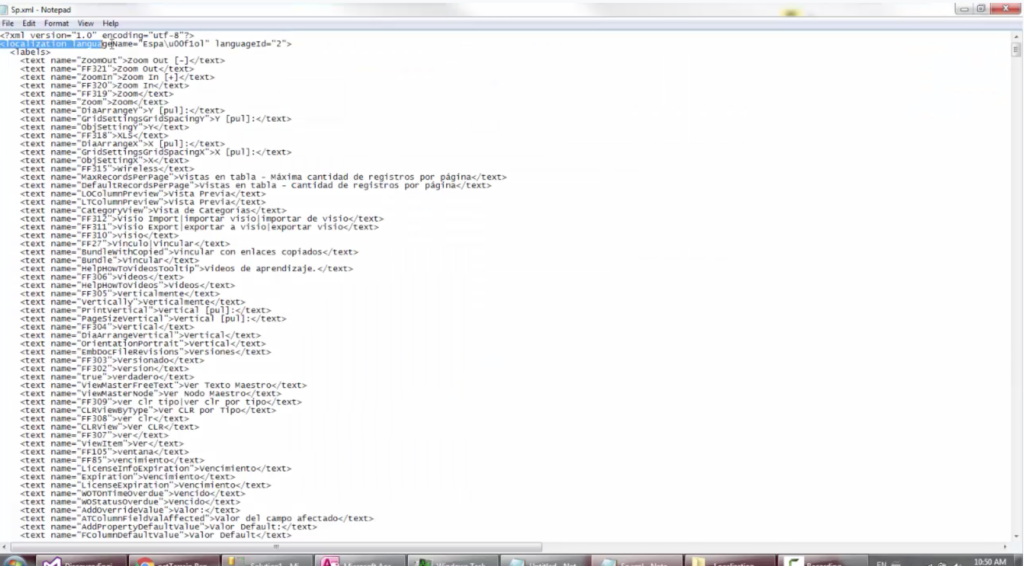
So if you open it in notepad, you’ll see this is an .xml file with a certain encoding: it has the language name, and the language ID. Stay tuned: we will take a closer look at these in a moment.
This file has a number of different sections: these sections correspond to the different things that are translated in netTerrain. Remember: this ONLY affects the web-based portion, so the ITK and dashboard designer are NOT included here.
In a nutshell: you can take one of these files, copy it, rename it to a new language, and start translating the entire contents. You will actually translate just what is inside of the tags.
There is, however, a translation tool that makes the whole process easier for you…
Using the Translation Tool
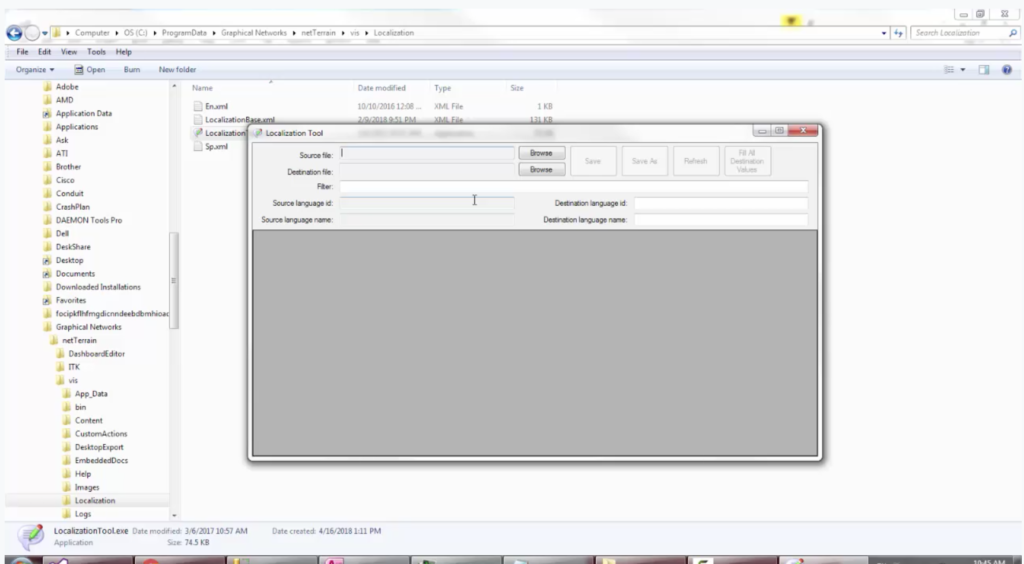
Now that you’ve seen the actual XML files, let’s take a look at it. So, we’ll start by opening up the translation tool. On the server, just double-click on the LocalizationTool.exe: it opens a small application.
So, how do you translate netTerrain DCIM, Logical, and Outside Plant to a new language using this tool? Here’s how to get started:
- Copy the localization base.
- Rename the copy to your new language. For example, if you’re translating to German, you would rename it to ‘DE.xml’.
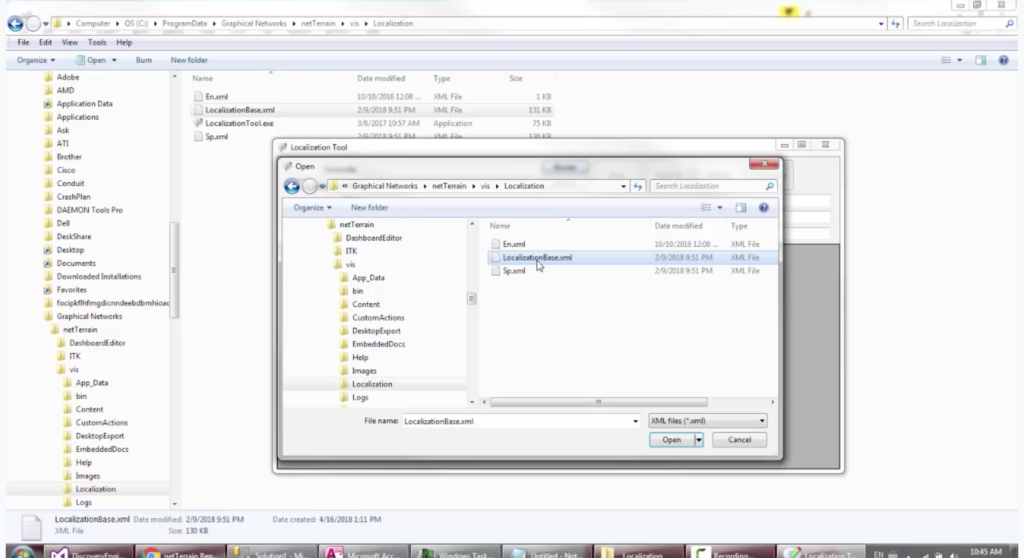
- The base file will always need to be open: in fact, that’s the source file here. We’re going to browse and find under ‘program data’:
‘Graphical Networks’ – ‘netTerrain’ – ‘vis’ – ‘Localization’ – our ‘LocalizationBase.xml’ file.
It takes a while to load: there are close to 2K strings here. It will probably take you several days to translate this – even if you are very fast. - Finally, the destination will be your new language file. We’ll use an existing one: Spanish. Spanish is already a supported language, but for the sake of example, let’s use this one. If you are getting started with a new language, and you copied the localization file, this language will have everything in English, as well.
You’ve now learned how to open these files in the translation tool. An important aside: be sure you use a proper naming convention for these files. Try to use a 2-letter combination when possible. For example, use ‘DE.xml’ for German, ‘SP.xml’ for Spanish, ‘CH.xml’ for Chinese — and so on.
So, how do we work with this translation tool? It’s very simple.
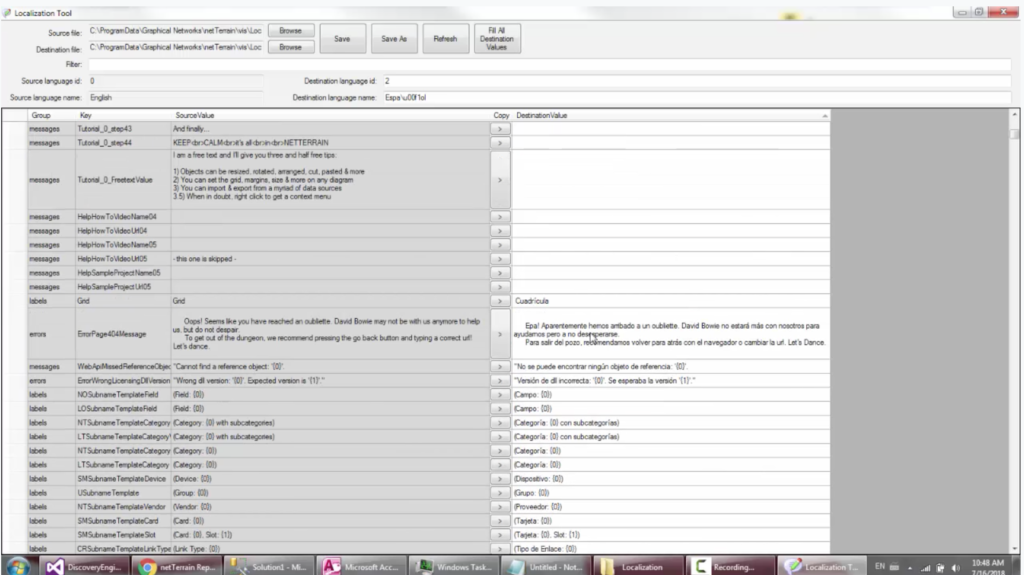
On the left-hand side of the tool, you have the following columns:
- Group,
- Key,
- Source Value.
The columns on the left side all correspond to the base file: they are grayed out and you can’t edit them here:
- The ‘group’ and the ‘key’ columns tell you what each is about (aka which specific key in the translation file it effects).
- The destination value is the column that you can actually type in: you can change the text in this column. The text you change in this column will be your new language in netTerrain.
When you are first getting started, sometimes it makes sense to simply take the existing source value and copy it to the destination — and maybe replace it there so that you can use the source as a reference. It’s simple to do so: double-click on the arrow and then start typing in the language.
When you are done, simply save or you can ‘save as’ and then create the new file, with a proper naming convention such as ‘DE’.
Sorting and Filtering
As you start working with the translations, you will probably want to sort things. An example of what you may want to sort: what has been translated already vs. what hasn’t yet been translated.
You can sort by clicking any column, such as: the destination value, the group, the key, and so on.
The filter function is handy. Sometimes, when translating, you will be working with a certain set of keywords that you already know how to specifically translate:
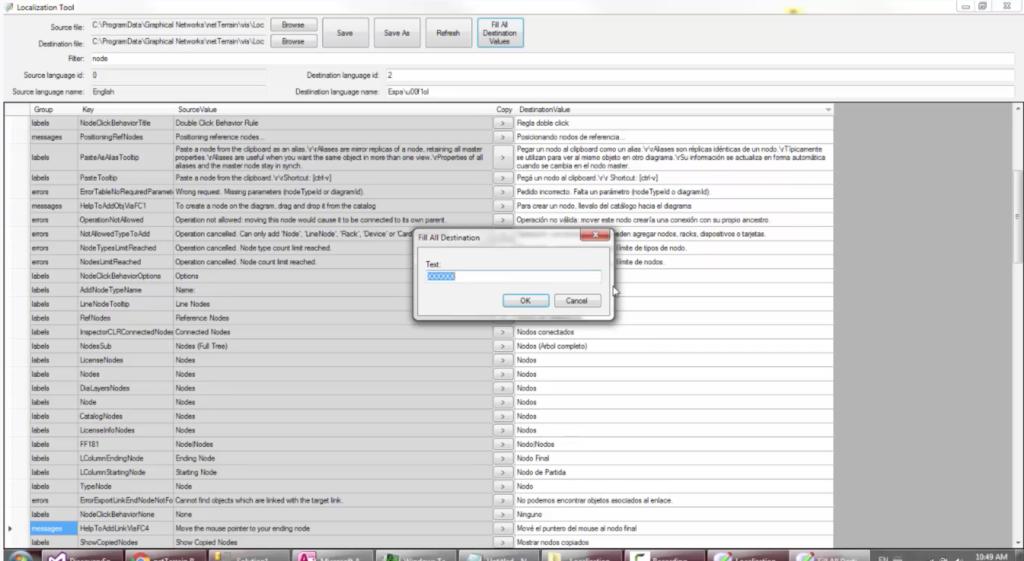
Let’s say you are working with nodes, translating everything that has to do with ‘node’. Maybe you’d like to change all of the strings related to specific parts of netTerrain that use those keys, for instance: ‘nodes’. Just type it in the filter section and then the translation tool will filter everything out that doesn’t have the string ‘nodes’.
As you can see, the filtering and sorting is very useful for translations.
Checking and Testing Your Work
Another helpful function is the ‘fill all destination values’ button. While this is really just for testing purposes, it’s useful because you may want to test out if your translation file actually works: if you just want to know that from the actual netTerrain GUI, you can pick and choose your own language — but you don’t want to do your own translation for testing that — you can fill out all destination values with a specific string for testing. For example, just type in ‘XXXXX’ or whatever you want, save it – then go ahead check out that your new language has saved from the netTerrain admin screen (we’ll go over choosing your new language below).
One thing that’s very important once you are done: make sure your file actually appears in netTerrain. As we mentioned it before: this is the destination language ID. What I tend to do is:
- Once I have my file saved, I close the translation tool.
- I open my new language file using notepad and I make sure that the second line says “localization languageName = between the quotes is your language name and it must be followed by a language ID.
- In whichever version of netTerrain you are working with (this applies to DCIM, Logical, and Outside Plant), make sure that all of the existing language files here are all using the same ID.
- So, in 7.2 for instance: you would have Spanish, French, and Chinese (in addition to English). Open them all, check out the language ID that you just saw, and then pick the next one available.
Edit that in the XML file because, in the translation tool, it won’t correctly override it sometimes. That’s really the only thing you have to do manually in the XML file: everything else you can do right in the translation tool. Once you are done, you should be able to open netTerrain, and basically choose your language.
Engage! (Putting It All Together)
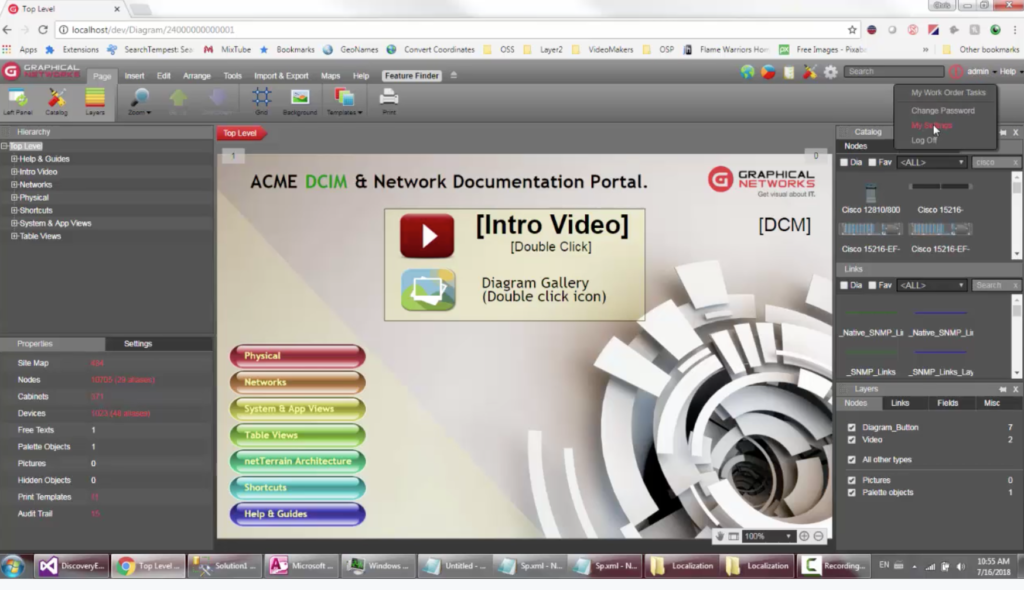
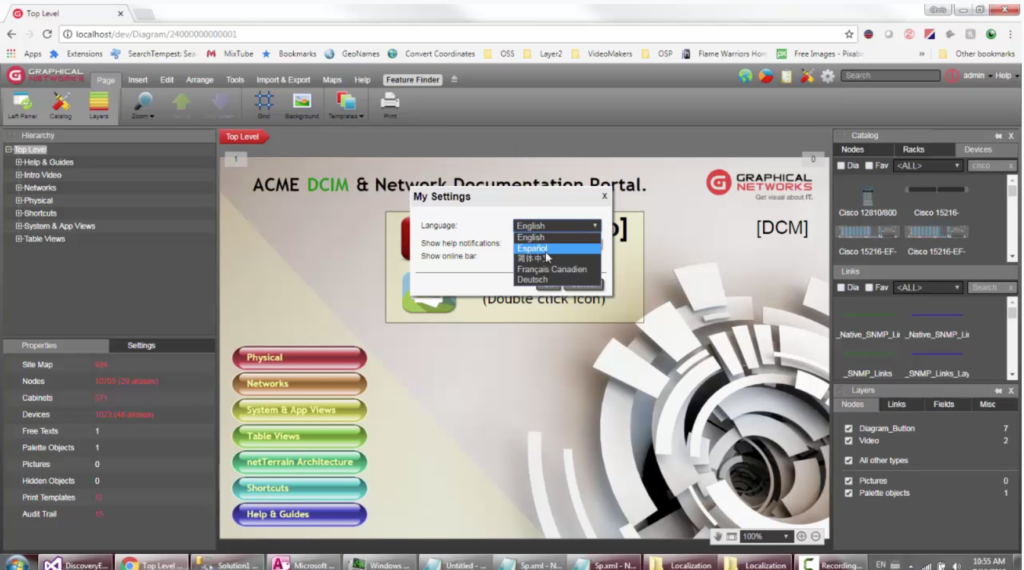
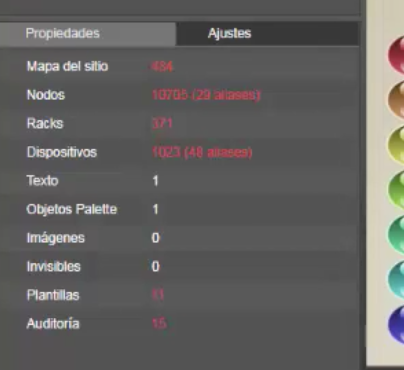
Ready to see the finished product? Open netTerrain: after you log in, navigate to admin on the upper right hand corner. Click settings, and a pop-up will appear. You can choose the language. Once you’ve picked it, it will show up in netTerrain translated.
Beam me up, Scotty!
So, that’s it. It’s a fairly simple translation tool that you can use to change strings and translate netTerrain to a different language. Over the years, a number of our DCIM, Logical, and Outside Plant users have needed to translate the software for one reason or another: because of this, we’ve streamlined the process as much as possible for our users.
