In the previous three blogs in this series on racks in DCIM software, you learned rack basics such as rack mounting, how to set rack capacity visual overrides, and rack changes plus capacity planning. What’s next?
All the features for rack management, rack capacity management, and so on are nice, but the question is: “how much flexibility do I have in netTerrain to design my own racks?”
The answer? A lot. In fact, you can model the racks or the cabinets without asking any graphical networks consultant to do so. In this blog and corresponding video (which begins at 12:55 and ends at 20:18), you’ll learn how to model your own racks.
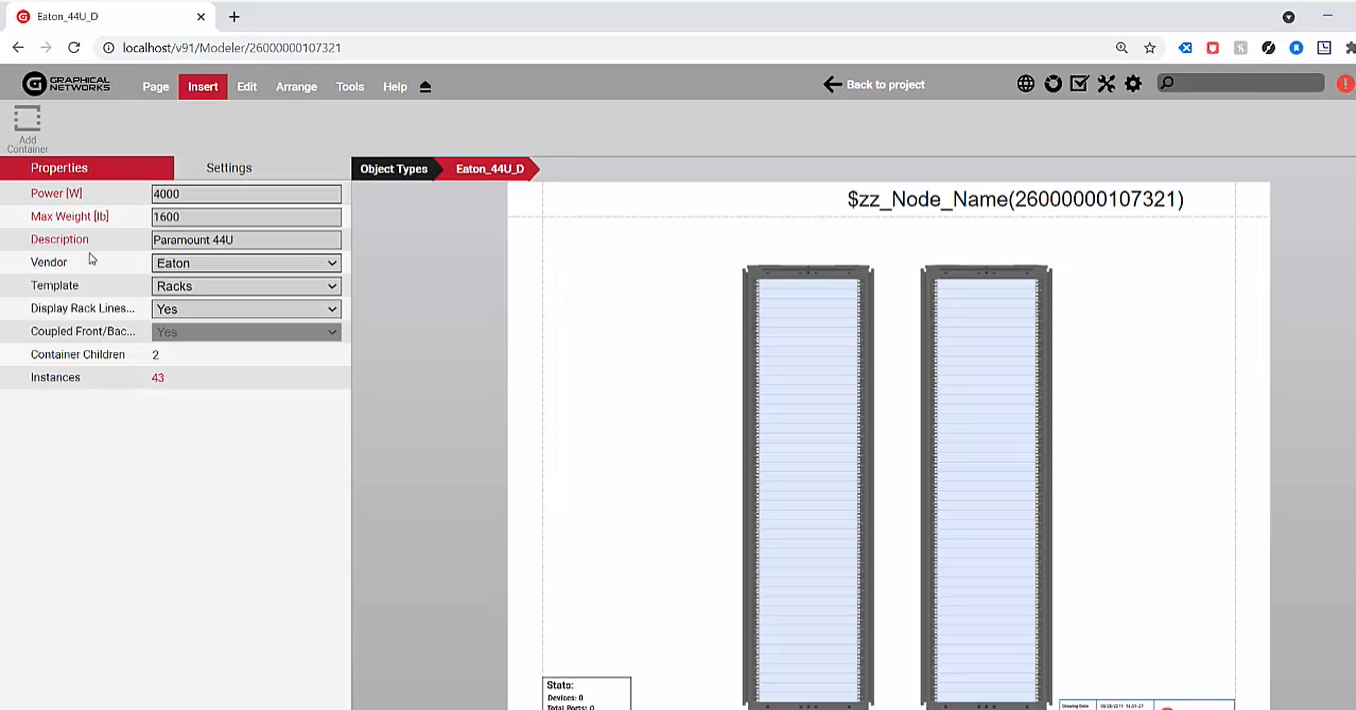
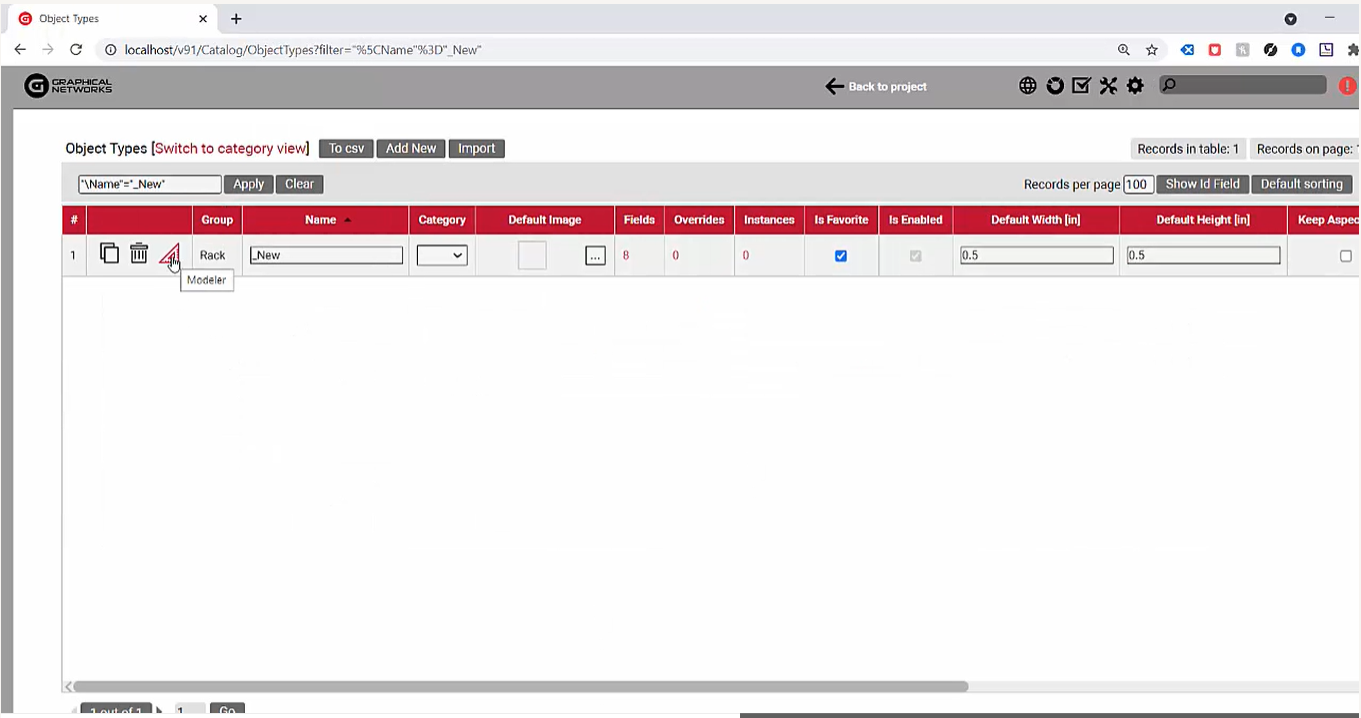
You can do it yourself using netTerrain’s graphical user interface. Much of it is point-and-click and drag-and-drop, which you’ll see shortly…but first, let’s look at the model of an existing rack. If you have the proper permissions as a catalog manager, you can access the catalog page for this specific rack or cabinet and see how it was modeled. In this case, we have a power, max weight, description (and we’ll get to that later), vendor, and other properties.
 View the properties for an existing rack model
This rack was modeled to allow for front and back couple rack mounting as well as a bunch of other parameters and features. You also get the count of instances and we have two containers that describe the front in the back of the rack. Also, we have a default template.
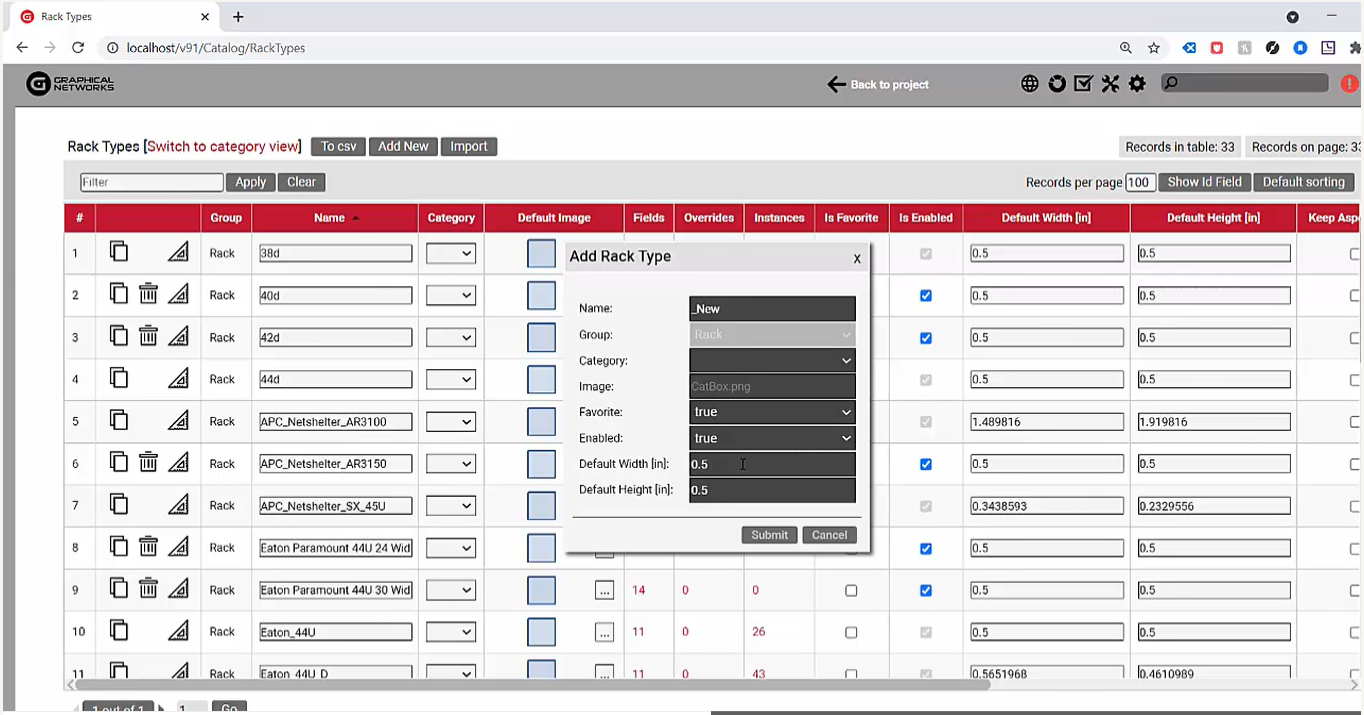
You could design your templates anywhere you want, have as many as you want, and you can assign a template as a default for a specific type or apply it to specific diagrams. If we wanted to design a rack from scratch, how would that work? As a catalog owner, you get to the rack section and then in here we’re just going to simply name it “new”.
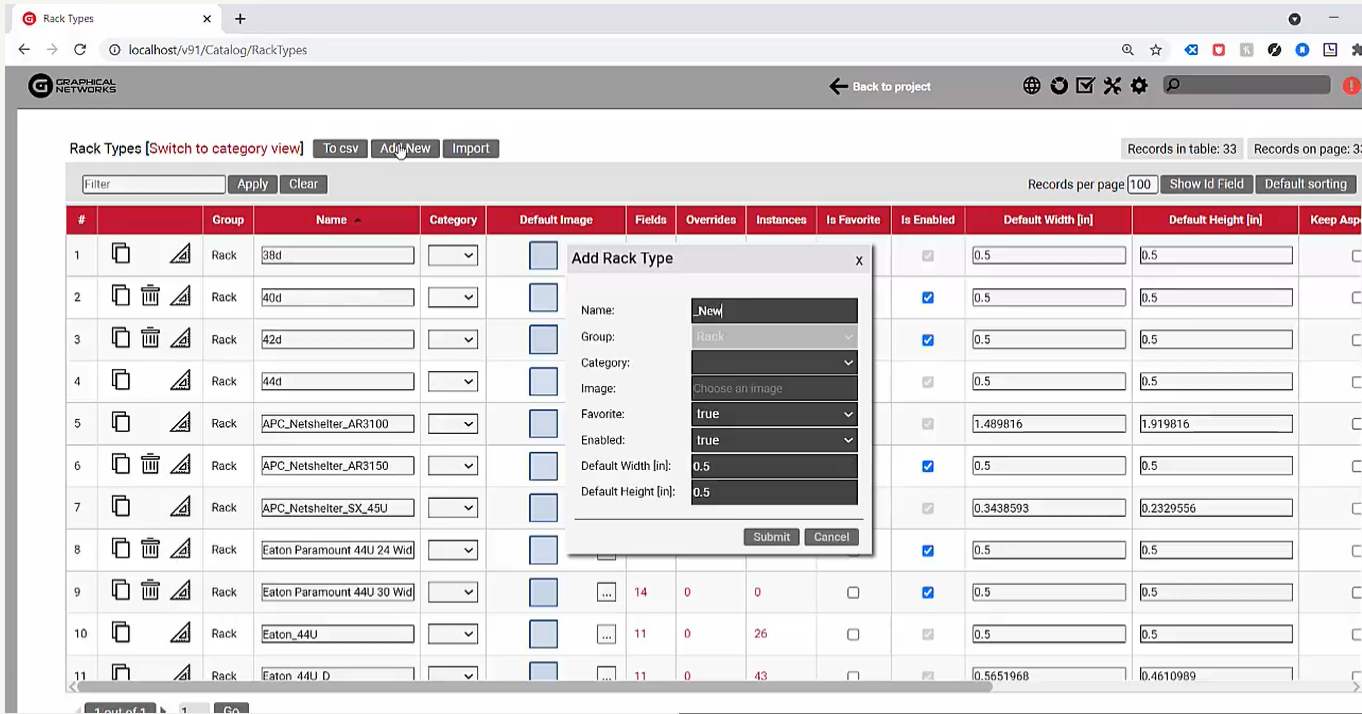 Start in the catalog’s rack section and assign a name, etc.
I’m going to go ahead and create this rack. You can assign a category if you want (it’s not required but optional), and then, if you’d like, you can assign an image for this. Usually all of the images that we ship with netTerrain are kind of default blue squares.
Don’t want the blue squares? You can have your own image assigned to what we call the floor plan icon that will be available for the rack, for instance, this one here, instead of it being blue.
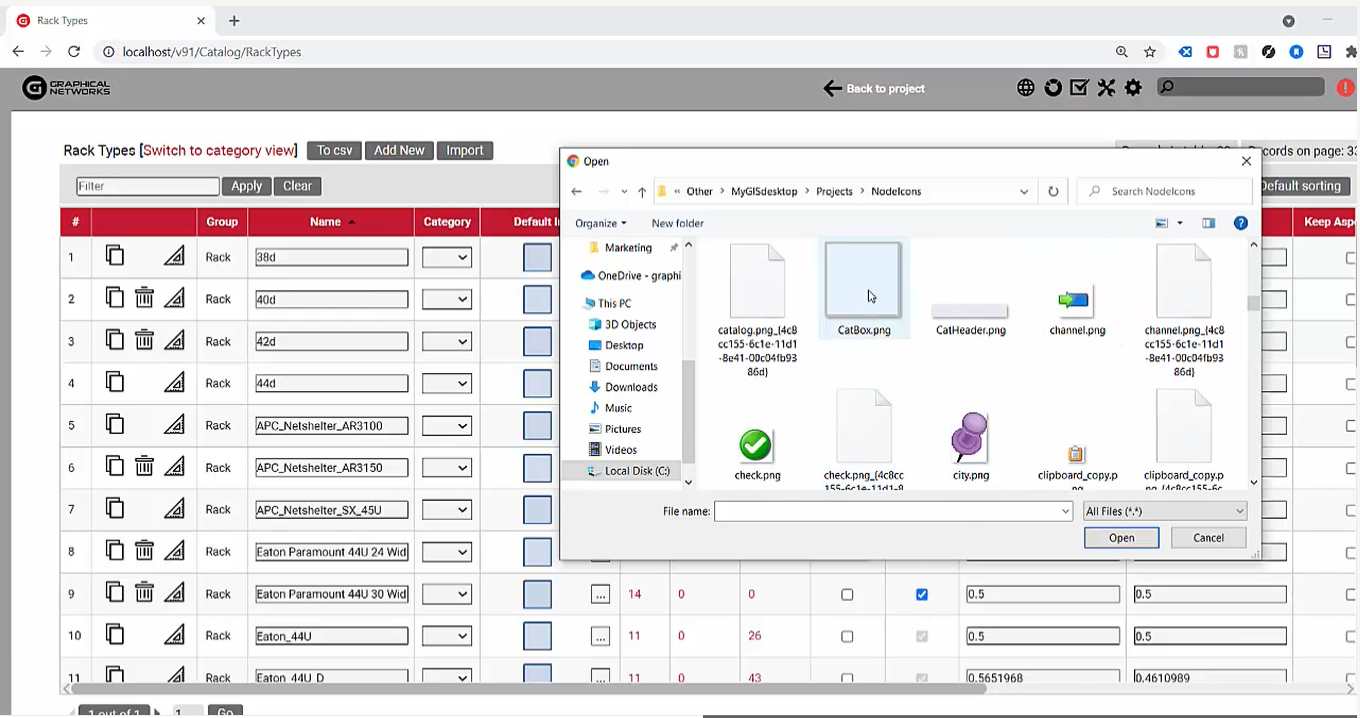 Choosing your own custom floor plan icon is easy
The default width and height refer to the sizes of the icon that you see when you drag-and-drop it on the floor plan. As far as the actual physical size of the rack when you look at the rack mounting areas, we will get to that shortly.
 Set default height and width sizes
This warrants another blog and video, but of course, you can create your own custom fields. Call it whatever you want, make it a ListBox, hyperlink combo box with mandatory values, et cetera, et cetera, make it display, so on and so forth.
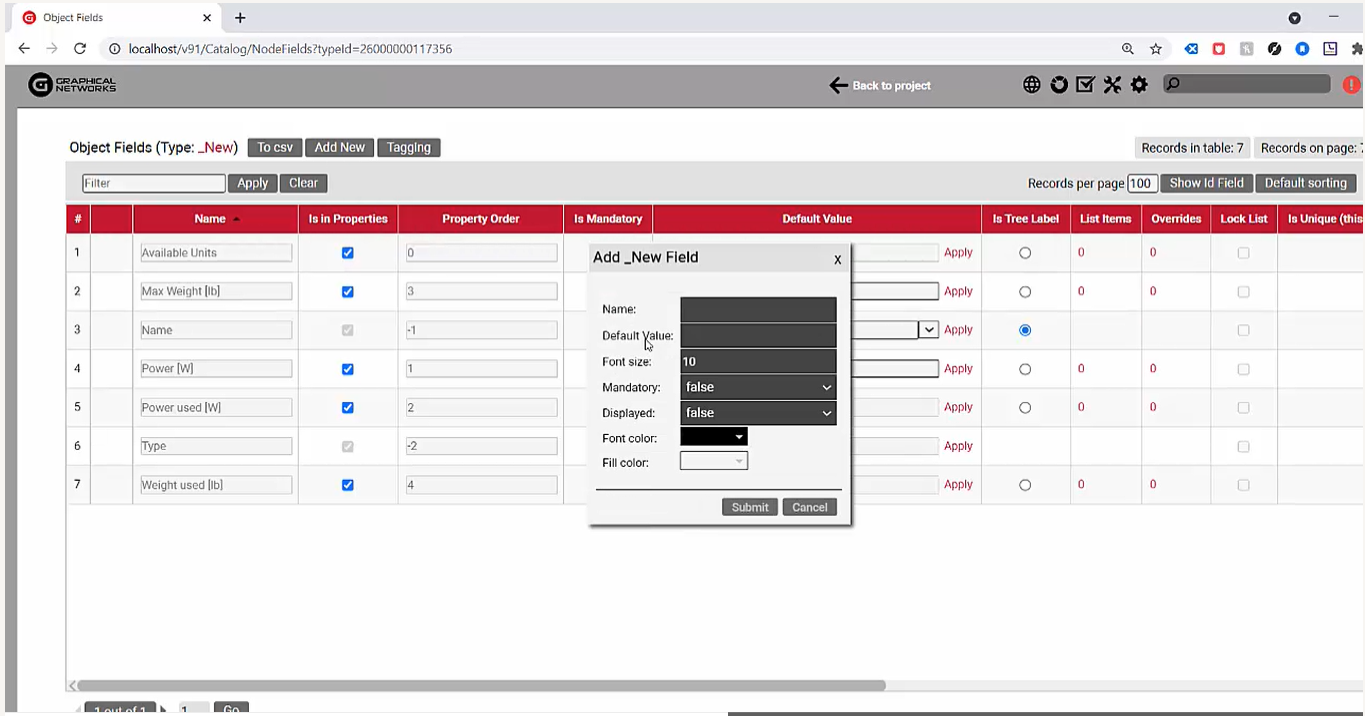 Create your own custom fields
You have lots of features and control in terms of your fields that we’re going to create for this rack.
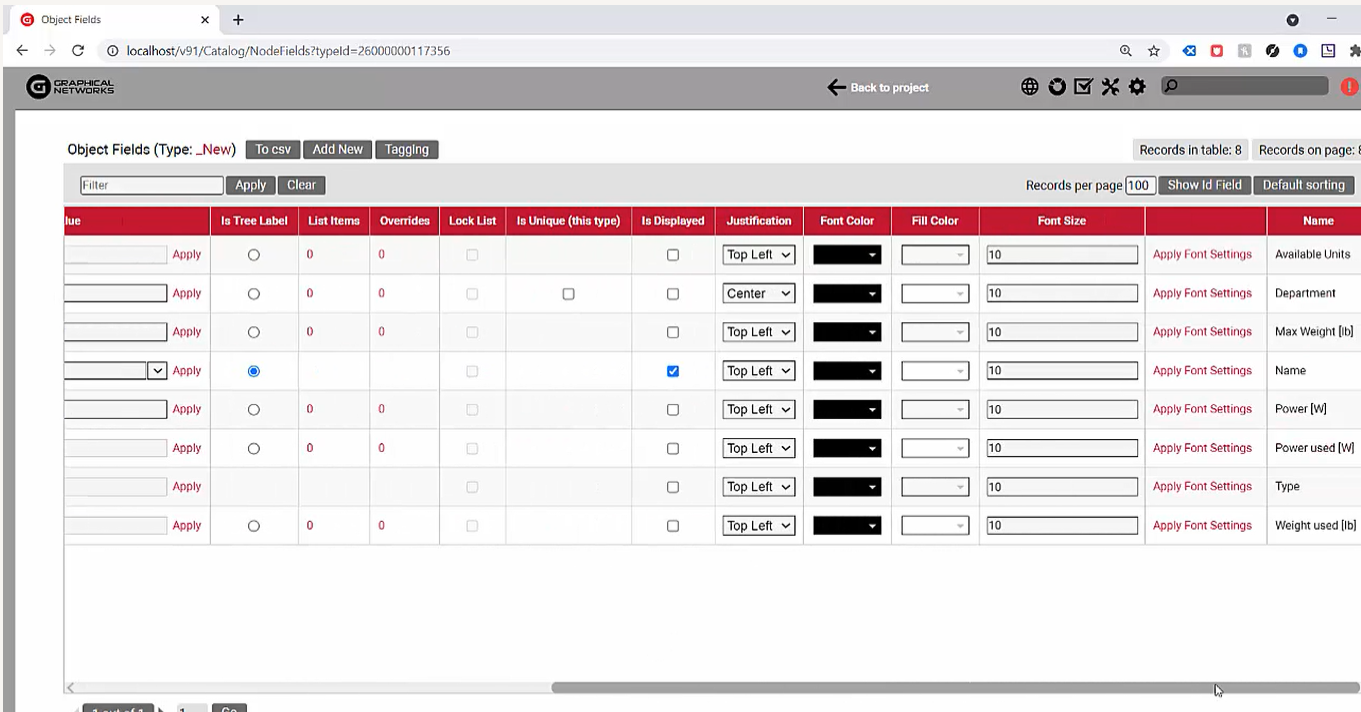 netTerrain’s features let you control a rack’s fields
The interesting piece here is, when you get to the modeling of the rack…
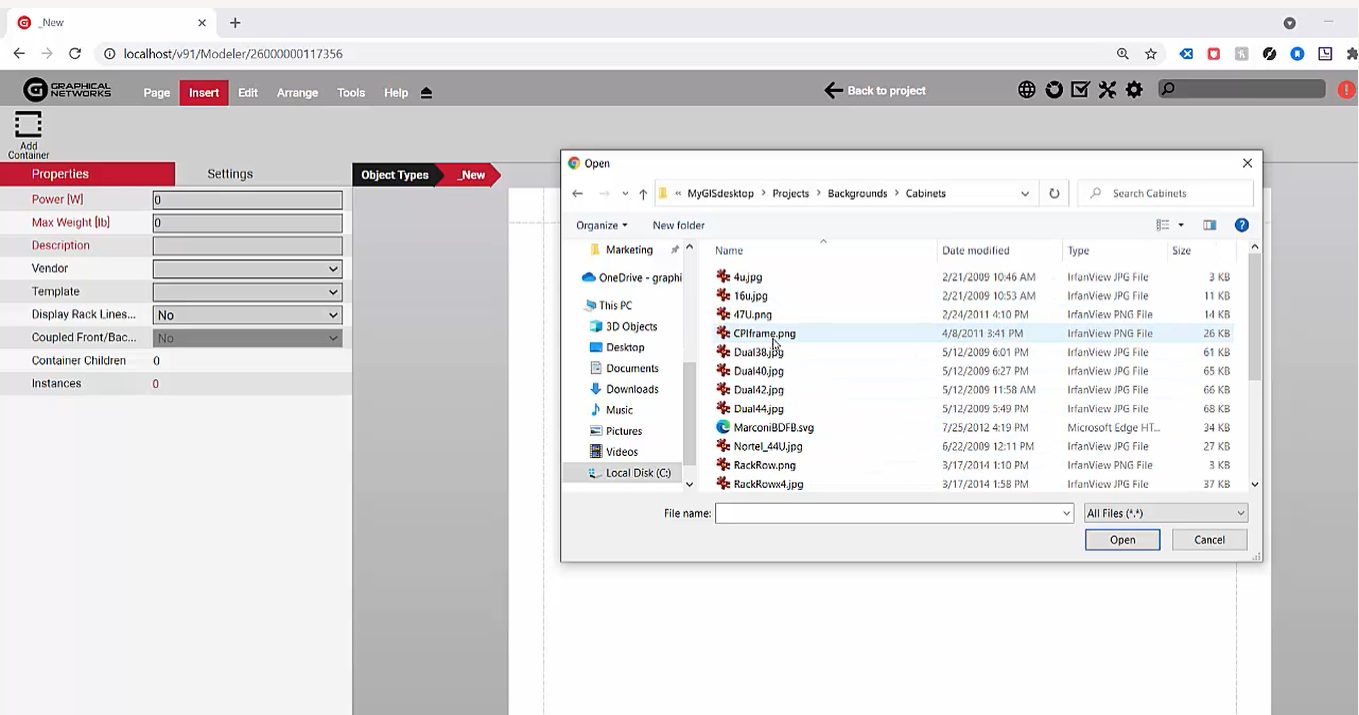
 Assign any background image you’d like for the backplane
As you discussed in this series’ first blog, when you model a rack, the first thing that you do is to assign a background image (the background image could be an AutoCAD image, a JPEG, or a PNG). You have unlimited flexibility for assigning any image that you want for the backplane (aka the image you see when you double-click).
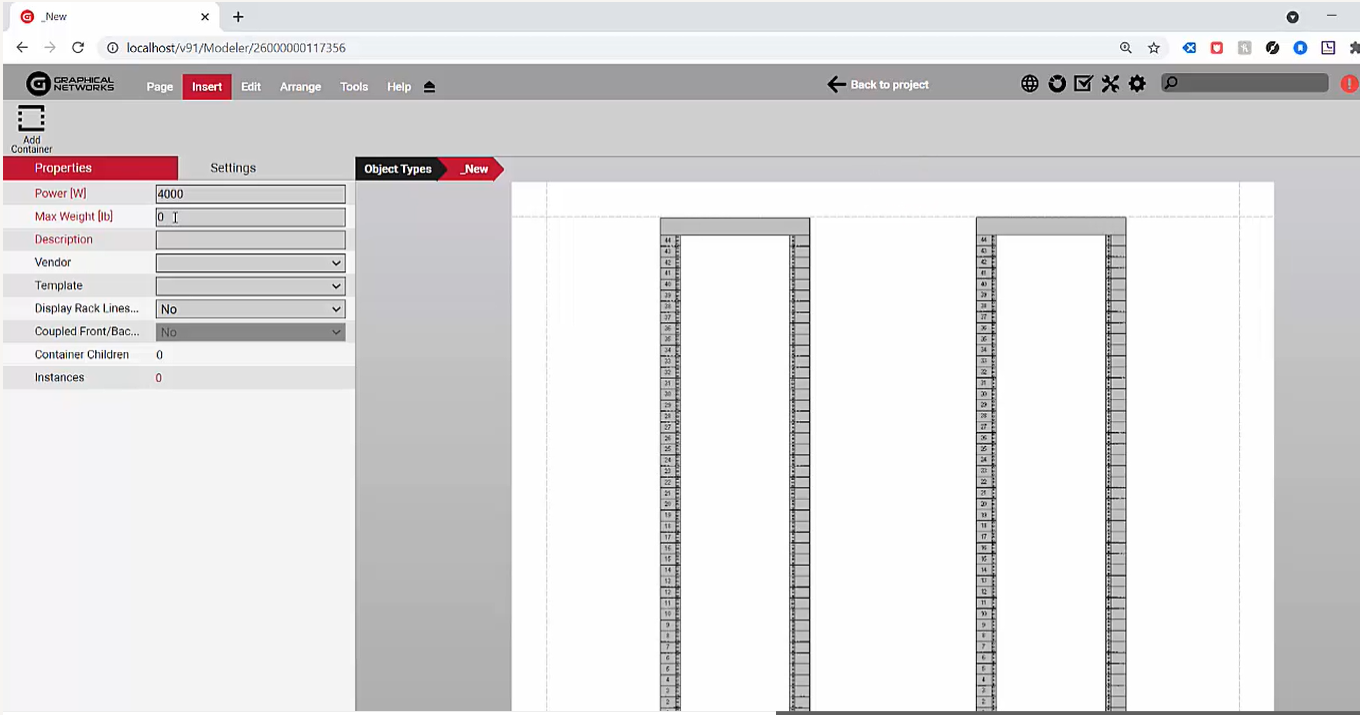
“Power” refers to the default maximum power allowed for the type: this is just to simplify the data entry process because you can easily override it on an instance-by-instance basis (and the same is true for the weight).
 Assign vendor, template, etc.
It doesn’t limit you to rack mounting per se (although it could if you wanted to); it simply serves as the threshold for the visual override that you see for capacity management purposes. Next, assign the vendor and assign the template like the one we were using before. Next, we’ll assign some containers…
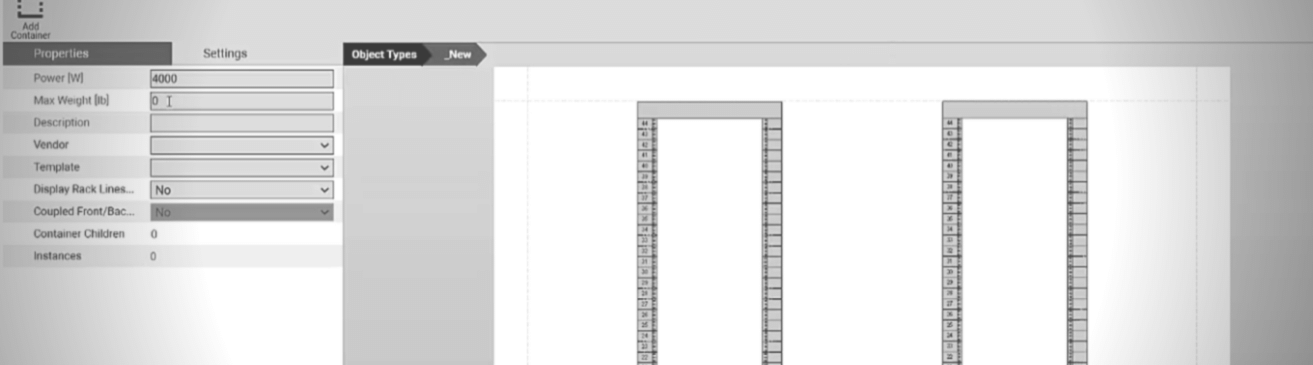
 Assign containers
The container is really the meat of this as it basically gives you the ability to specify, exactly, the area where we’re going to rack mount the devices.
 Specify where you’ll rack mount devices
netTerrain gives you a lot of flexibility in terms of the place on the diagram where you are going to mount the objects. When we click on this container, for example, we can see that we can specify the number of rack units in this case, such as a width of 19 inches. You can specify anything you’d like for designing and modeling your rack units.
The physical height and weight of traditional racks in your data center typically is determined by the number of rack units times 1.75 in inches. If I’m going to design a rack that allows both front and back mounting, I’m usually going to choose two containers, but actually you can add more because, again: in netTerrain, racks can be anything.
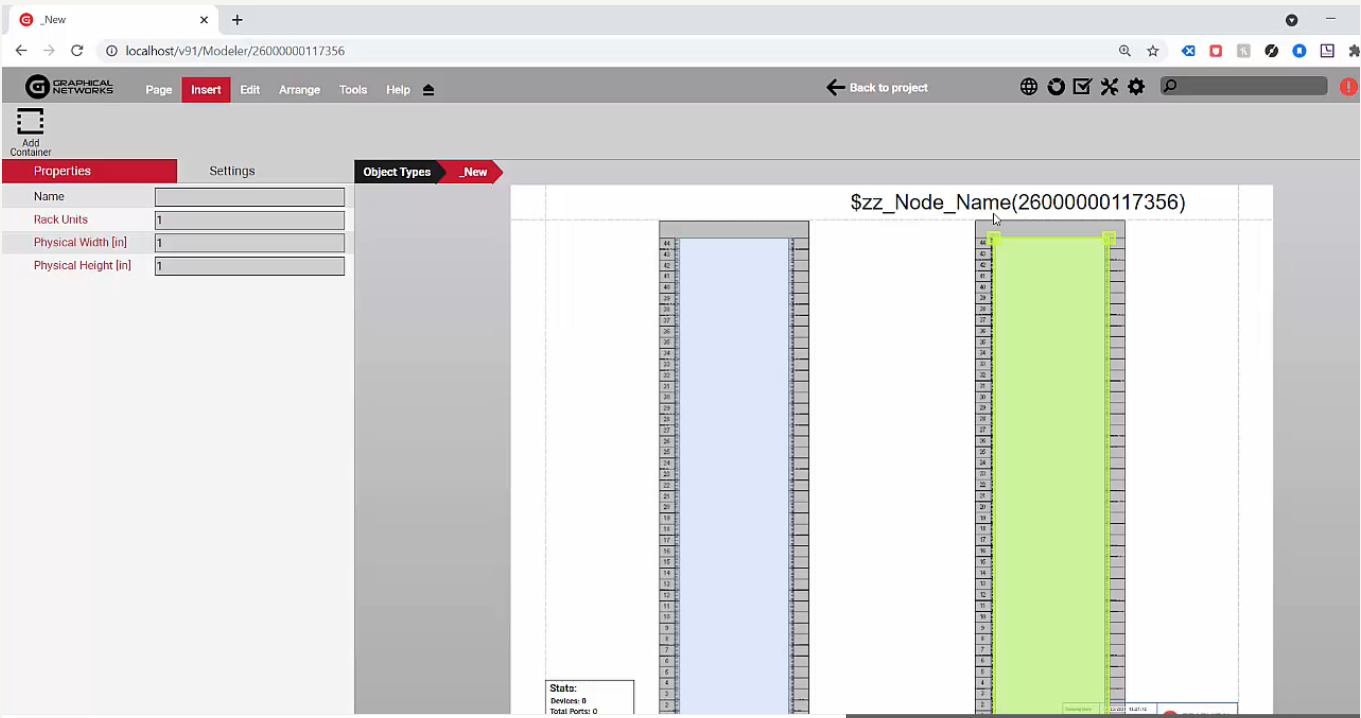 Choose two containers for front and back mounting
You can fine tune them but we won’t go too crazy doing that now. So, next, I’ll just import the values again.
Note that this is a one-time process for this type of rack: you do not have to do this for every rack of this type that you have in the project. It’s just for the type and just for the modeling (if you’re not asking us to model it because the modeling process, which is what you’re learning here, is part of the paid maintenance and not something you have to do). Don’t want to model? Easy: just have Graphical Networks do the modeling for you by specifying which type of rack you want us to model. It’s a one time process.
netTerrain then creates a rack type, which is replicated among all the instances of this rack type that you use in the project. If you’d like, you can display the rack lines. So, let’s say that you want a couple, front and back, that means that when you mount on the front, you’ll see in faint mode the device on the back and vice versa. You also fine tune the positioning by going to the “Settings” tab and clicking on the container, but we’re not going to go into detail about that now as it’s beyond the scope of this blog and video (video begins at 12:55 and ends at 20:18).
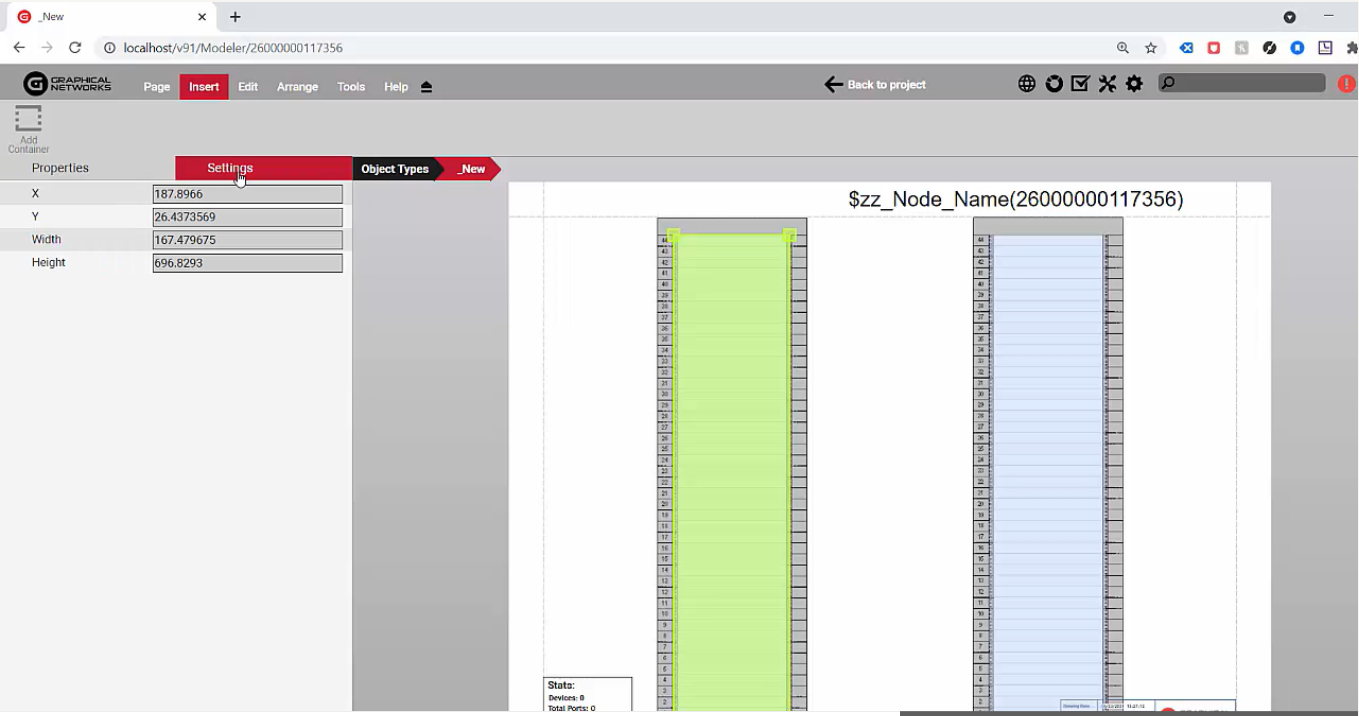 Fine-tune positioning from the “Settings” tab
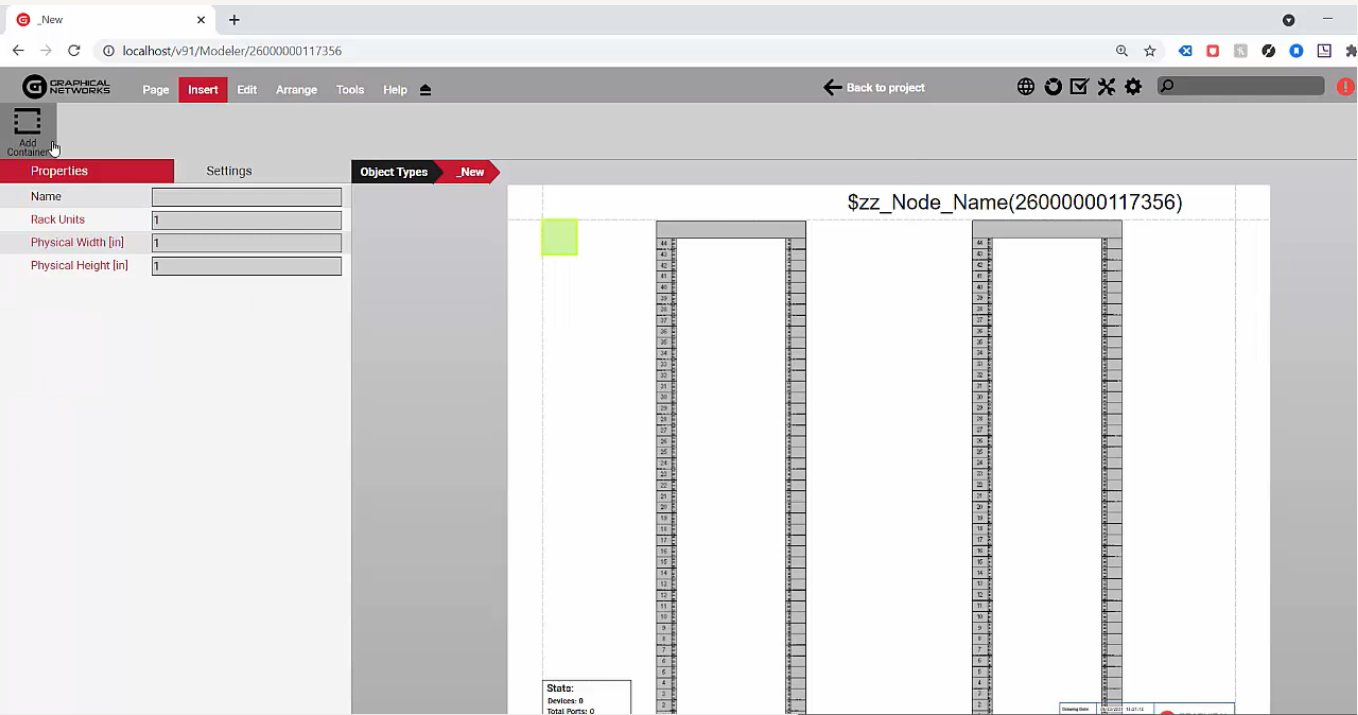
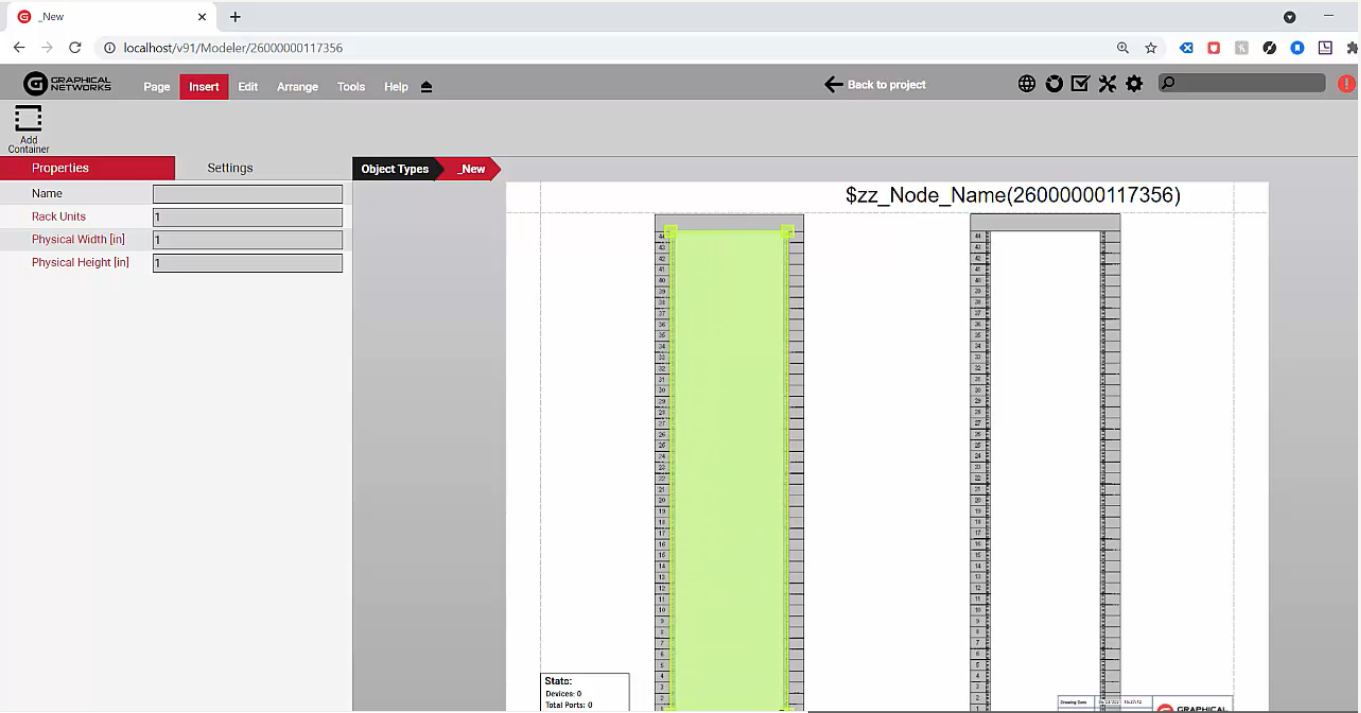
This is, in a nutshell, the rack modeling process in netTerrain DCIM software. If we go back to the project and go to the floor plan, go up one level and click on racks, you can see the rack we created. Now, if we drag-and-drop and/or resize it, it shows up in green as initially, it doesn’t have anything in there. If we double-click now, we have the rack model that we had created before.
As you can see, this is very easy: it is all just drag-and-drop. And it’s my own custom rack, front and back a couple times, my own mounting, my own template, my own size in terms of rack units, and so on. It all works very nicely. To summarize, if you don’t want to just have the Graphical Networks team model racks for you, doing your own rack modeling in netTerrain is easy.