
Cable management can be a daunting task, especially if you need to create many cables between different ports in your inventory. You can use shortcuts and other methods to create single cables between different ports. You can also create multiple cables between sequences of ports using shortcuts, however, this only works when there is some sort of uniform pattern for the connections. In addition, for these techniques, you always need to go to the actual ports to start the connection process…enter the ‘cable mapper’.
The ‘cable mapper’ is an informal name we use for a utility launched from a context menu, which already existed in the Integration Toolkit (ITK) in an unofficial capacity to speed up the process of creating cables. We ported this utility to our web-based interface, improved it, and made it official. It can be used for any kind of link connection — but we refer to it as the ‘cable mapper’ because the endpoints are always ports (and the way you create the cables is by mapping these port endpoints, as we will see below).
The cable mapper simplifies the process of creating cables for netTerrain users in two ways:
- you can launch it from anywhere in the project by selecting two nodes,
- and it doesn’t require a specific connectivity pattern for cables to be created.
You launch the cable mapper utility simply by selecting two nodes from a diagram. As mentioned above, they don’t have to be the actual ports or even the devices that you want to connect. It can be the two buildings where the end devices are. This makes life easy because right away it simplifies the process by not having to navigate to the endpoints back and forth. After selecting the two objects bring up the context menu (alt-c), you just click on the ‘Insert Cables’ menu (or just click on alt-m, which is the hotkey for the utility).
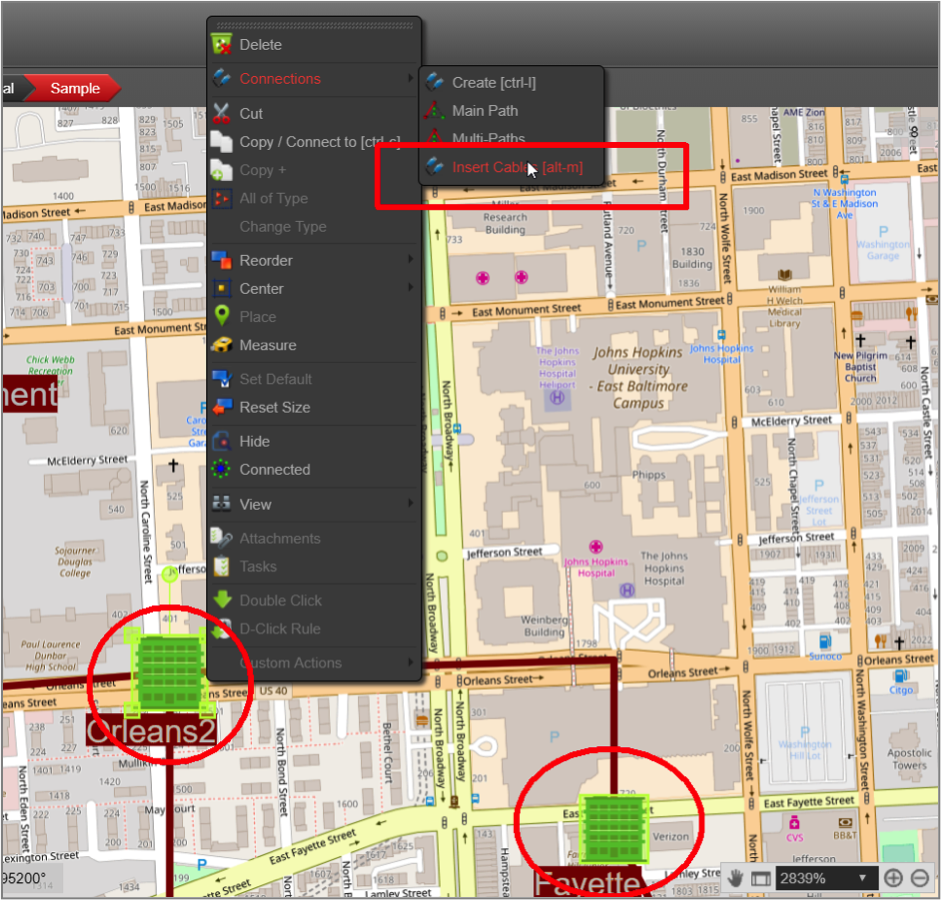 Insert Cables utility launched for two buildings
The cable mapper shows you the two endpoints, and their entire hierarchy, as well as a list of already existing cables between these two endpoints on the far-right window. You can navigate both hierarchies until you find the devices you want to connect. You can expand the devices to show the ports. If the devices have cards, you can expand those as well.
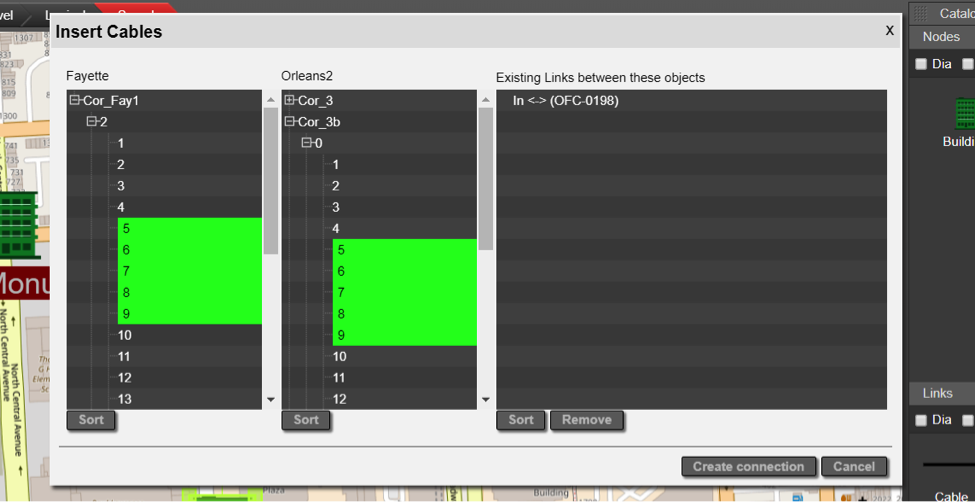 The cable mapper interface
At this point, you can start clicking on the ports you want to connect on each side. You can use the ctrl or shift keys to multi-select ports. Two sort buttons let you sort the ports in ascending or descending order on each side.
Once you are done selecting the ports you want to connect, press the ‘create connection’ button. This opens a dialog that lets you choose the sequence in which you want to connect these ports and the ordering.
Sequence:
- By name: connects port 1 with 1, 2 with 2, etc.
- By horizontal position: connects the left most port with the left most, and so on
- By vertical position: connects the top most port with the top most, and so on
- All-to-All: connects every port on the left with every port on the right
Ordering:
- Ascending: connects ports in ascending order (such as if, for example, you choose the ‘By name’ option above, you are now connecting the ports front-to-back)
- Descending
Link Type:
allows you to choose which catalog type you want to use for these cables.
Once you click ‘Ok’ the connections are created.
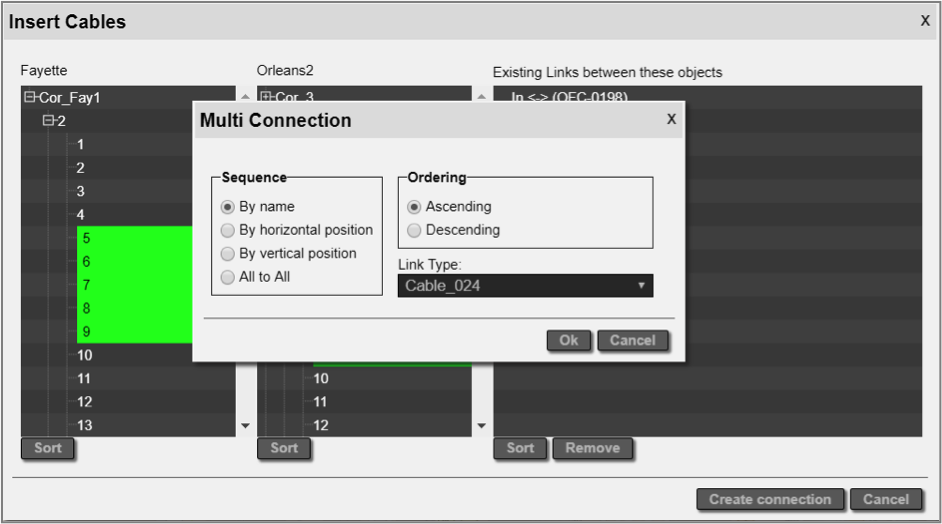 Creating cables with the cable mapper
The cable mapper will remember the settings for the multi-connection dialog above, so that next time you use the same preferences, you can just click through it. By being able to click through this dialog, you are also making it easy to quickly create connections between ports in no discernible pattern. Just select any pair of ports from the cable mapper, create the connection, and click through the dialog.
Because the cable mapper shows you existing connections between the selected endpoints, it can also be used to quickly remove existing connections. Just select any connections from the right panel and click on the remove button – voilà!